June 2025 · AS Paper 2 (Further Mechanics 2) · Q3(c)3 marks
Mark scheme (whole question; this part is marked with the orange bar)
Examiner's comment
(c) A great number of responses struggled to maintain consistency with distances in their moments equations and a significant proportion of weaker responses thought that the force at D was kMg. A small number of otherwise good responses gave an approximate final answer without stating an exact one as part of their solution.
Key points from the mark scheme and examiner's report
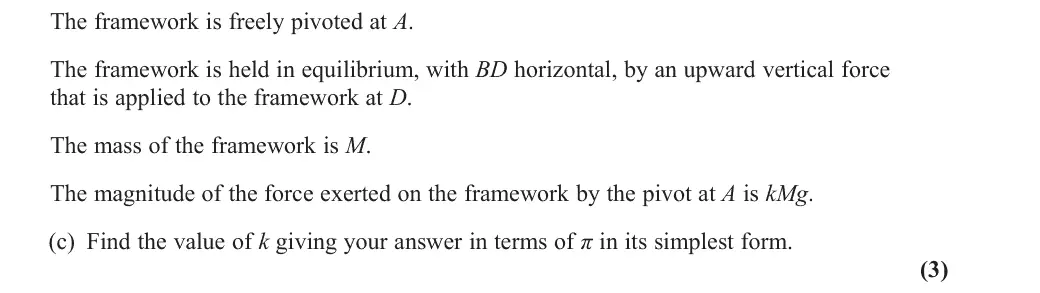
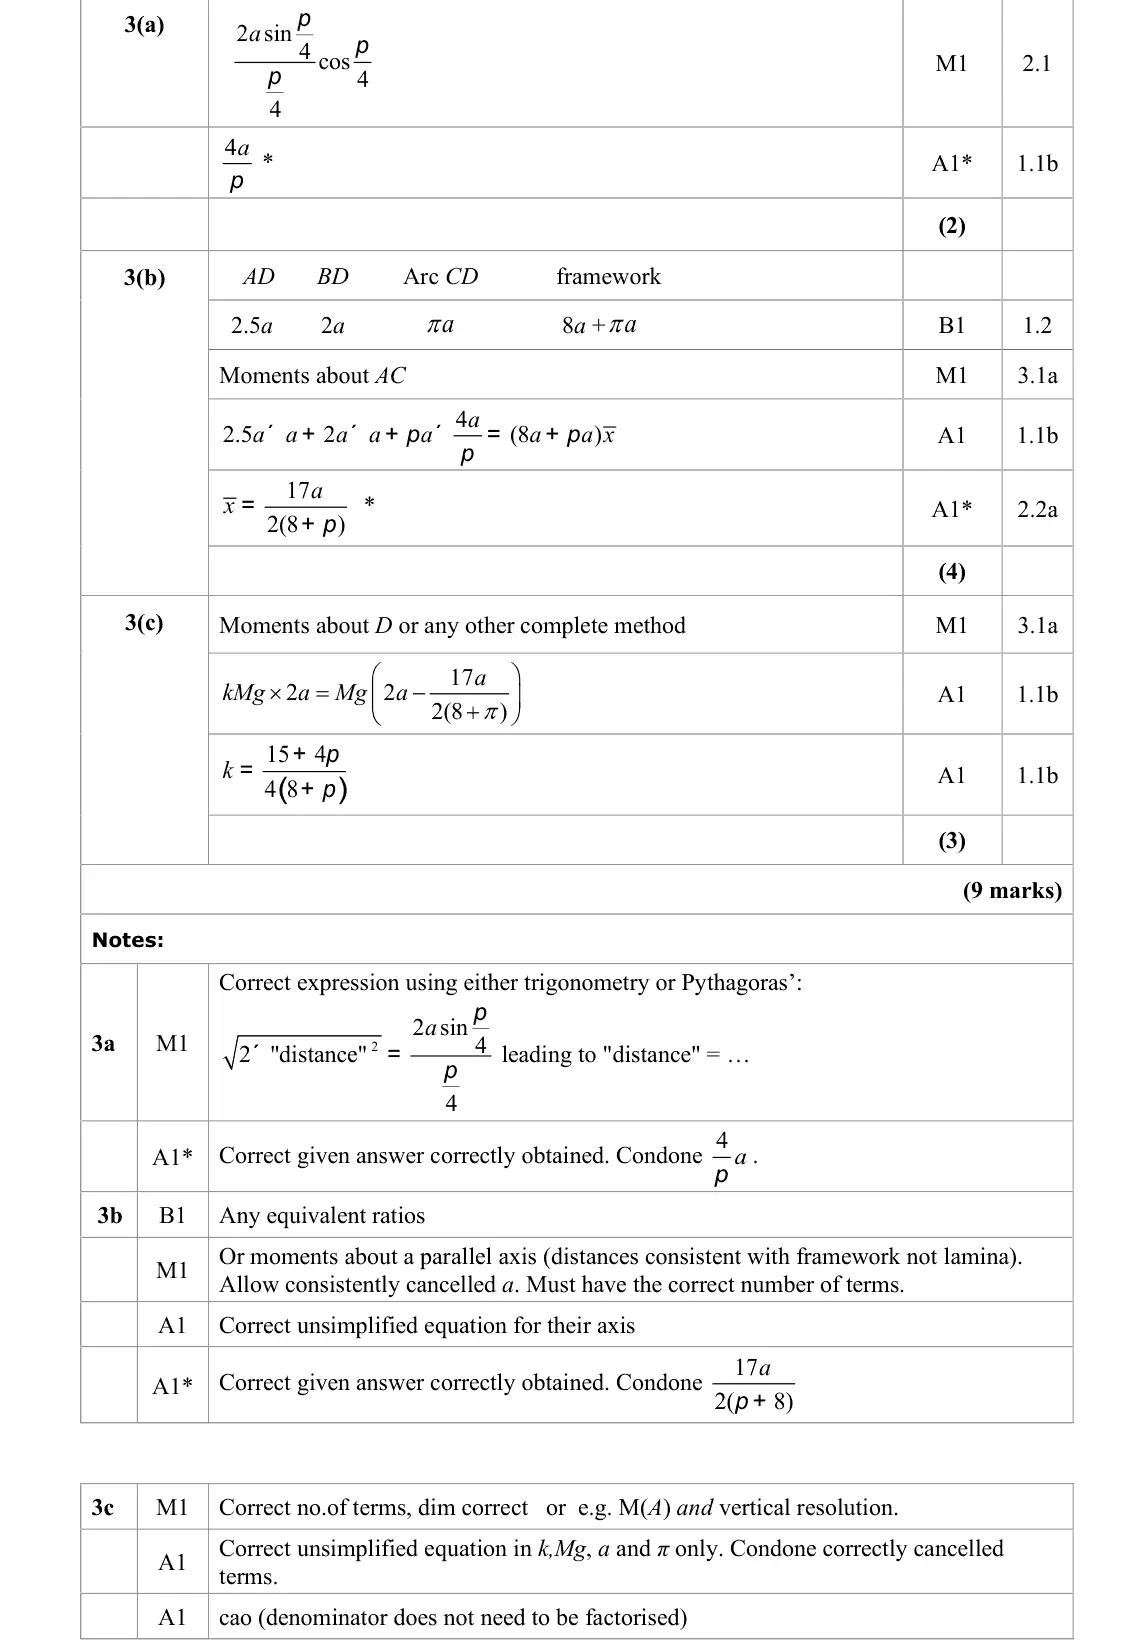
moments about D: kMg × 2a = Mg(2a − 17a/(2(8 + π))) gives k = (15 + 4π)/(4(8 + π))
the force at D is not kMg
exact form required
June 2025 · Paper 4C (Further Mechanics 2) · Q1(b)3 marks
Mark scheme (whole question; this part is marked with the orange bar)
Examiner's comment
(b) Several strong responses were seen which simply wrote k + 1 = d then used a calculator to get the answer. Weaker responses often introduced a surd-form for M or did not simply their moments equation to get a value for k.
Key points from the mark scheme and examiner's report
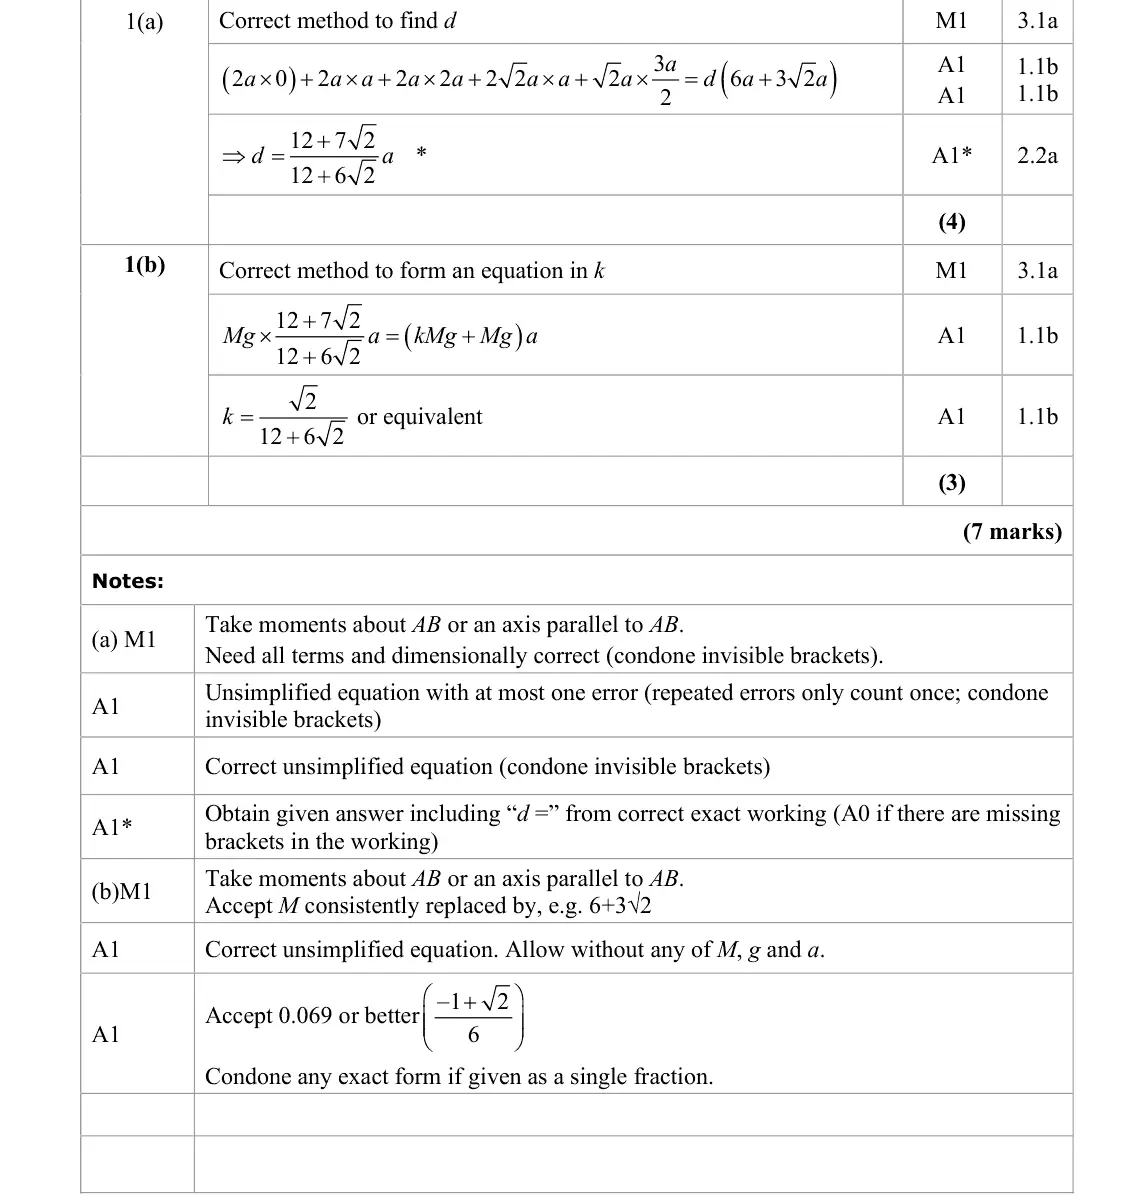
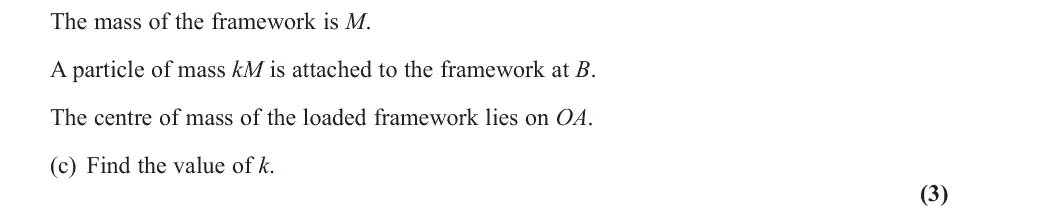
particle at B is on AB so adds no moment: Md = (M + kM)a, so k + 1 = d/a
k = √2/(12 + 6√2) = (√2 − 1)/6 ≈ 0.069
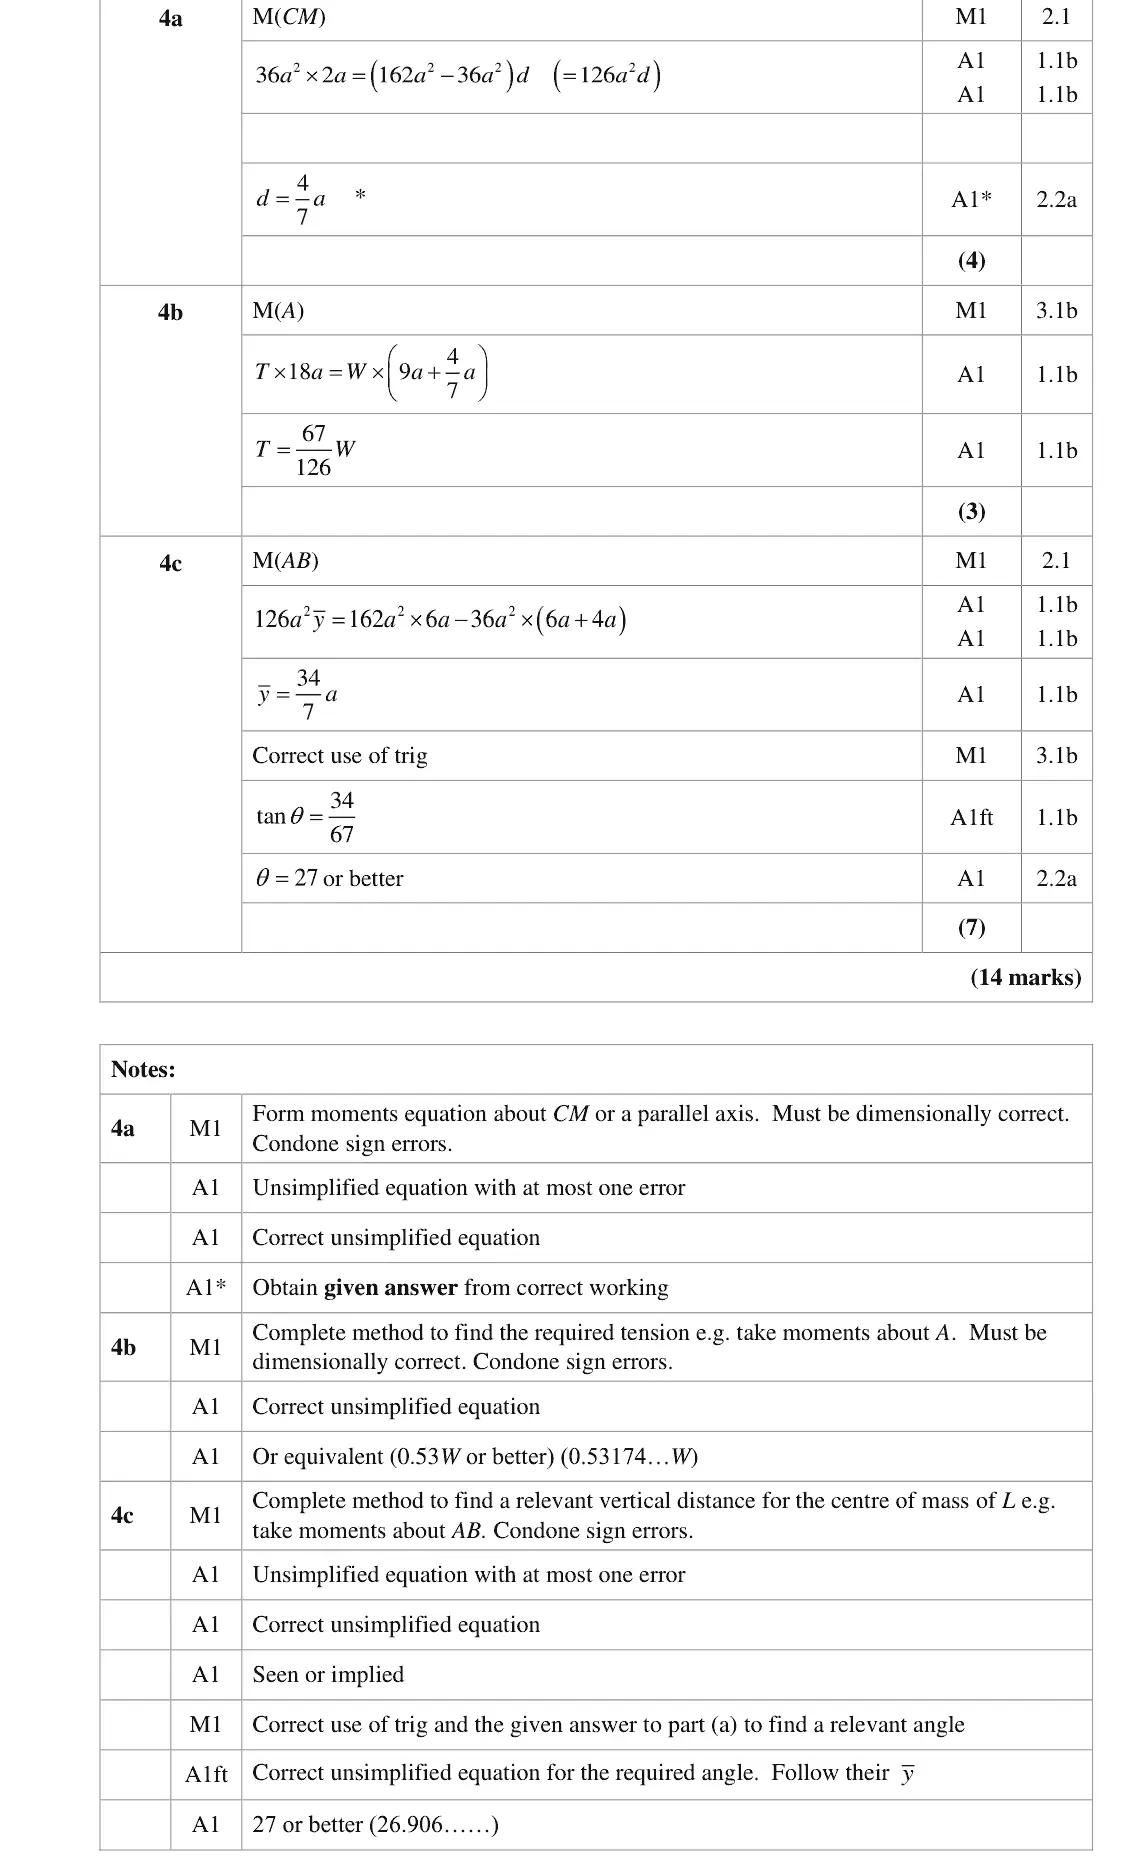
June 2024 · AS Paper 2 (Further Mechanics 2) · Q4(c)4 marks
Mark scheme (whole question; this part is marked with the orange bar)
Examiner's comment
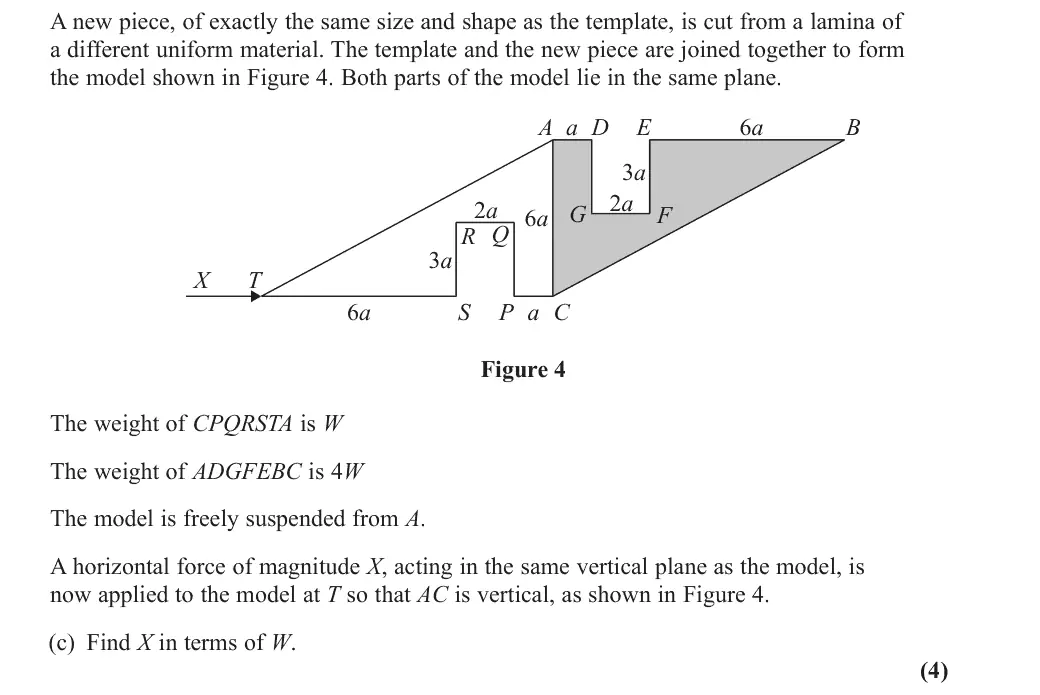
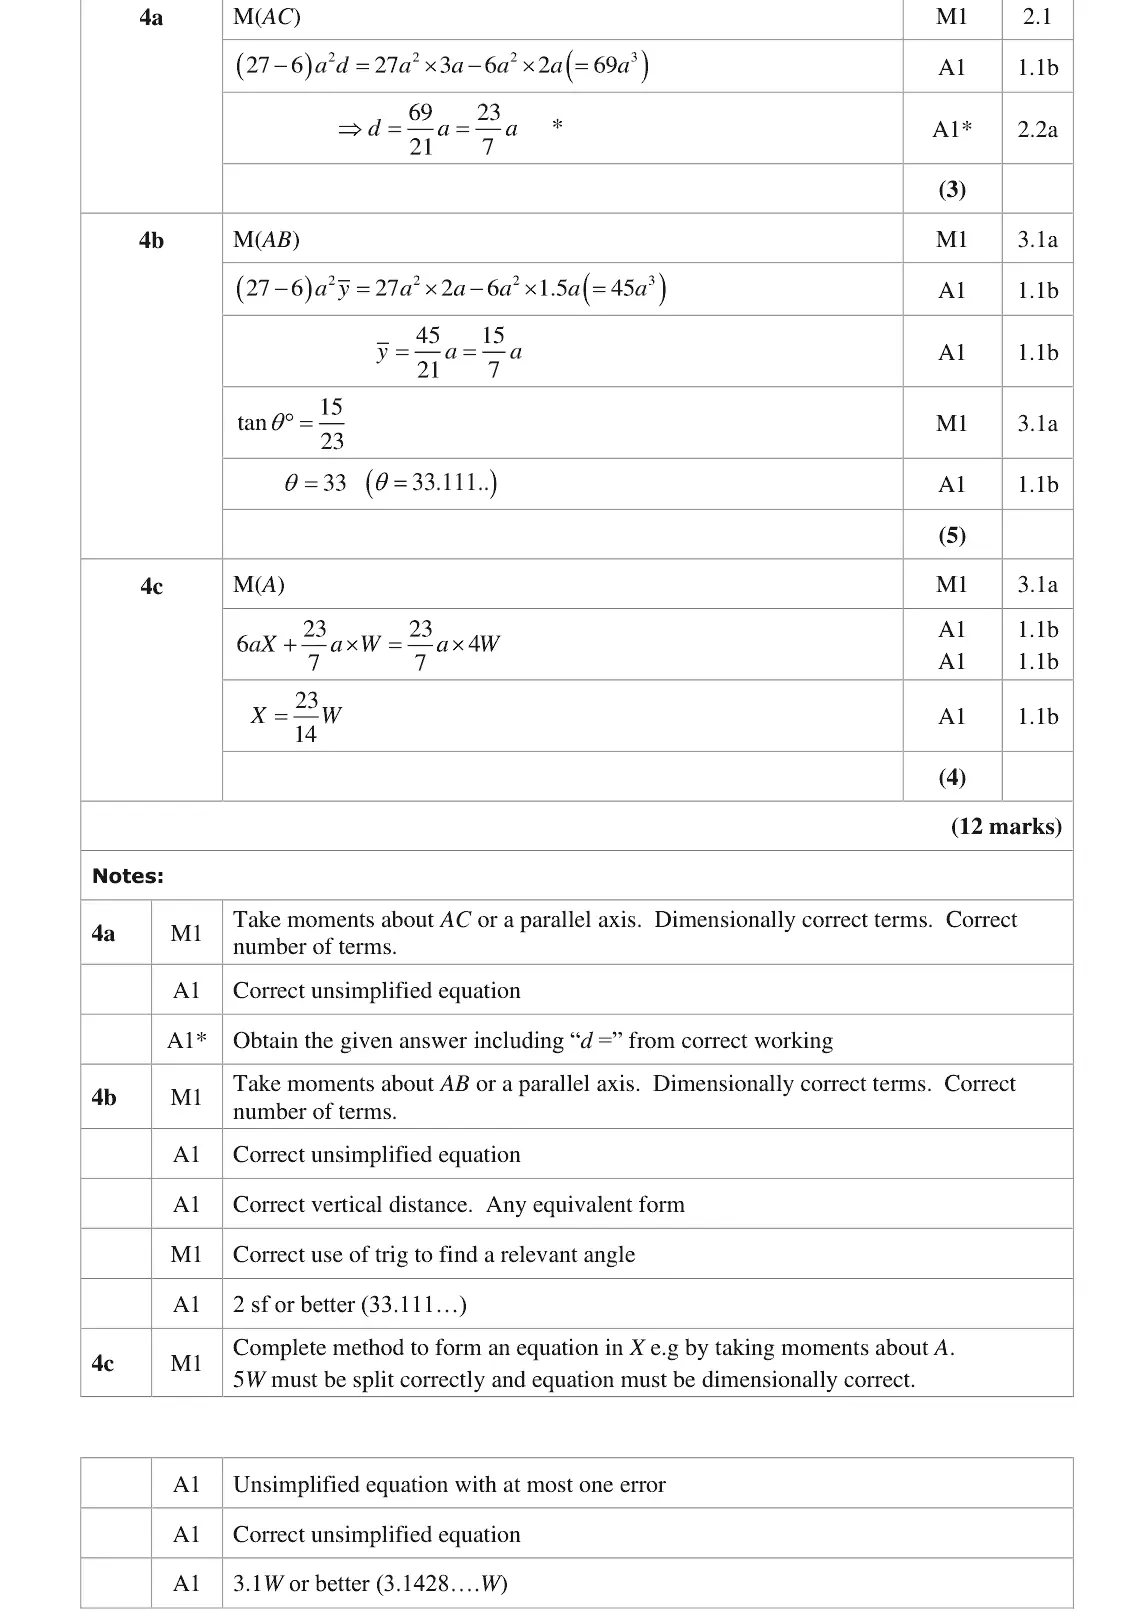
(c) This part was found by most candidates the hardest with many of them scoring no marks. A number of candidates successfully found the centre of mass of the combined shape then took moments. The most common incorrect responses included a moments equation with either no distance term with X or an incorrect distance of 9a, or moments about somewhere other than A which forgot to include a tension or equivalent force.
Key points from the mark scheme and examiner's report
moments about A with AC vertical: 6aX + (23a/7)W = (23a/7)(4W), X = 23W/14 ≈ 3.14W
the new piece's centre of mass is 23a/7 the other side of AC
X acts 6a from A, not 9a
hardest part
June 2023 · AS Paper 2 (Further Mechanics 2) · Q1(a)3 marks
Mark scheme (whole question; this part is marked with the orange bar)
Examiner's comment
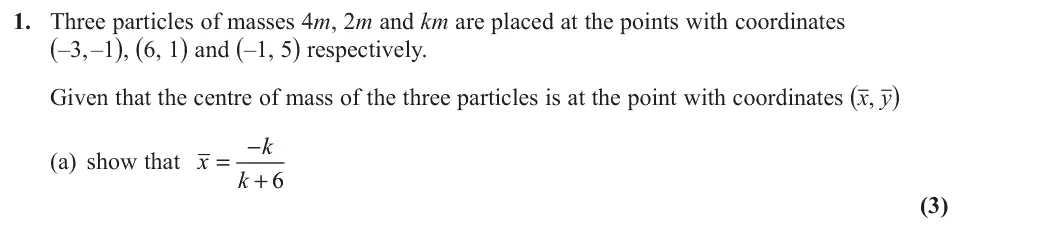
(a) This question has a given answer, so the working needs to be clear and correct. The majority of candidates achieved this. The most common problem was the inconsistent use of m, which needs to be in all terms or in none for the equation to be dimensionally consistent.
Key points from the mark scheme and examiner's report
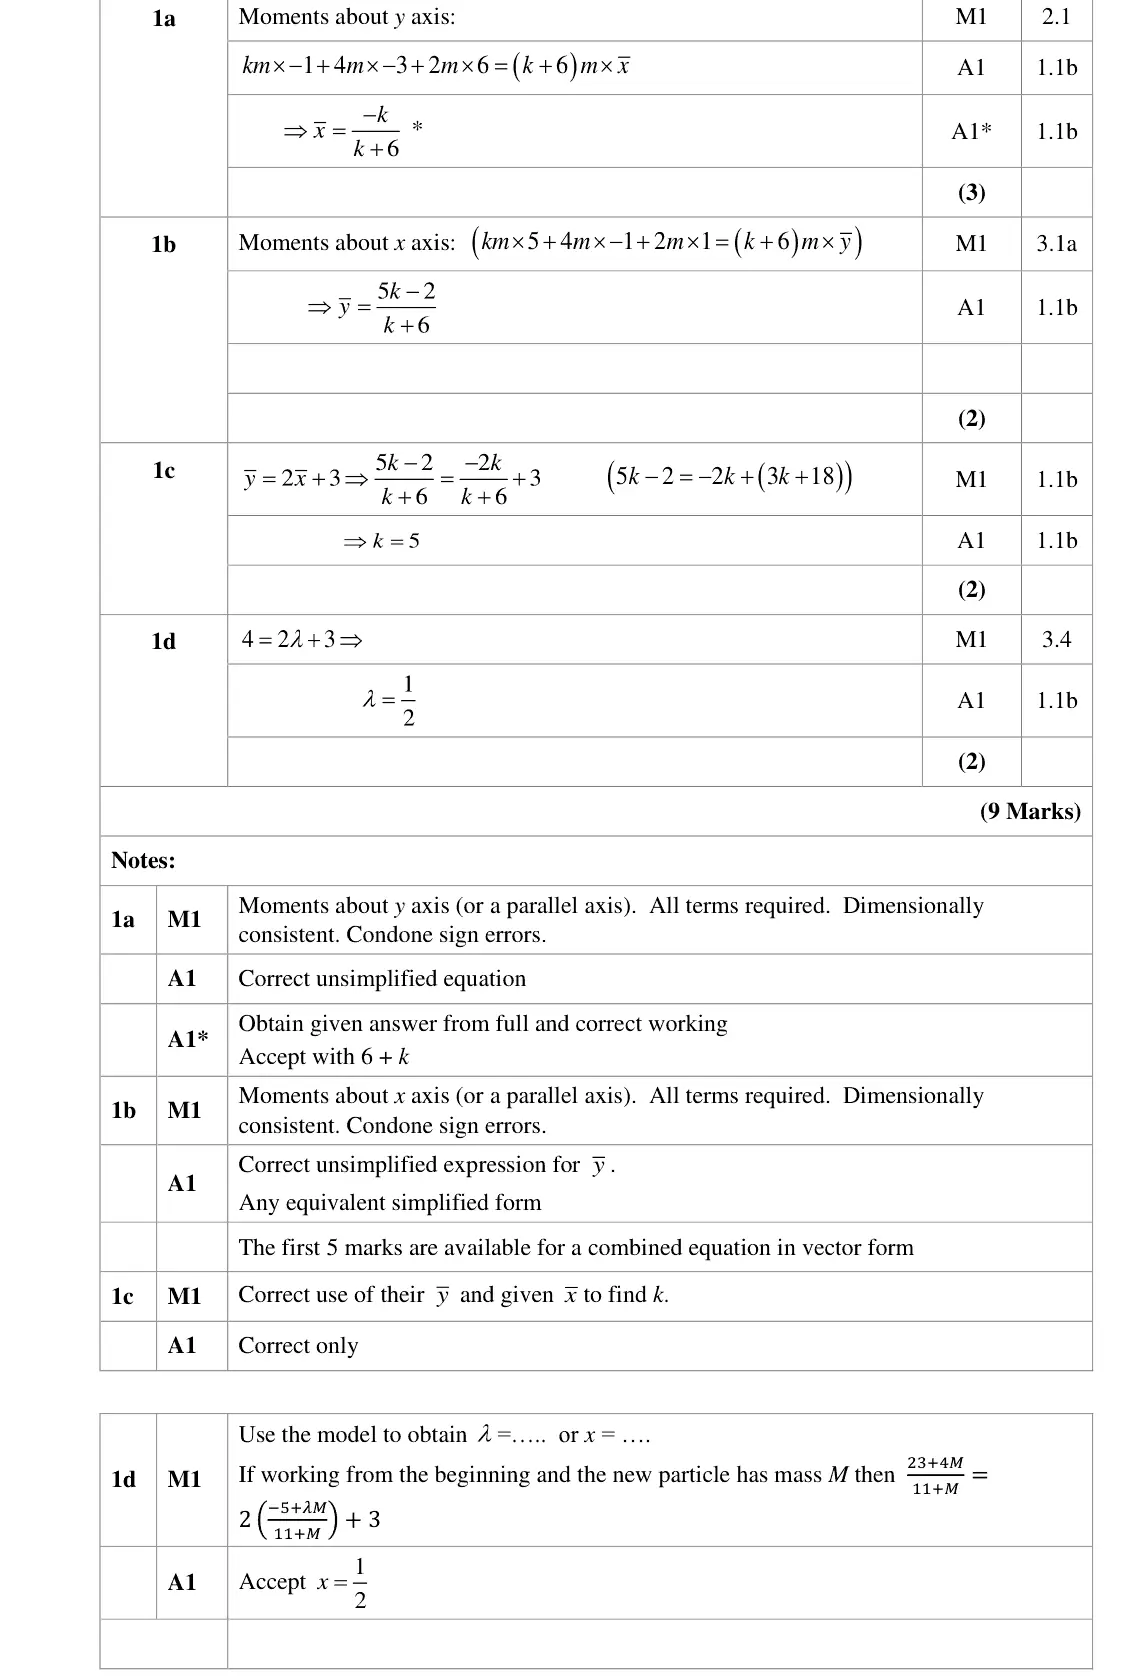
moments about the y-axis: −km − 12m + 12m = (k + 6)m x̄ gives −k/(k + 6)
m must be in all terms or none (dimensional consistency)
June 2023 · AS Paper 2 (Further Mechanics 2) · Q1(b)2 marks
Mark scheme (whole question; this part is marked with the orange bar)
Examiner's comment
(b) Many candidates did the working for part (b) alongside the working for (a) in a vector equation. The answer was usually correct.
Key points from the mark scheme and examiner's report
moments about the x-axis: ȳ = (5k − 2)/(k + 6)
often done with (a) as one vector equation
June 2023 · AS Paper 2 (Further Mechanics 2) · Q1(c)2 marks
Mark scheme (whole question; this part is marked with the orange bar)
Examiner's comment
(c) The majority of candidates understood that they needed to substitute their coordinates for the centre of mass into the equation of the line. There were a few slips in the algebra and in the arithmetic, but several correct solutions.
Key points from the mark scheme and examiner's report
substitute x̄ and ȳ into y = 2x + 3: 5k − 2 = −2k + 3k + 18 so k = 5
June 2023 · AS Paper 2 (Further Mechanics 2) · Q1(d)2 marks
Mark scheme (whole question; this part is marked with the orange bar)
Examiner's comment
(d) Those candidates who realised that the fourth particle must lie on the line scored these marks very easily. Those who did not spot this needed to assign a mass to the new particle and work through from the beginning. Some of these candidates were successful, but the arithmetic and algebra were a problem.
Key points from the mark scheme and examiner's report
the fourth particle must itself lie on the line: 4 = 2λ + 3 so λ = 1/2
those who missed this had to assign a mass and work from the start
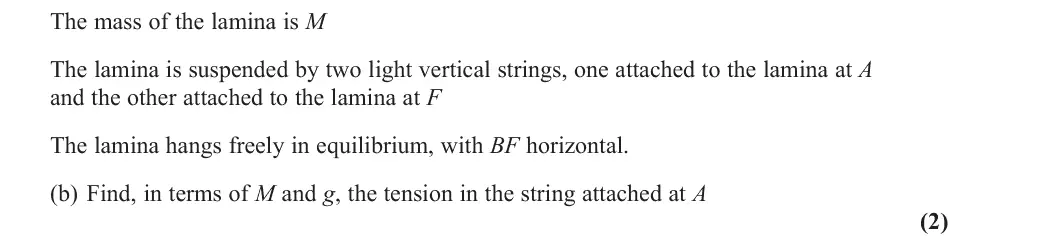
June 2023 · AS Paper 2 (Further Mechanics 2) · Q4(b)3 marks
Mark scheme (whole question; this part is marked with the orange bar)
Examiner's comment
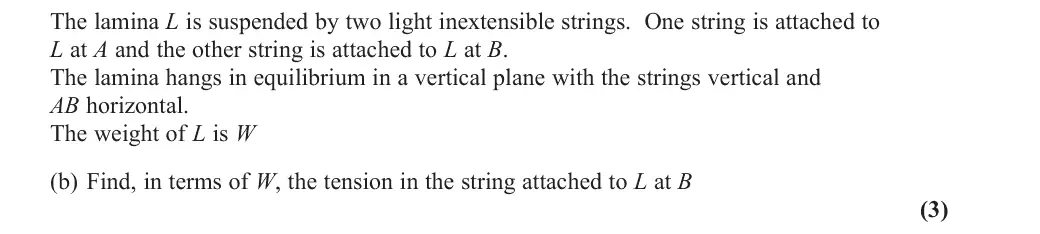
(b) Several candidates were successful in using the answer to part (a) to solve this task. However, many did not appreciate that if they needed to know the tension in the string attached at B then the most efficient approach was to take moments about A.
Key points from the mark scheme and examiner's report
moments about A: 18aT = W(9a + 4a/7) gives T = 67W/126 (0.53W)
moments about A is the efficient route
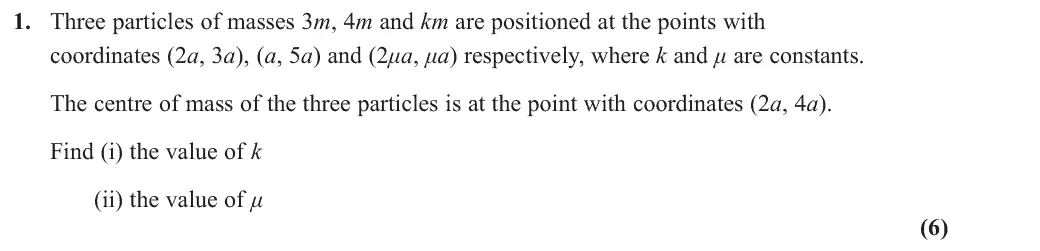
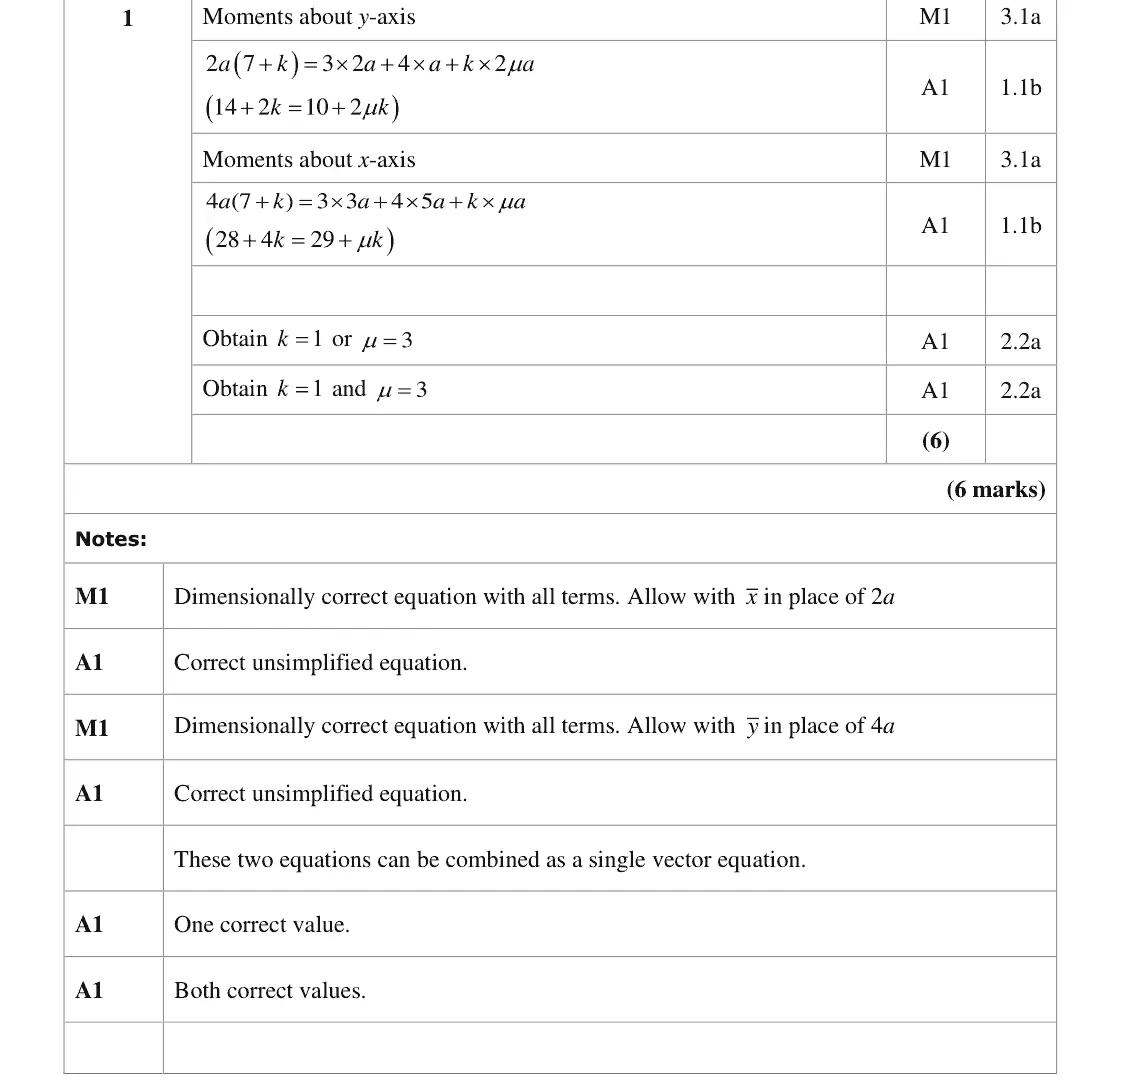
June 2023 · Paper 4C (Further Mechanics 2) · Q1(ii)6 marks
Mark scheme (whole question; this part is marked with the orange bar)
Examiner's comment
Almost all of the candidates identified the need to take moments around the coordinate axes and correctly obtained a pair of simultaneous equations, usually expressed in vector form. The vast majority of the errors occurred in trying to solve these equations.
Key points from the mark scheme and examiner's report
moments about both axes (or one vector equation): 14 + 2k = 10 + 2μk and 28 + 4k = 29 + μk
solve simultaneously for k = 1, μ = 3
most errors came in solving the equations
June 2022 · AS Paper 2 (Further Mechanics 2) · Q1(b)2 marks
Mark scheme (whole question; this part is marked with the orange bar)
Examiner's comment
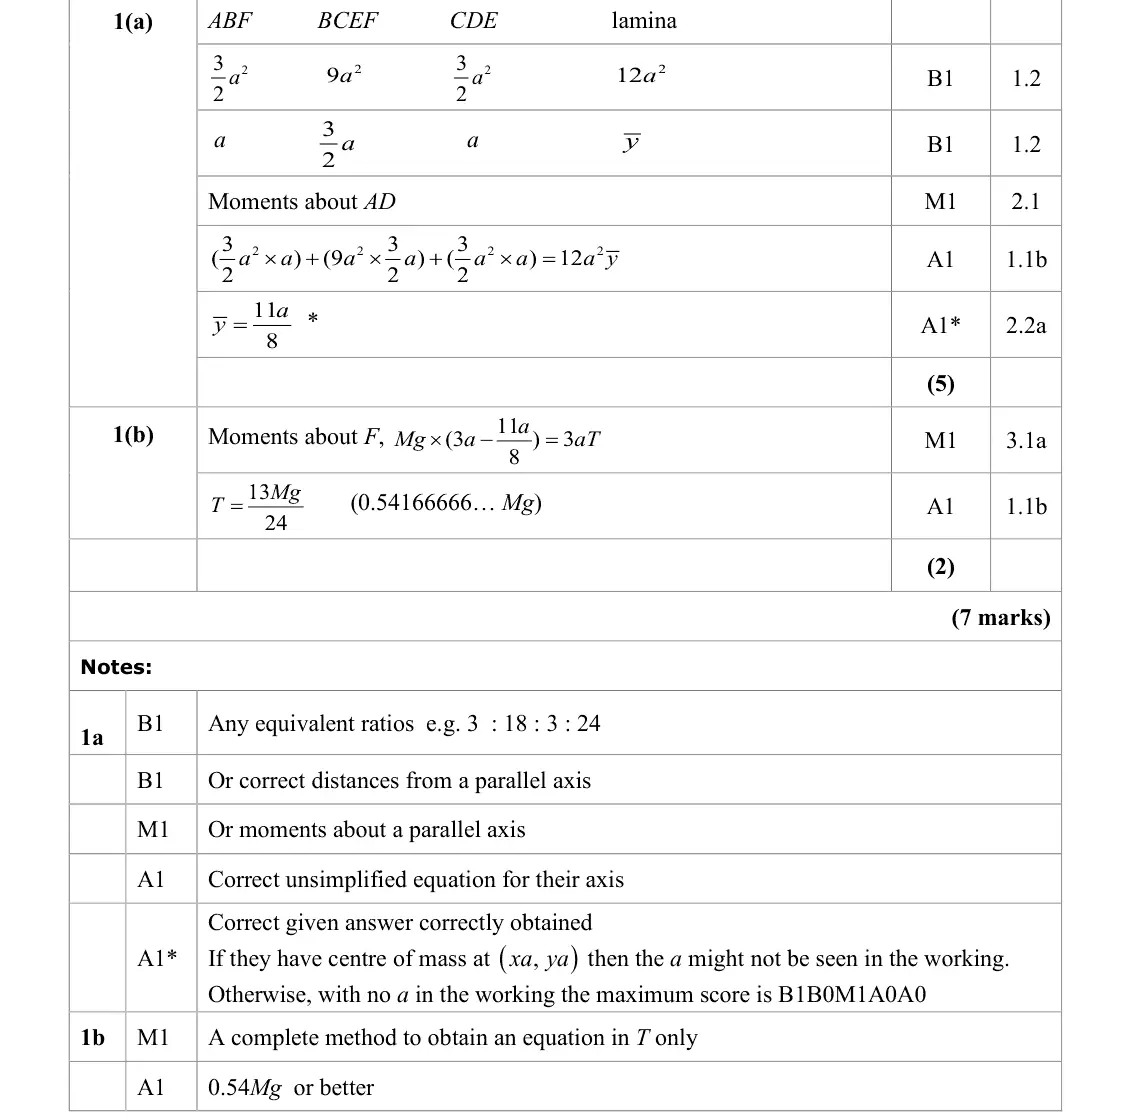
(b) Most candidates who attempted this part of the question understood that they needed to take moments about F. There were some fully correct solutions, but also several errors in the distances used, most notably using a in place of 3a.
Key points from the mark scheme and examiner's report
moments about F: Mg(3a − 11a/8) = 3aT so T = 13Mg/24 (0.54Mg)
common error a in place of 3a
June 2022 · AS Paper 2 (Further Mechanics 2) · Q2(c)3 marks
Mark scheme (whole question; this part is marked with the orange bar)
Examiner's comment
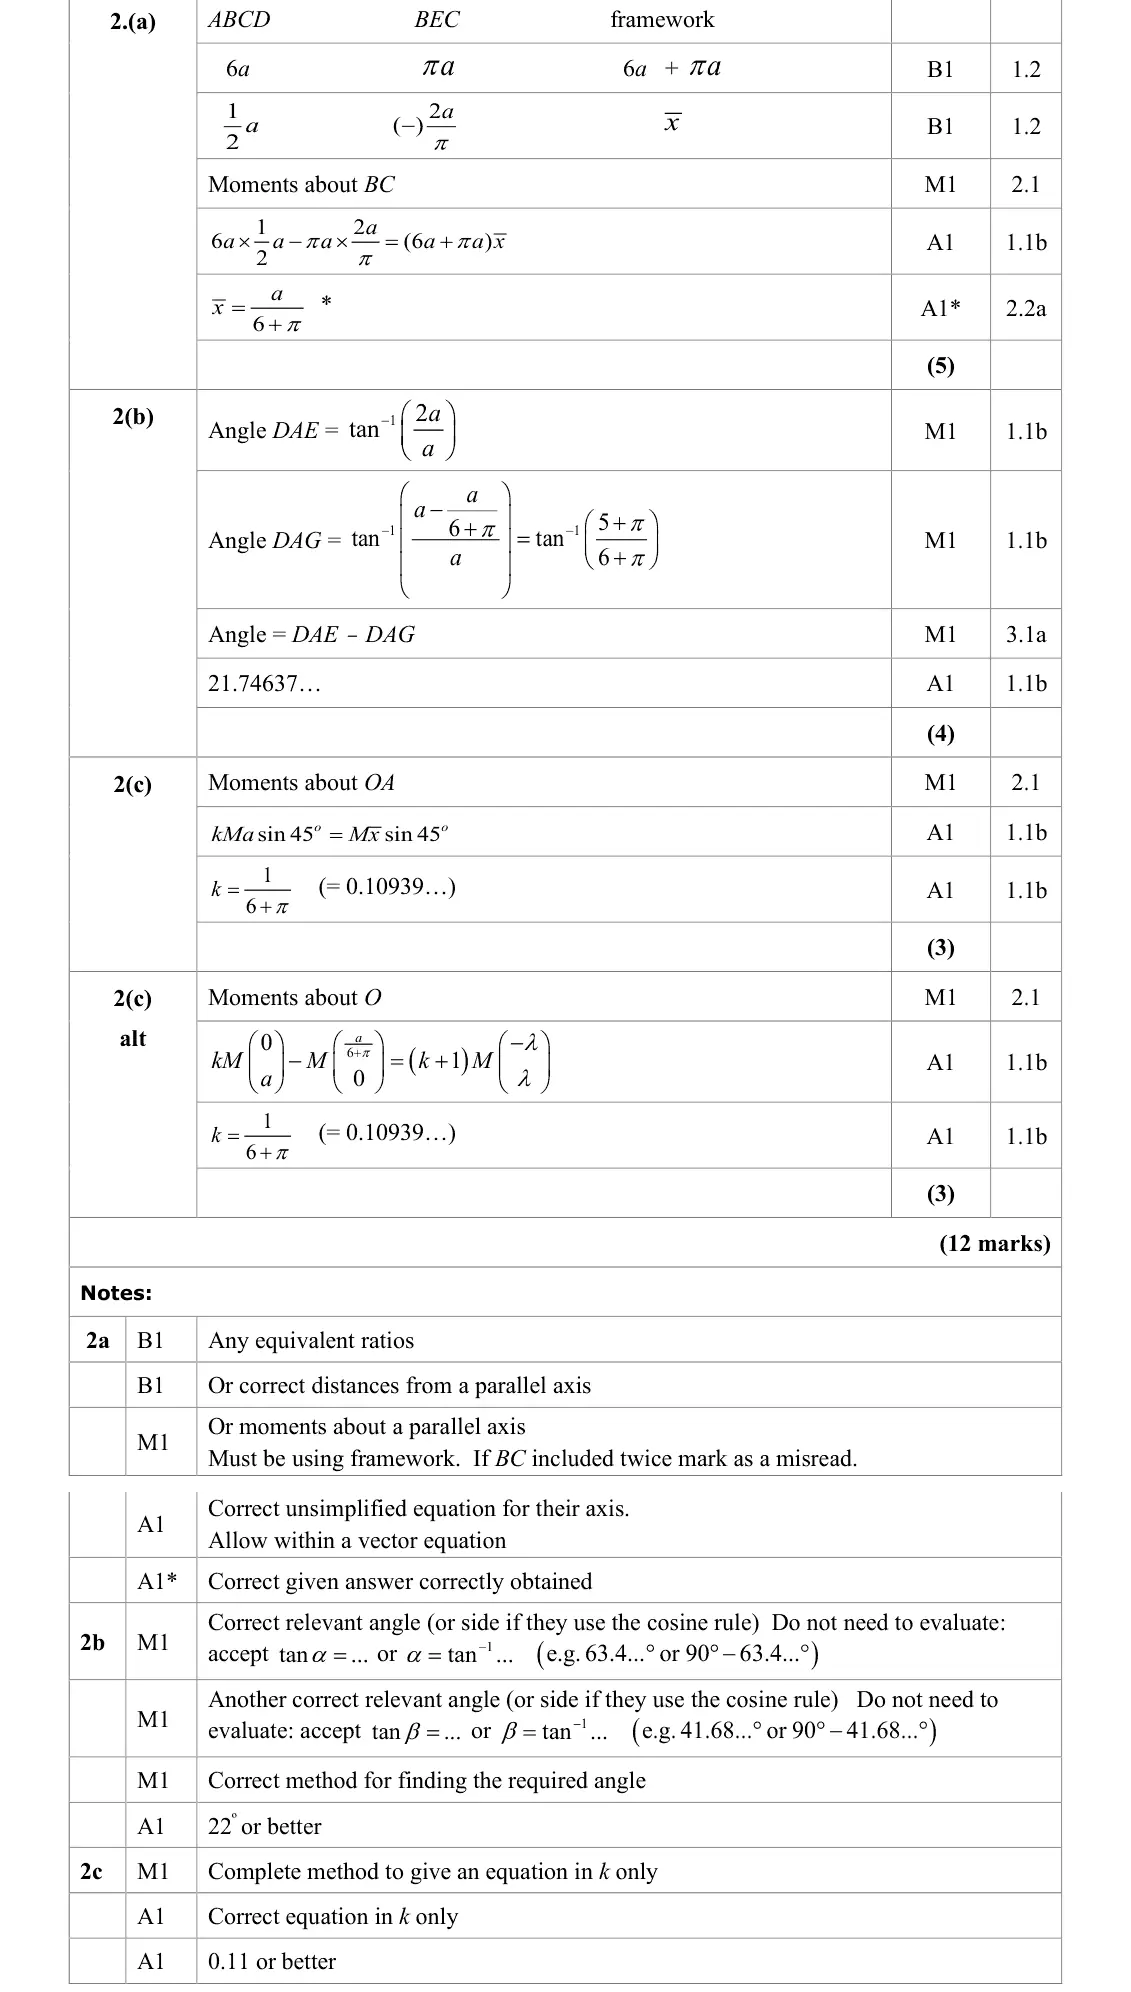
(c) Very few candidates were able to offer a correct solution to this part of the problem. The most successful solutions used a moments equation with position vectors for the two components, as in the alternative method on the mark scheme.
Key points from the mark scheme and examiner's report
moments about OA (at 45°): kMa sin 45° = M x̄ sin 45° so k = 1/(6 + π) ≈ 0.109
position vectors about O were the most successful route
very few correct
June 2022 · Paper 4C (Further Mechanics 2) · Q1(a)4 marks
Mark scheme (whole question; this part is marked with the orange bar)
Examiner's comment
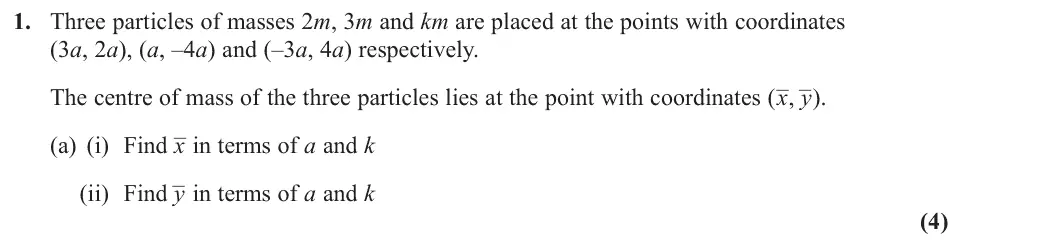
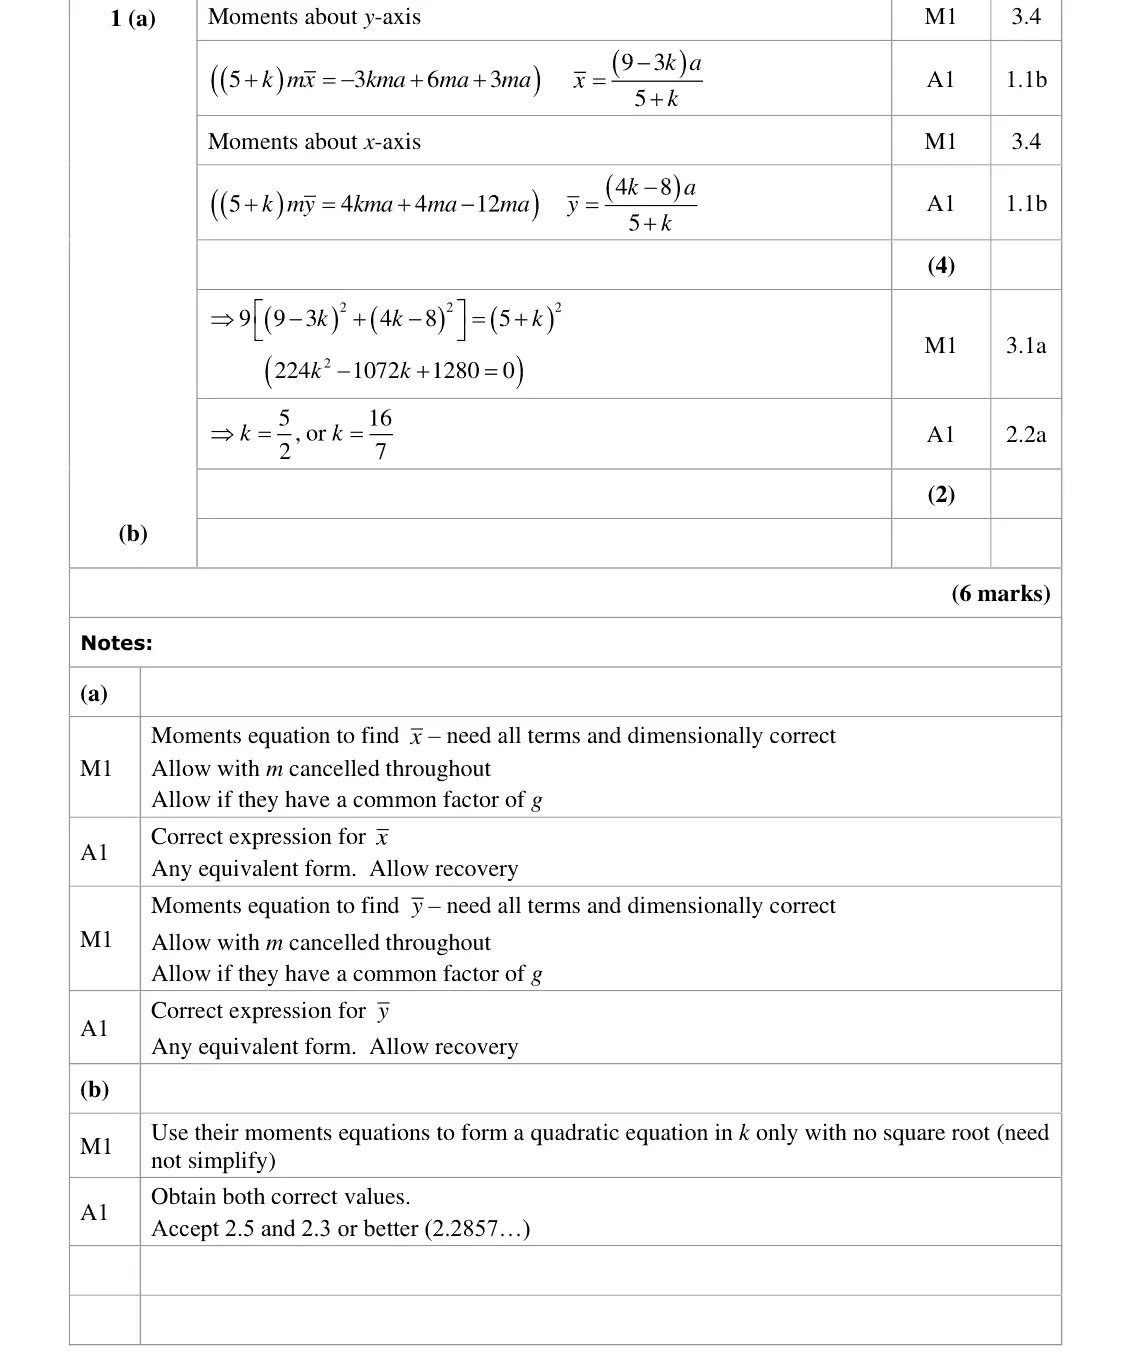
(a) This was a very accessible introduction to the paper, with the vast majority of students forming two correct moments equations and finding the correct distances. Many candidates worked with a vector equation. Common errors included inconsistent presence of “a” in equations and arithmetic errors.
Key points from the mark scheme and examiner's report
moments about each axis: x̄ = (9 − 3k)a/(5 + k), ȳ = (4k − 8)a/(5 + k)
keep a consistently in both equations
vector form also accepted
June 2022 · Paper 4C (Further Mechanics 2) · Q1(b)2 marks
Mark scheme (whole question; this part is marked with the orange bar)
Examiner's comment
(b) Nearly all candidates went on to use the given information about the distance to form and solve an equation in k. Again, some solutions were spoiled by processing errors.
Key points from the mark scheme and examiner's report
x̄² + ȳ² = a²/9 gives 224k² − 1072k + 1280 = 0
k = 5/2 or 16/7
processing slips common
Oct 2020 · AS Paper 2 (Further Mechanics 2) · Q1(a)2 marks
Mark scheme (whole question; this part is marked with the orange bar)
Key points from the mark scheme and examiner's report
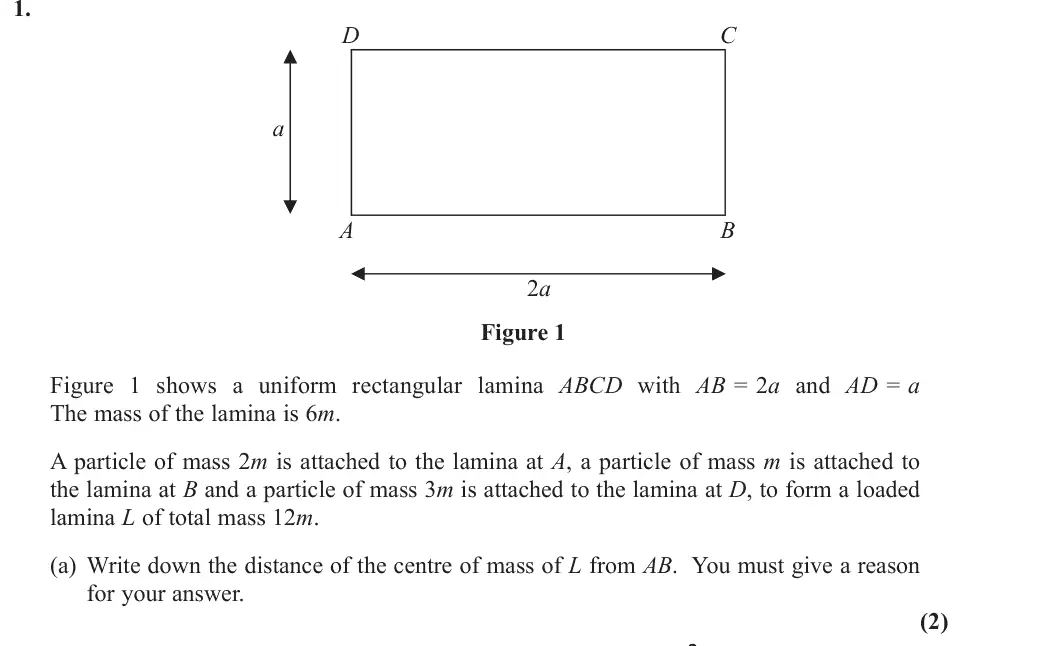
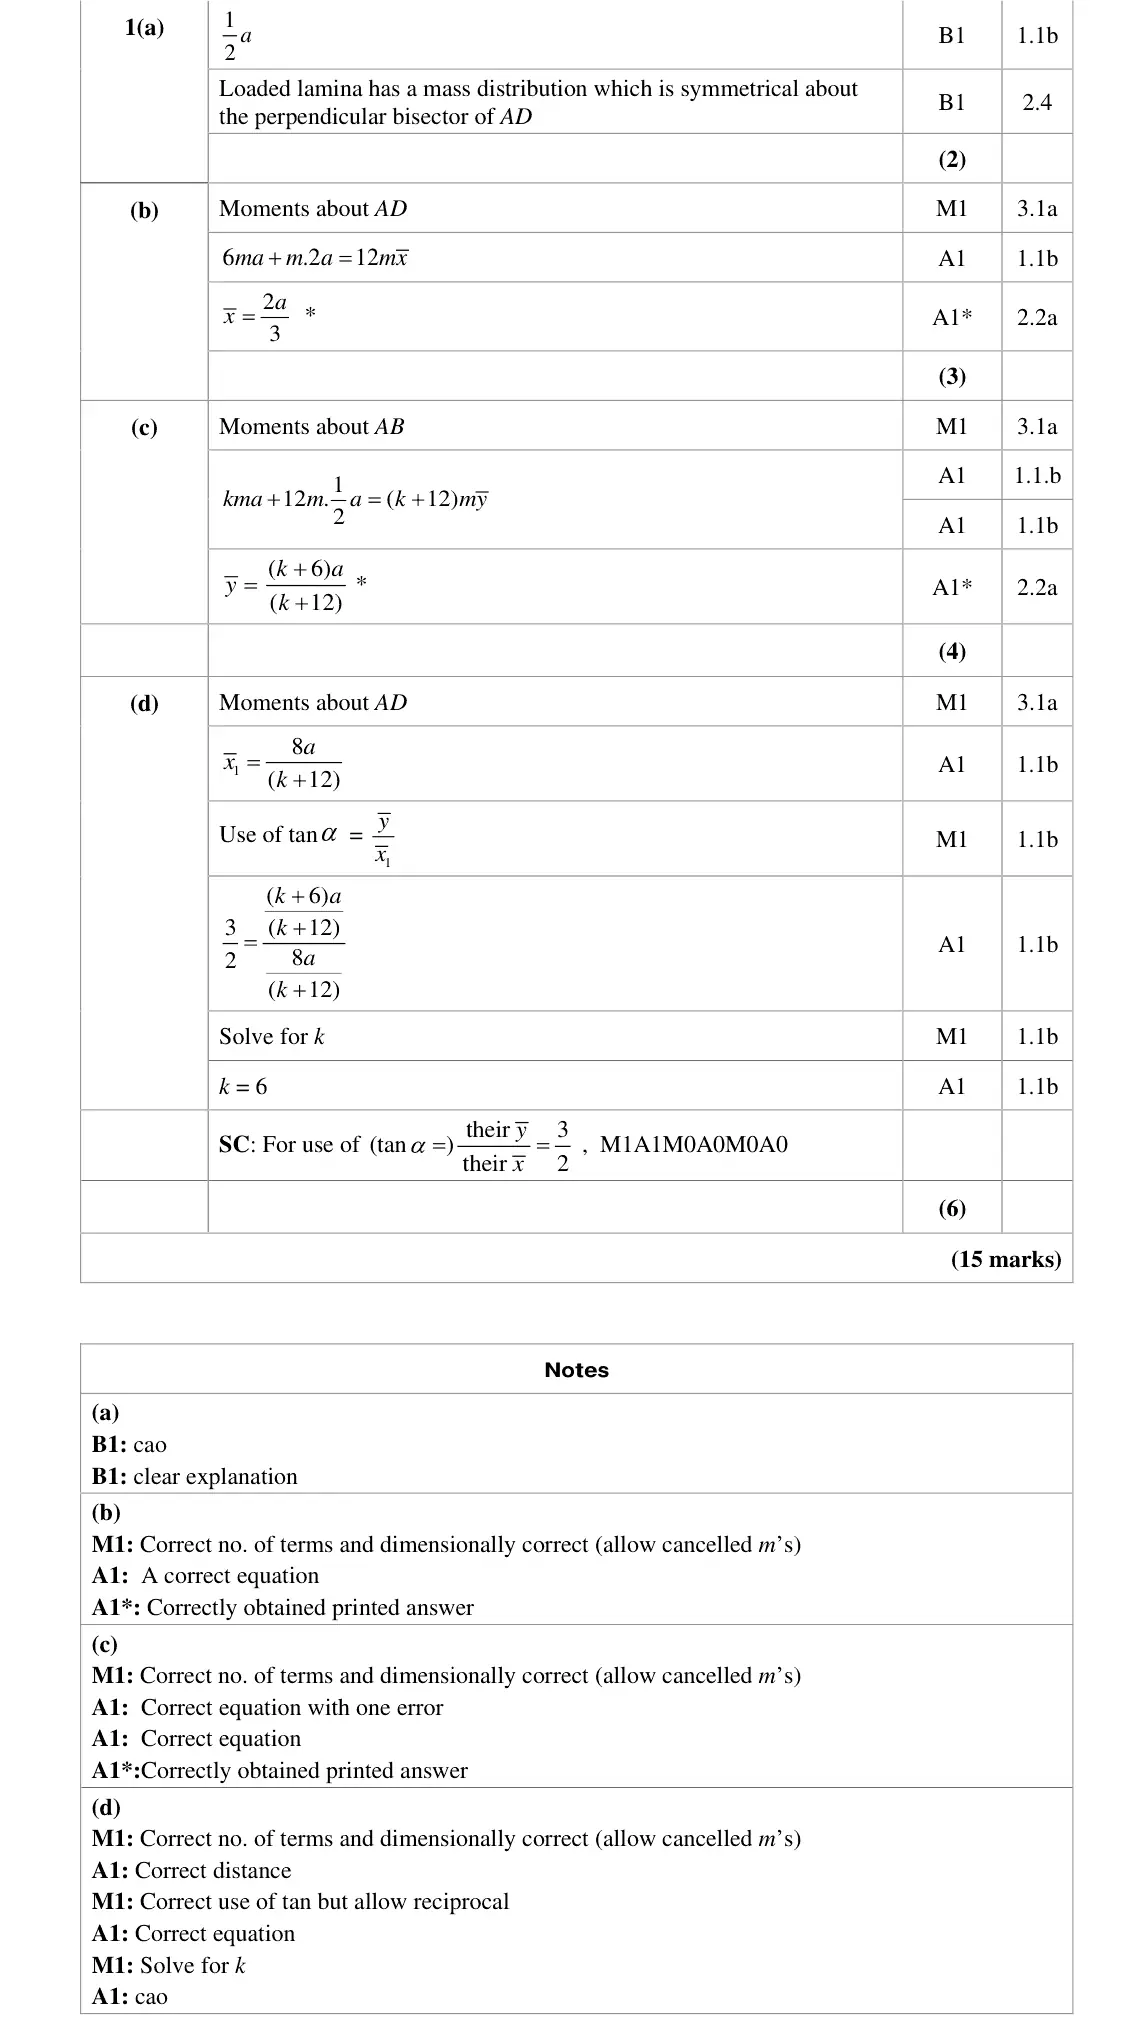
a/2
reason needed: the loaded lamina's mass distribution is symmetrical about the perpendicular bisector of AD (3m on each side)
Oct 2020 · AS Paper 2 (Further Mechanics 2) · Q1(b)3 marks
Mark scheme (whole question; this part is marked with the orange bar)
Key points from the mark scheme and examiner's report
Oct 2020 · AS Paper 2 (Further Mechanics 2) · Q1(d)6 marks
Mark scheme (whole question; this part is marked with the orange bar)
Key points from the mark scheme and examiner's report
new distance from AD is 8a/(k + 12) (the 2a/3 for L no longer applies)
tan α = ȳ/x̄ = 3/2 gives k = 6
using L's x̄ = 2a/3 earns only M1A1 (special case)
Oct 2020 · Paper 4C (Further Mechanics 2) · Q17 marks
Mark scheme (whole question; this part is marked with the orange bar)
Key points from the mark scheme and examiner's report
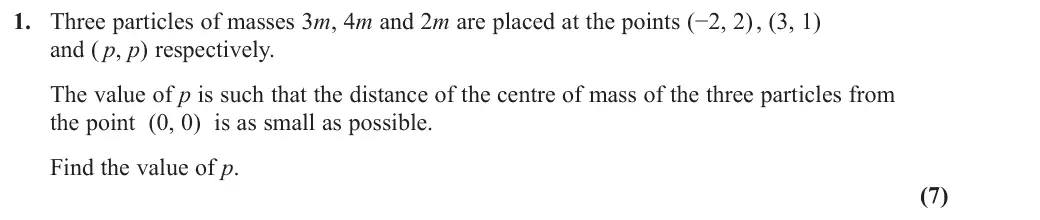
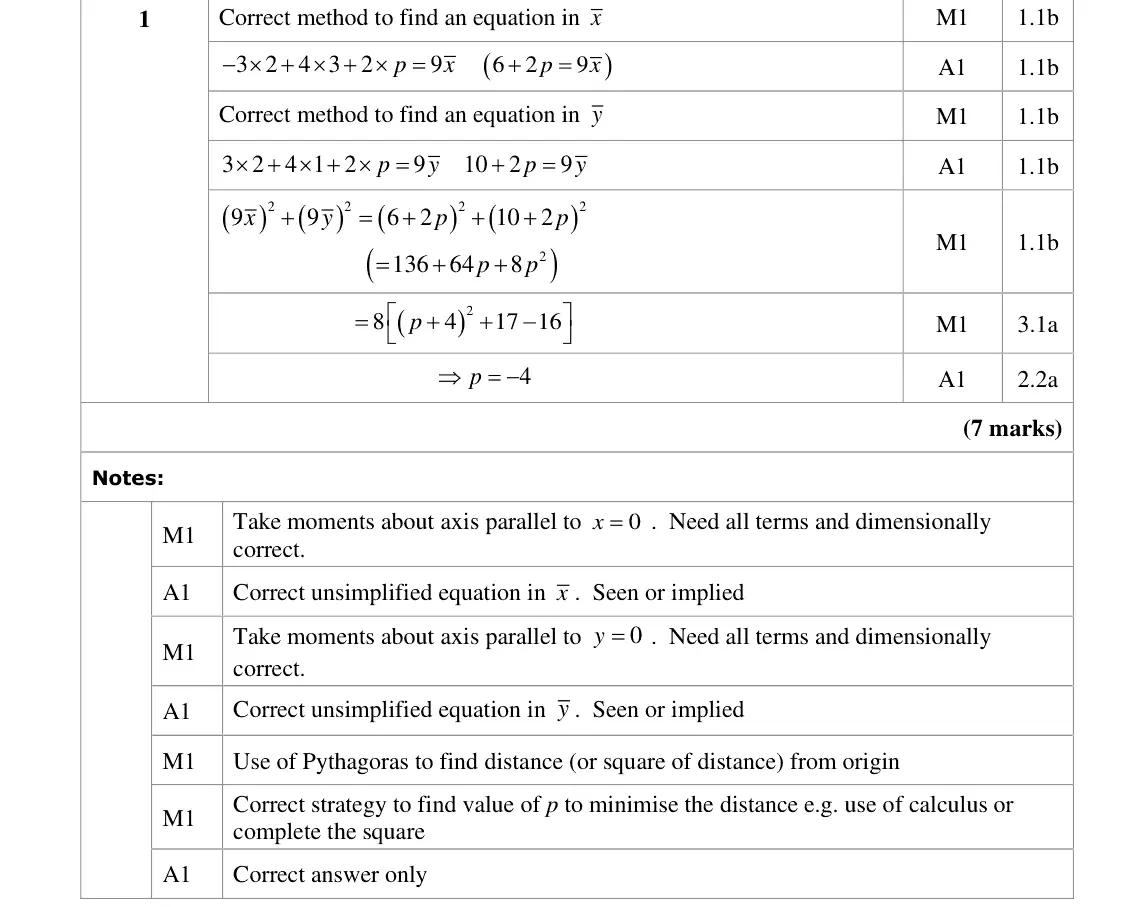
moments about both axes: 9x̄ = 6 + 2p, 9ȳ = 10 + 2p
minimise (6 + 2p)² + (10 + 2p)² = 8[(p + 4)² + 1] by completing the square or calculus
p = −4
June 2019 · AS Paper 2 (Further Mechanics 2) · Q1(b)4 marks
Mark scheme (whole question; this part is marked with the orange bar)
Examiner's comment
In Q01(a), very few scored the B1 mark. The uniformity of the rods was the criterion which was the most often missed. There were also several zero scores for the second part. Some took the weight of the entire lamina as W, some wrote down dimensionally incorrect equations and some displayed a general lack of understanding of moments, with candidates working out the distance from the point at which the weight acted to the point A or B rather than the perpendicular distance from the line of action. The majority of those who did manage to produce a correct answer used the tensions and 5W rather than considering every rod. In Q01(c), very few realised that TA was the larger tension. A number took moments about both A and B and then selected the correct k. Some chose the wrong one on the basis that 9.5 > 0.9 and they thought they were looking for the largest k overall. Some chose the right one but ended up with an inequality rather than the maximum value.
Key points from the mark scheme and examiner's report
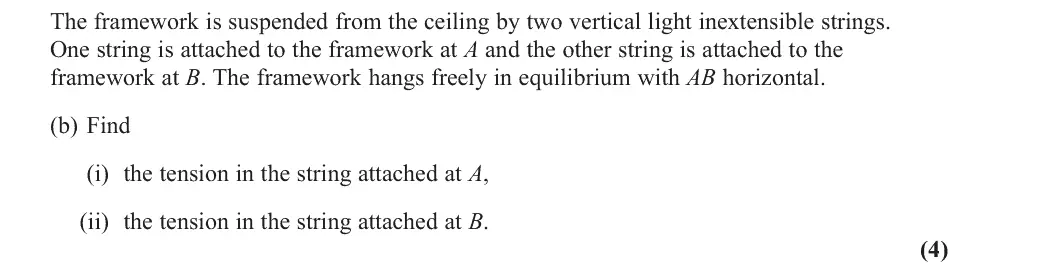
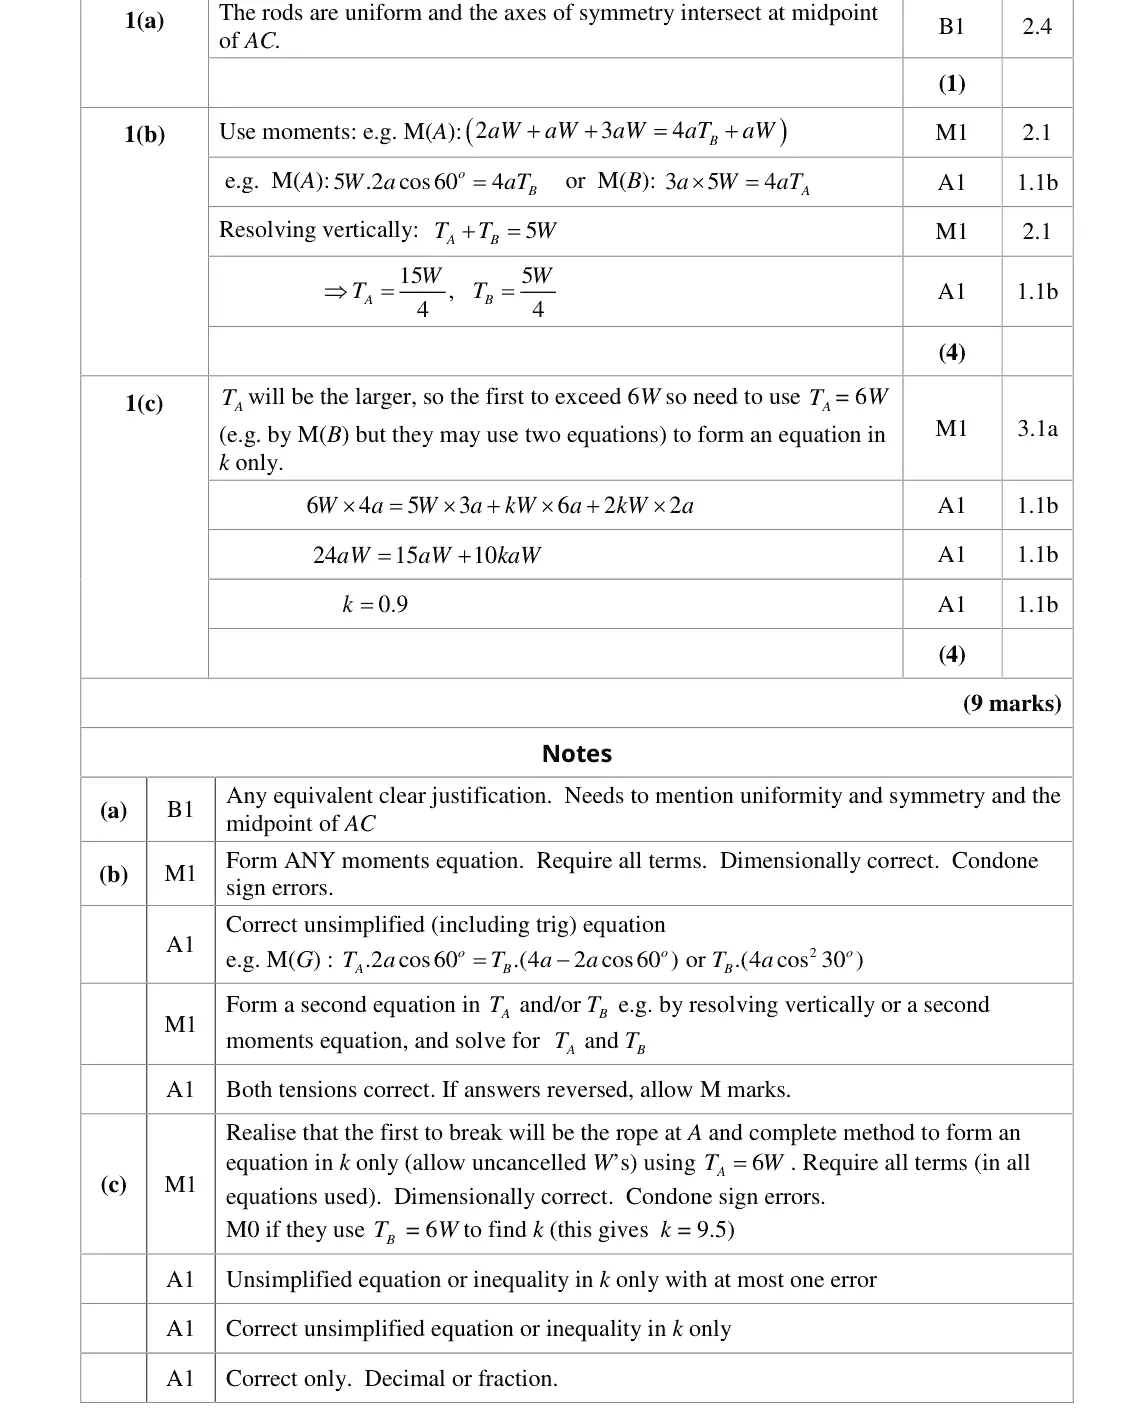
moments about A or B plus resolving vertically: T_A = 15W/4, T_B = 5W/4
use the perpendicular distance from the line of action
total weight is 5W, not W
June 2019 · AS Paper 2 (Further Mechanics 2) · Q1(c)4 marks
Mark scheme (whole question; this part is marked with the orange bar)
Examiner's comment
In Q01(a), very few scored the B1 mark. The uniformity of the rods was the criterion which
Key points from the mark scheme and examiner's report
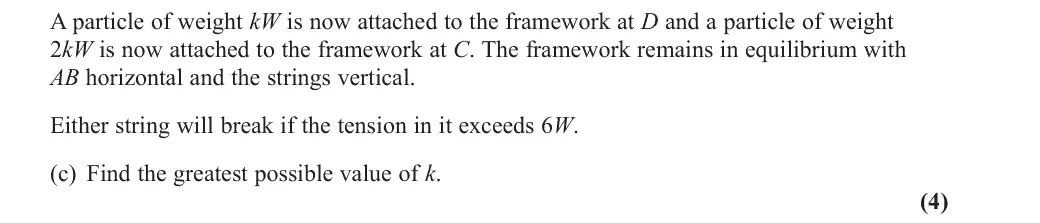
T_A is the larger tension so set T_A = 6W, moments about B: 24W = 15W + 10kW so k = 0.9
using T_B = 6W gives 9.5 (M0)
some left an inequality
June 2018 · AS Paper 2 (Further Mechanics 2) · Q1(b)3 marks
Mark scheme (whole question; this part is marked with the orange bar)
Examiner's comment
(b) Fully correct solutions to this part of the question were unusual. The question talks about applying a horizontal force to maintain AB in a vertical position. Many students worked through their solution as if they were attaching a particle to the frame, with its weight acting vertically and AB horizontal. The distance that was actually needed was given in part (a), but the majority of students felt that they needed to know the vertical distance of the centre of mass of the frame from BC and to use that.
Key points from the mark scheme and examiner's report
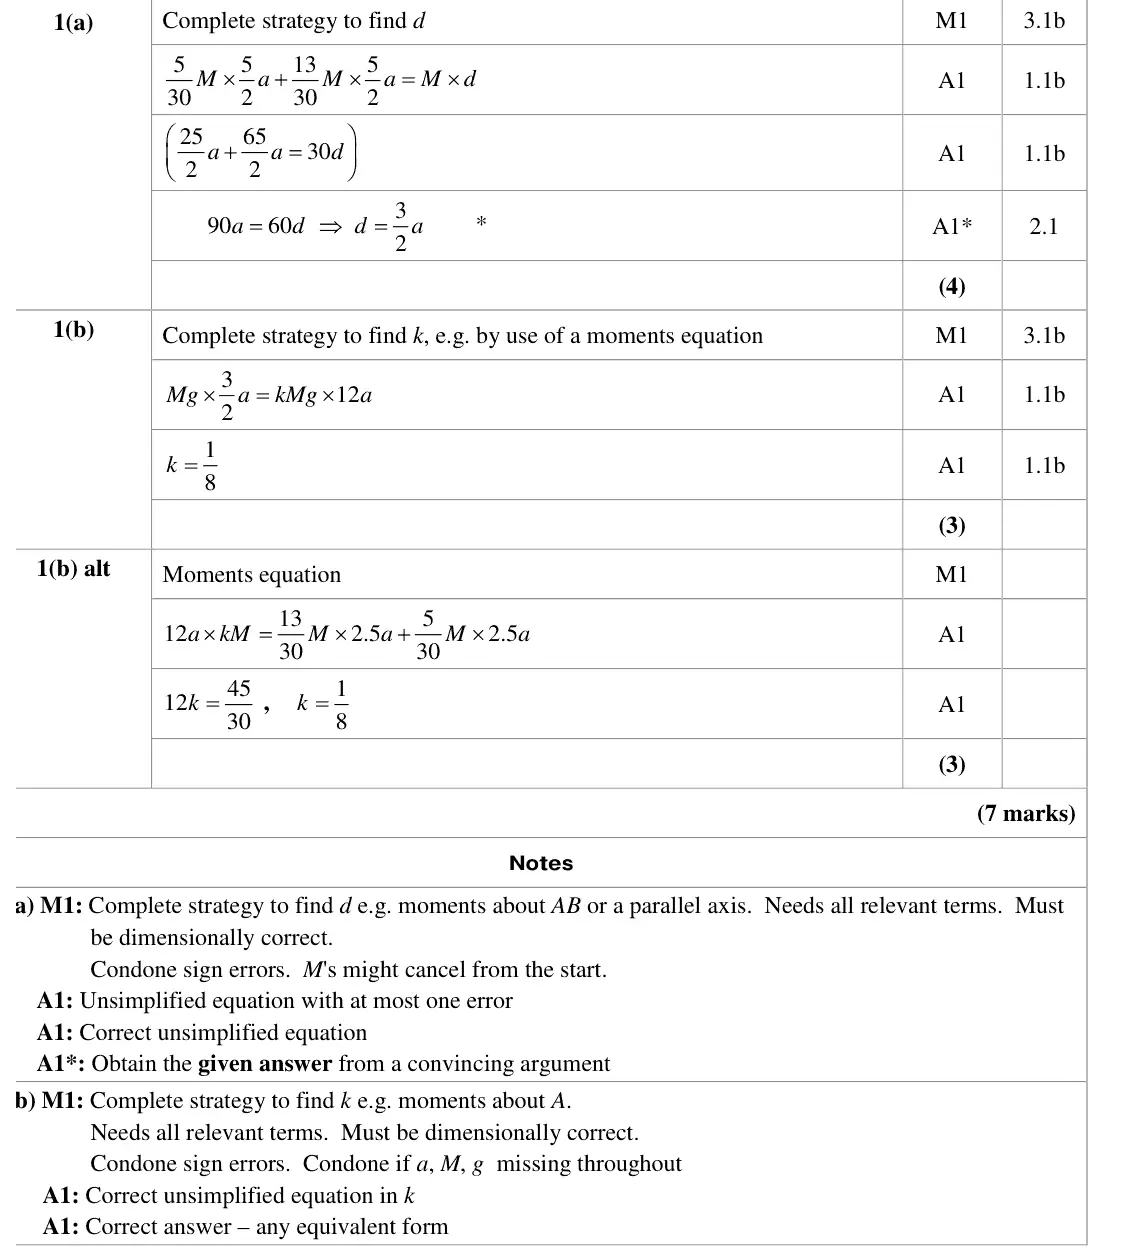
moments about A with AB vertical: Mg × (3a/2) = kMg × 12a so k = 1/8
the distance needed is the one from (a)
many treated the force as a hanging particle or used the distance from BC
Find an Edexcel Further Maths tutor
Stuck on this? Book a trial lesson with our Further Maths tutor.