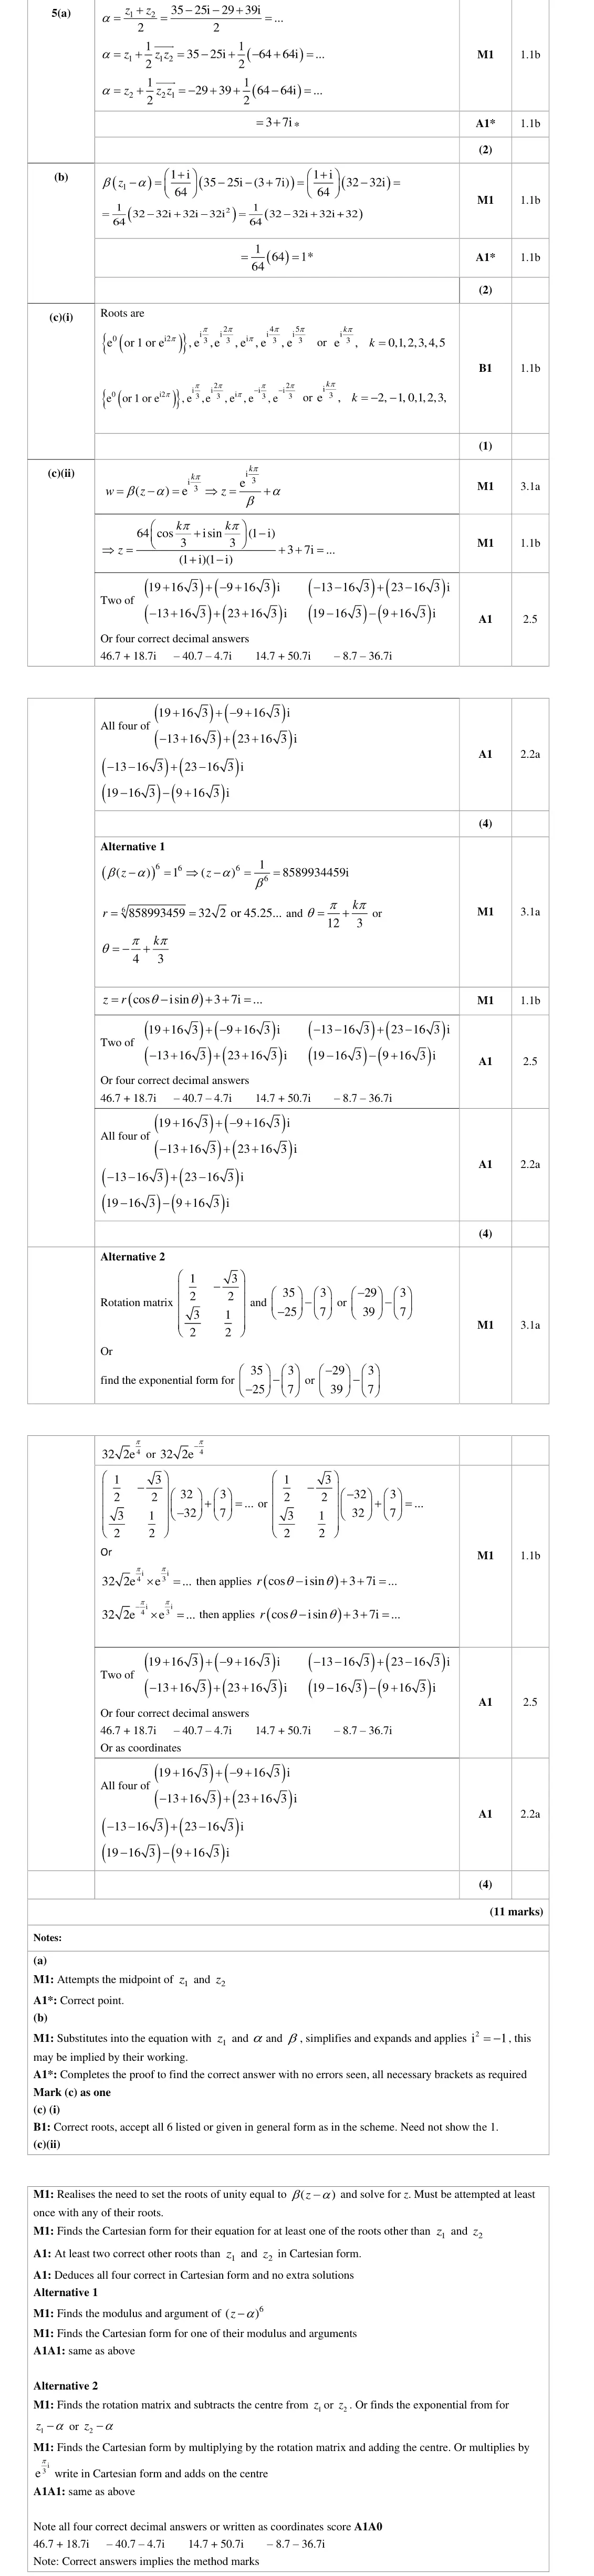
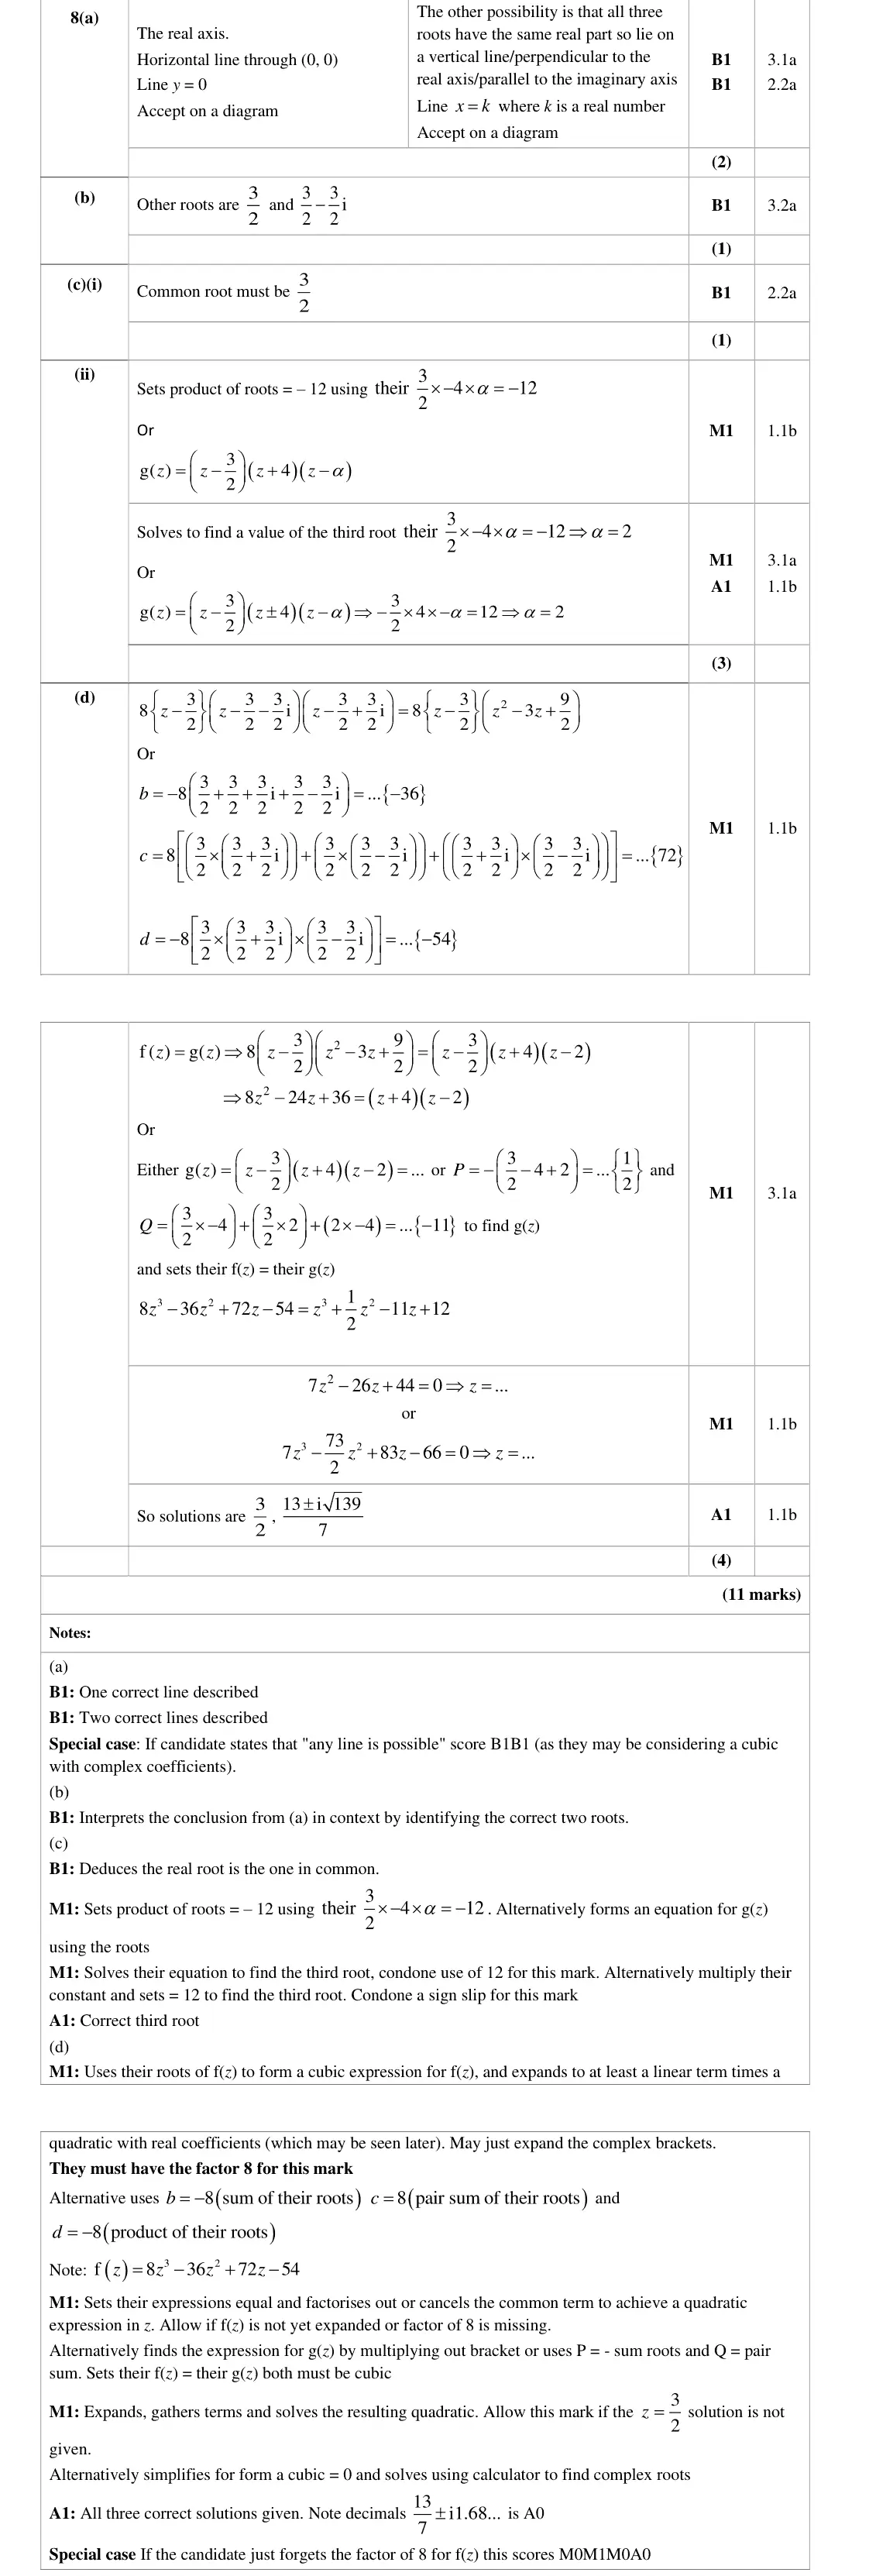
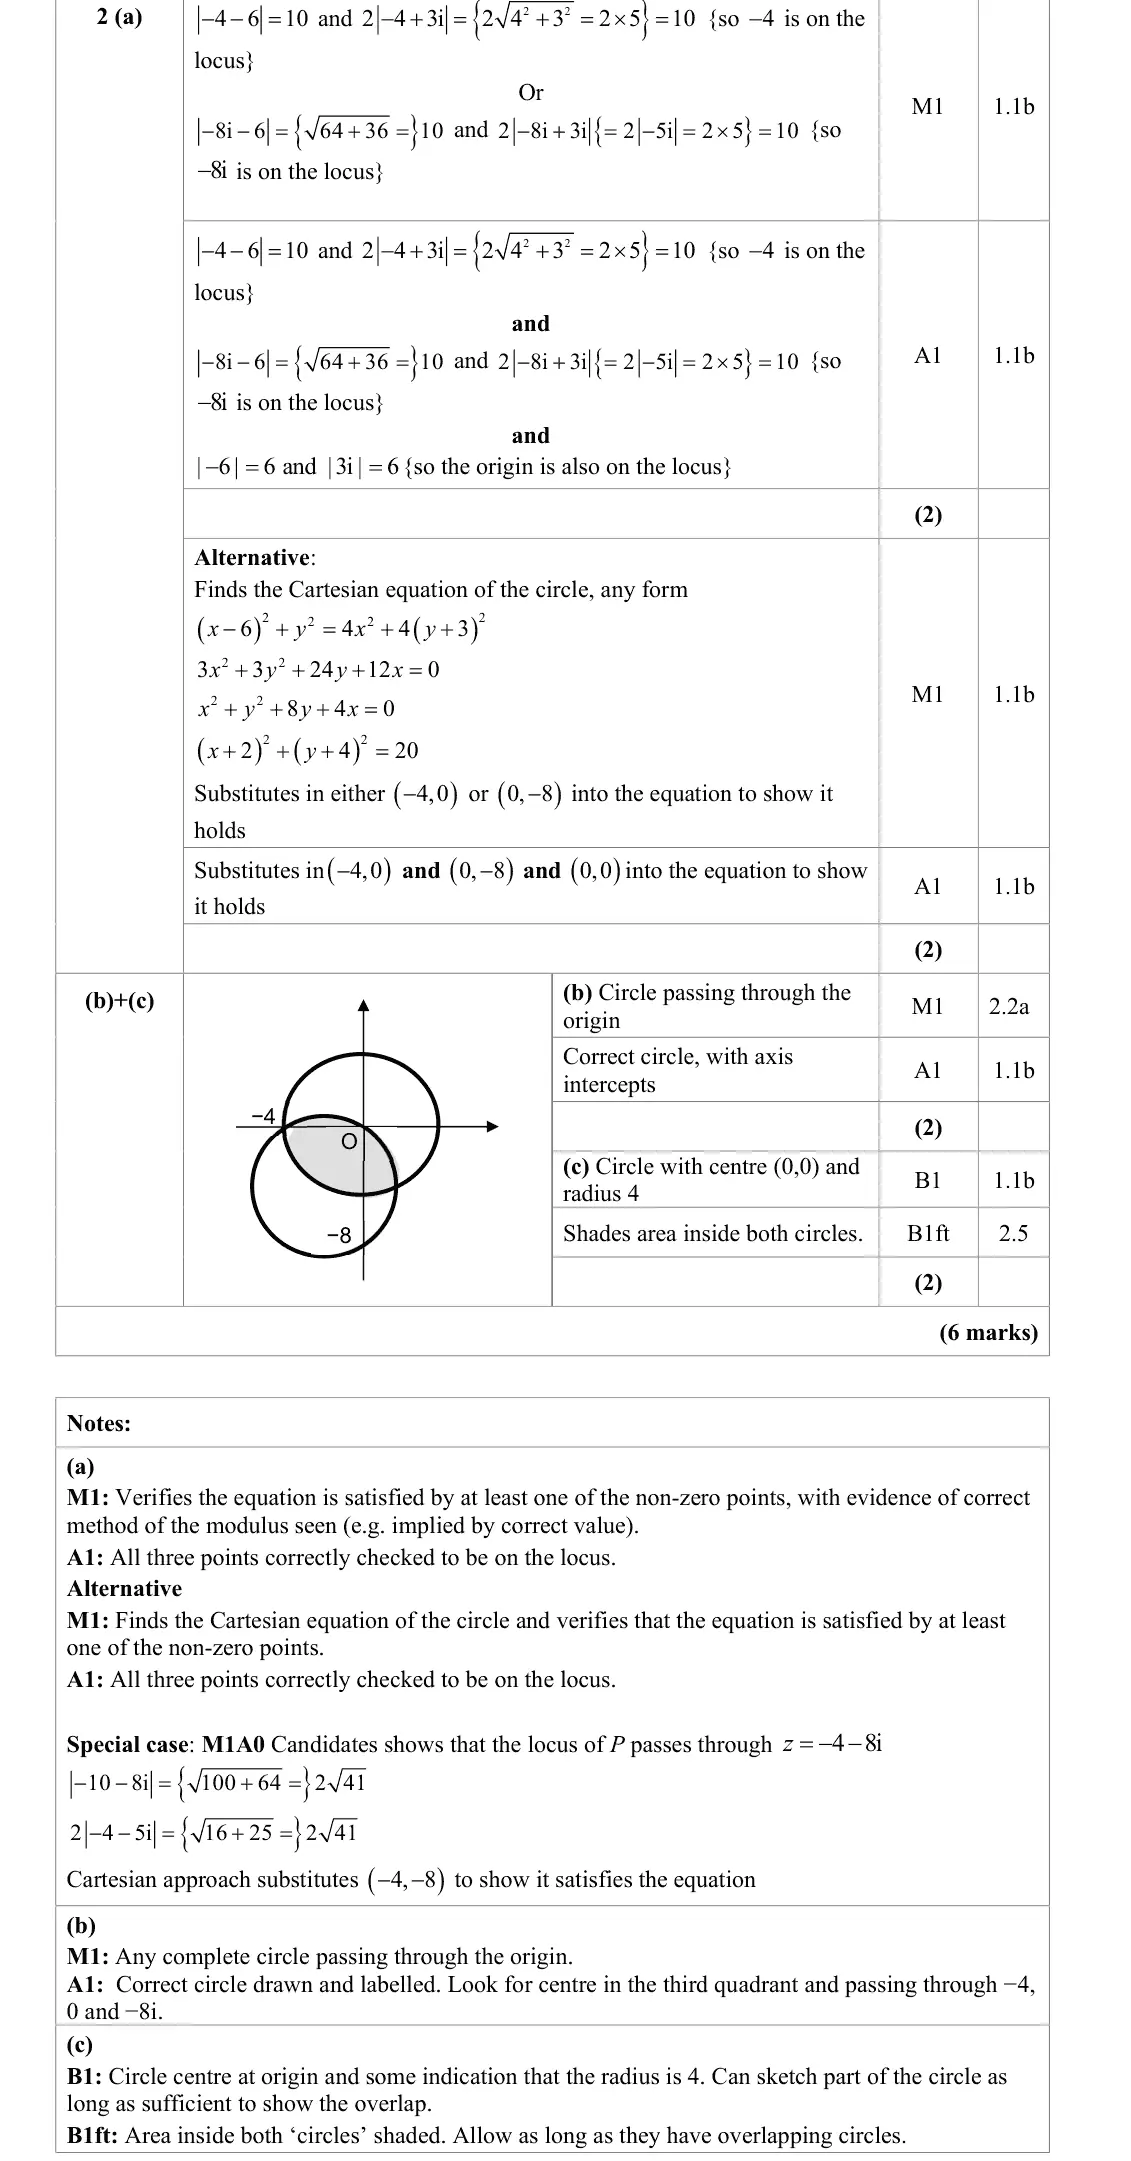
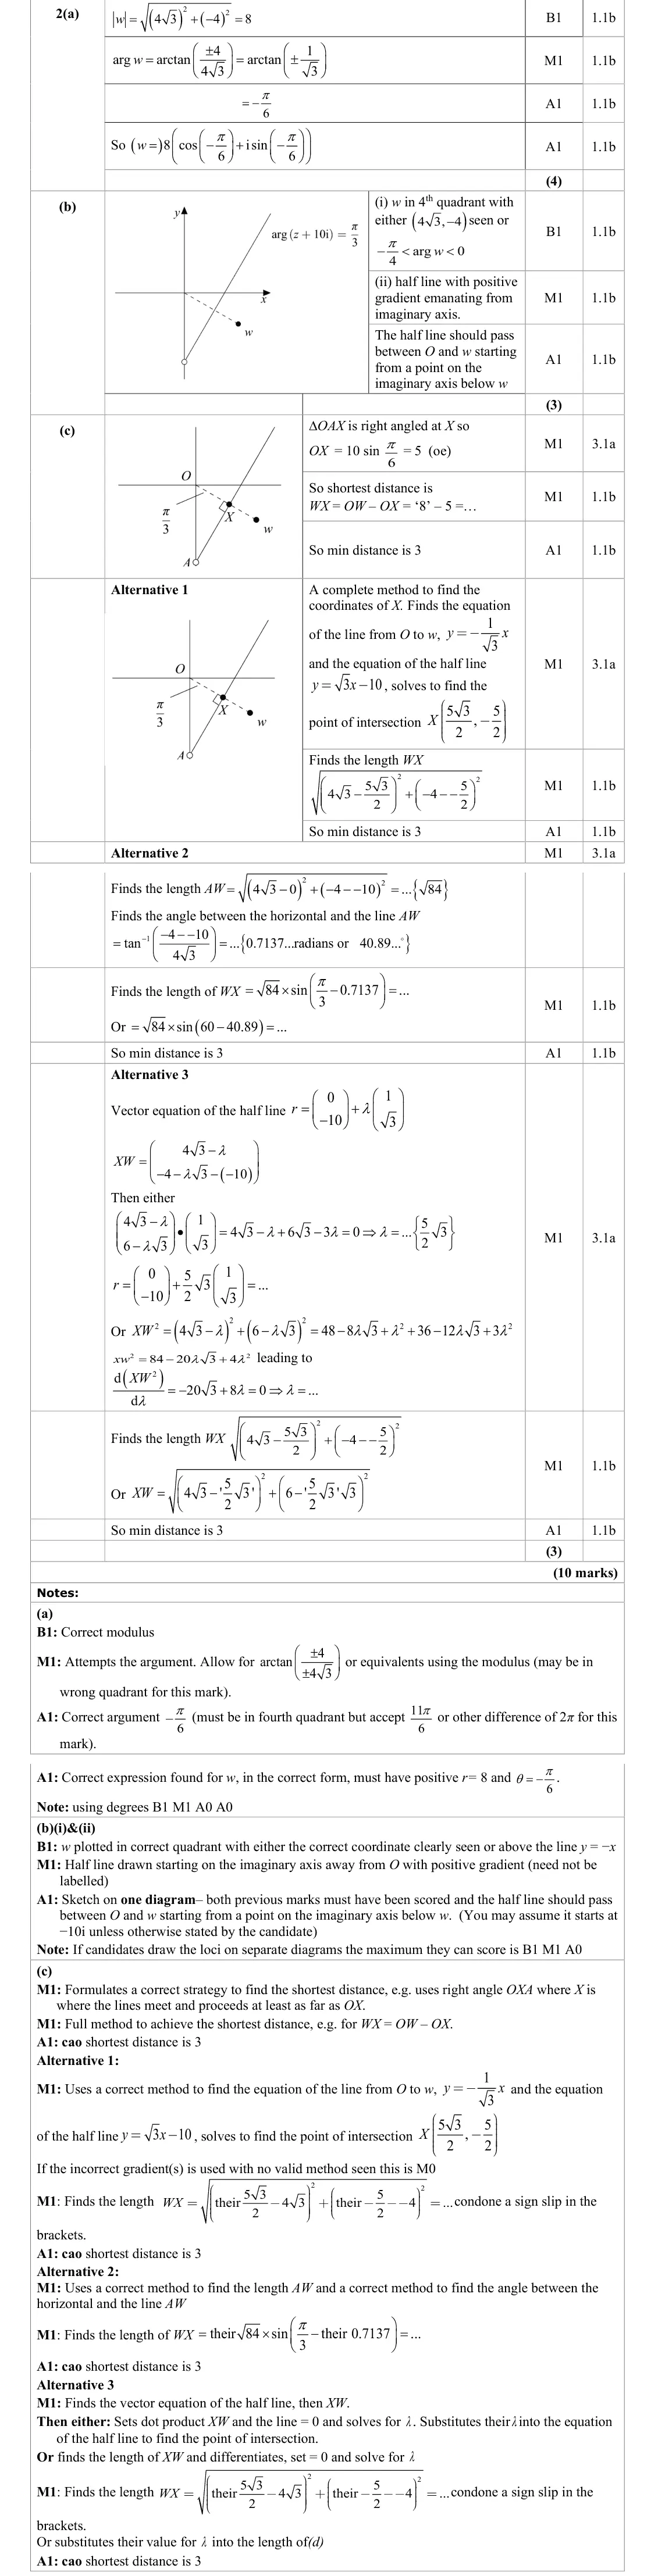
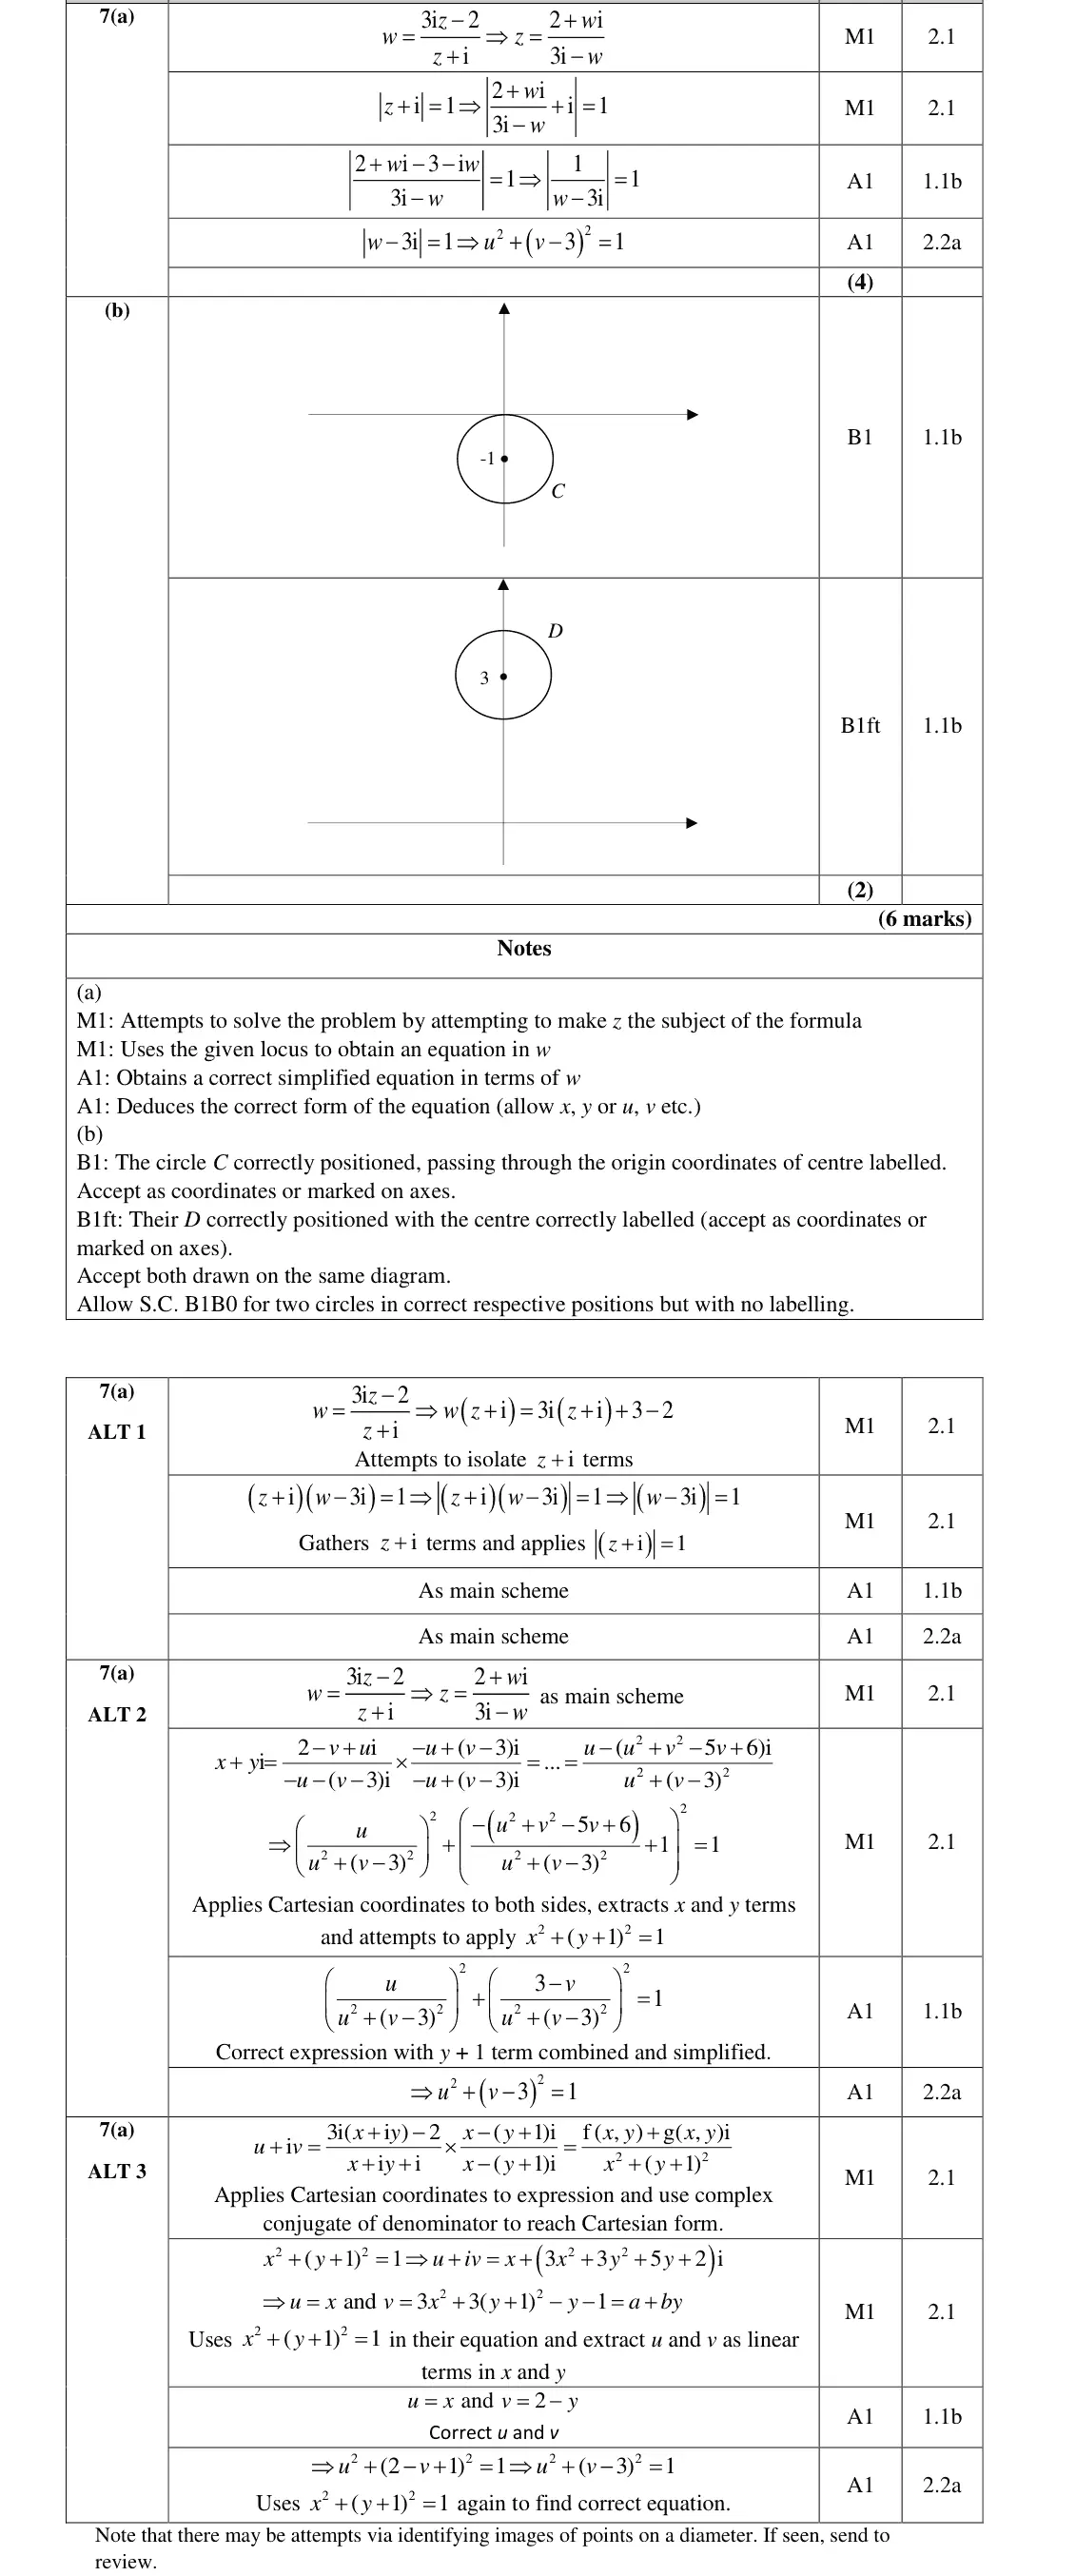
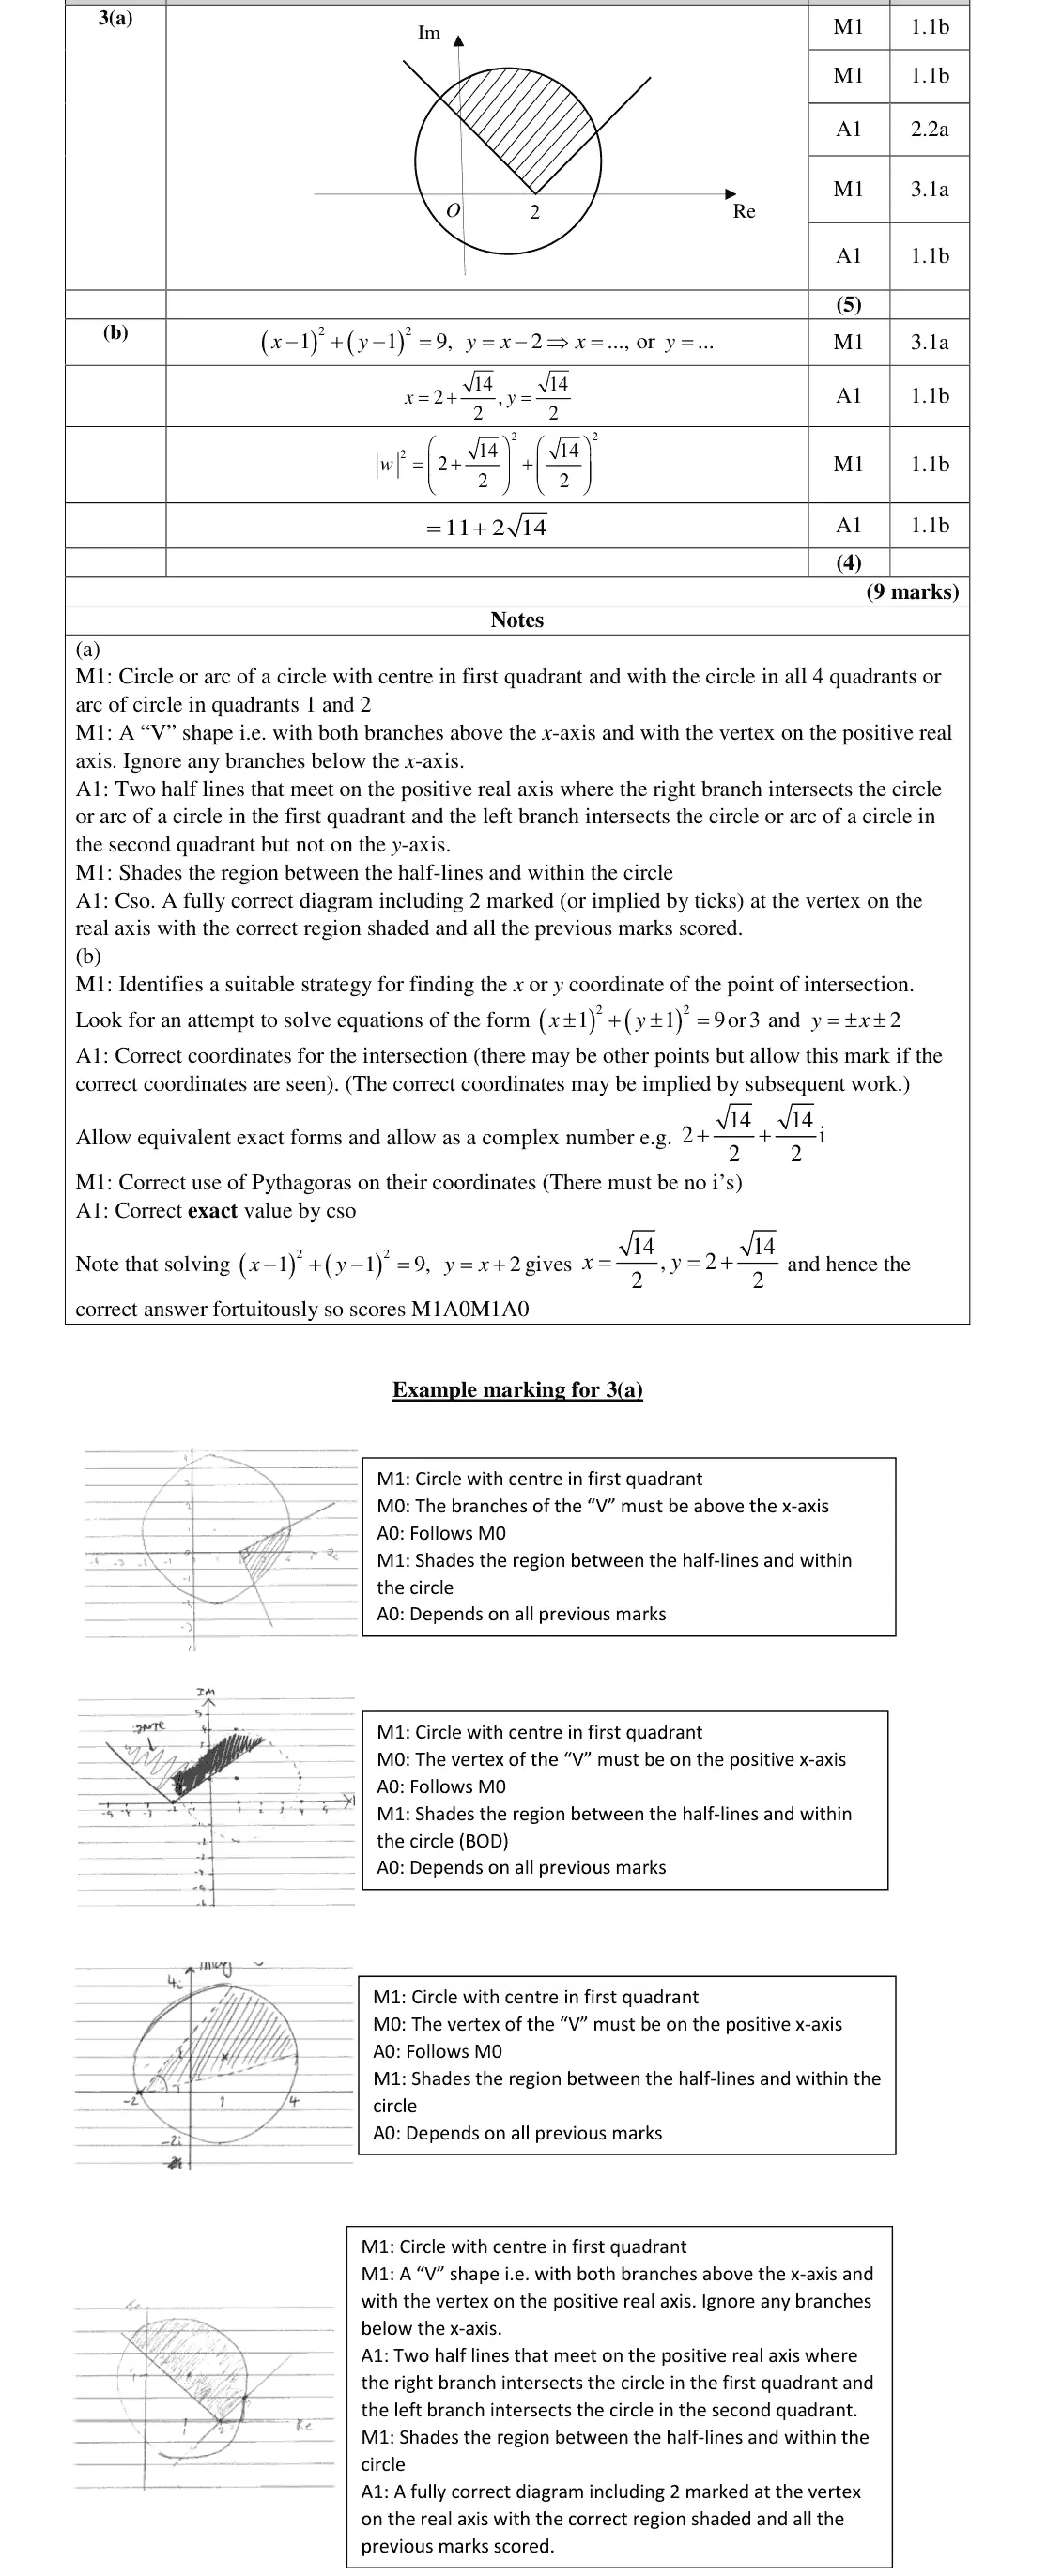
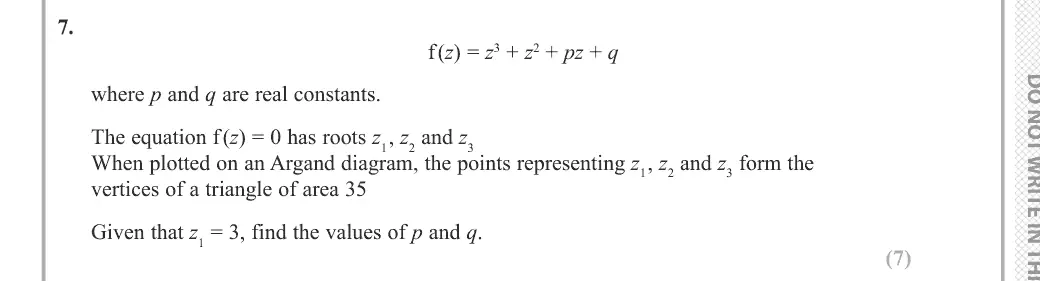
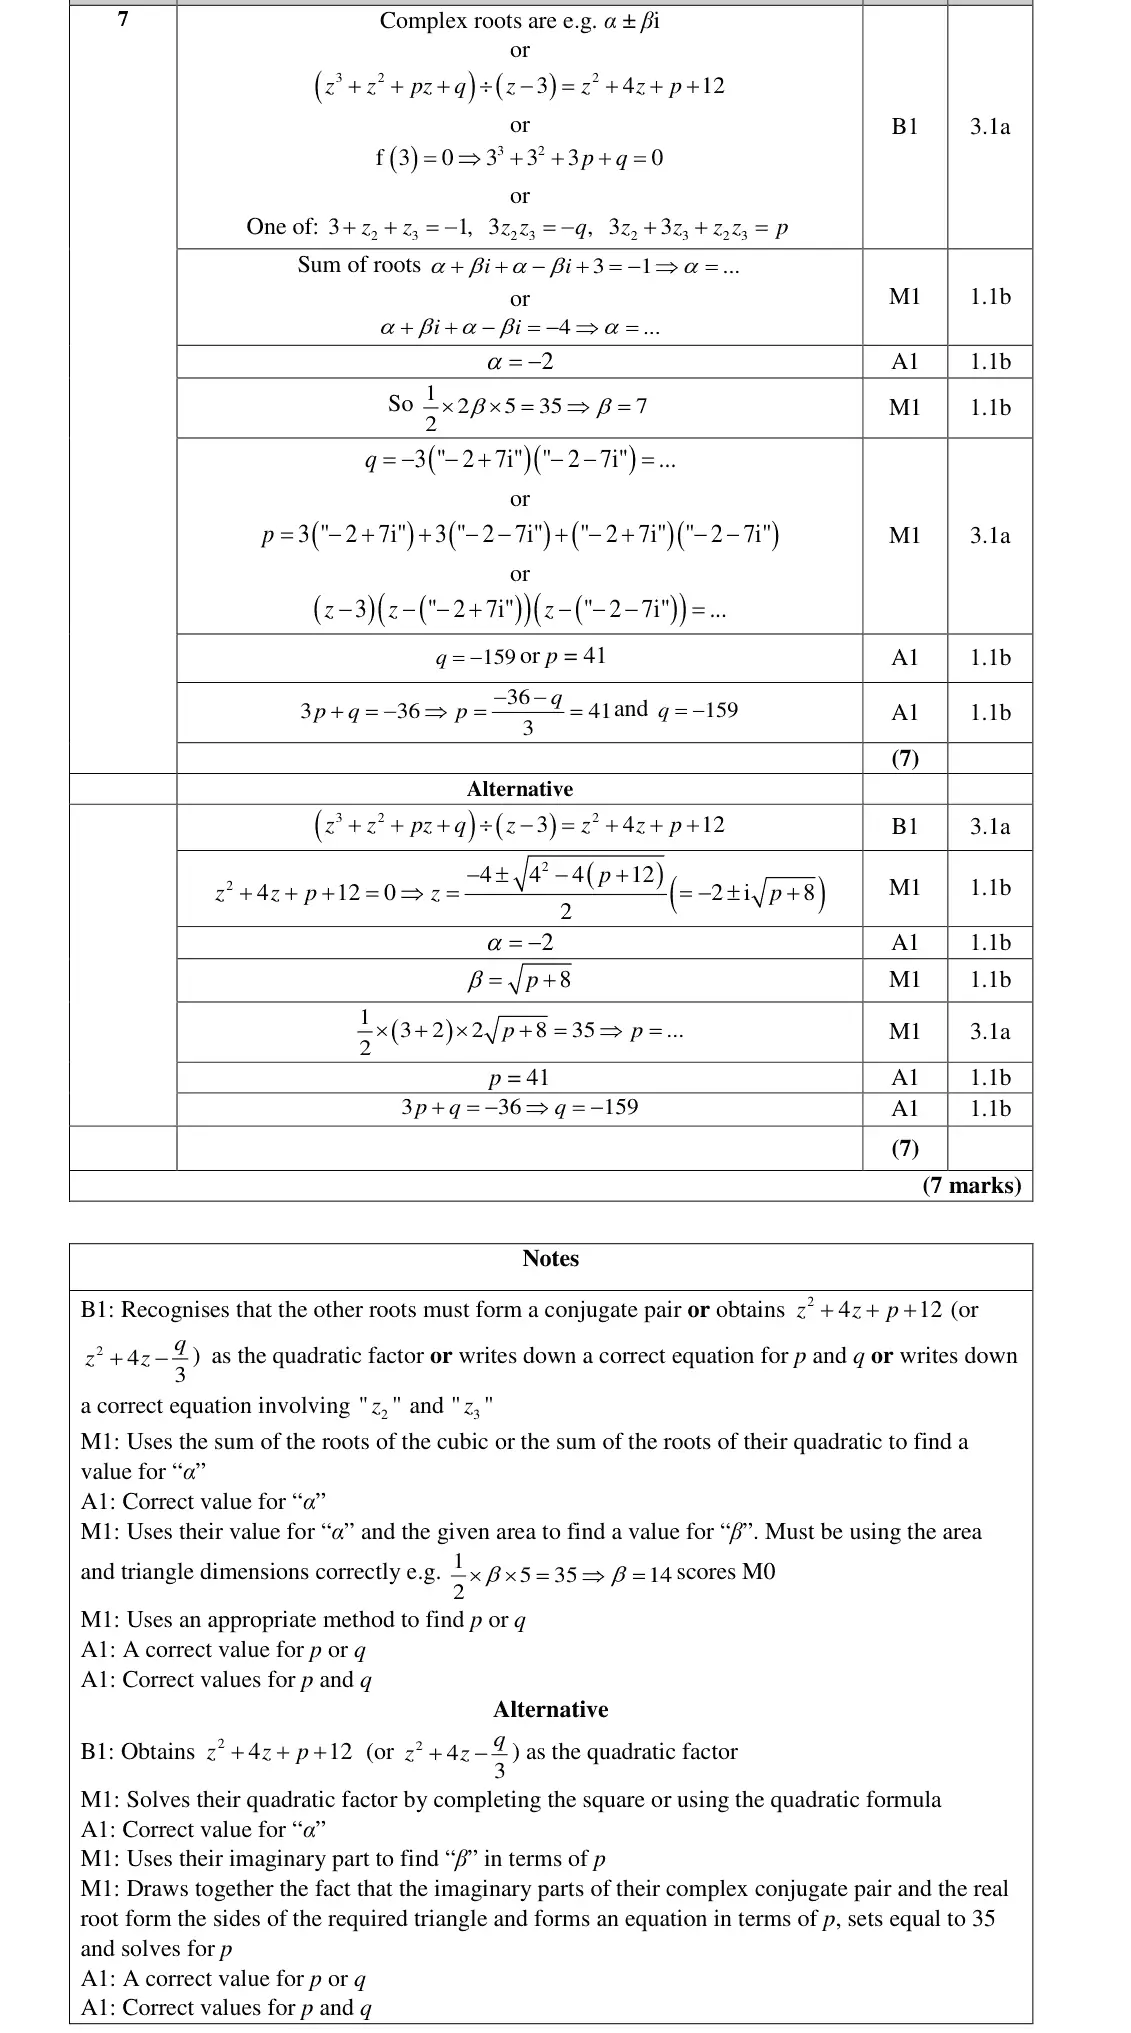
Mark scheme (whole question; this part is marked with the orange bar)
Examiner's comment
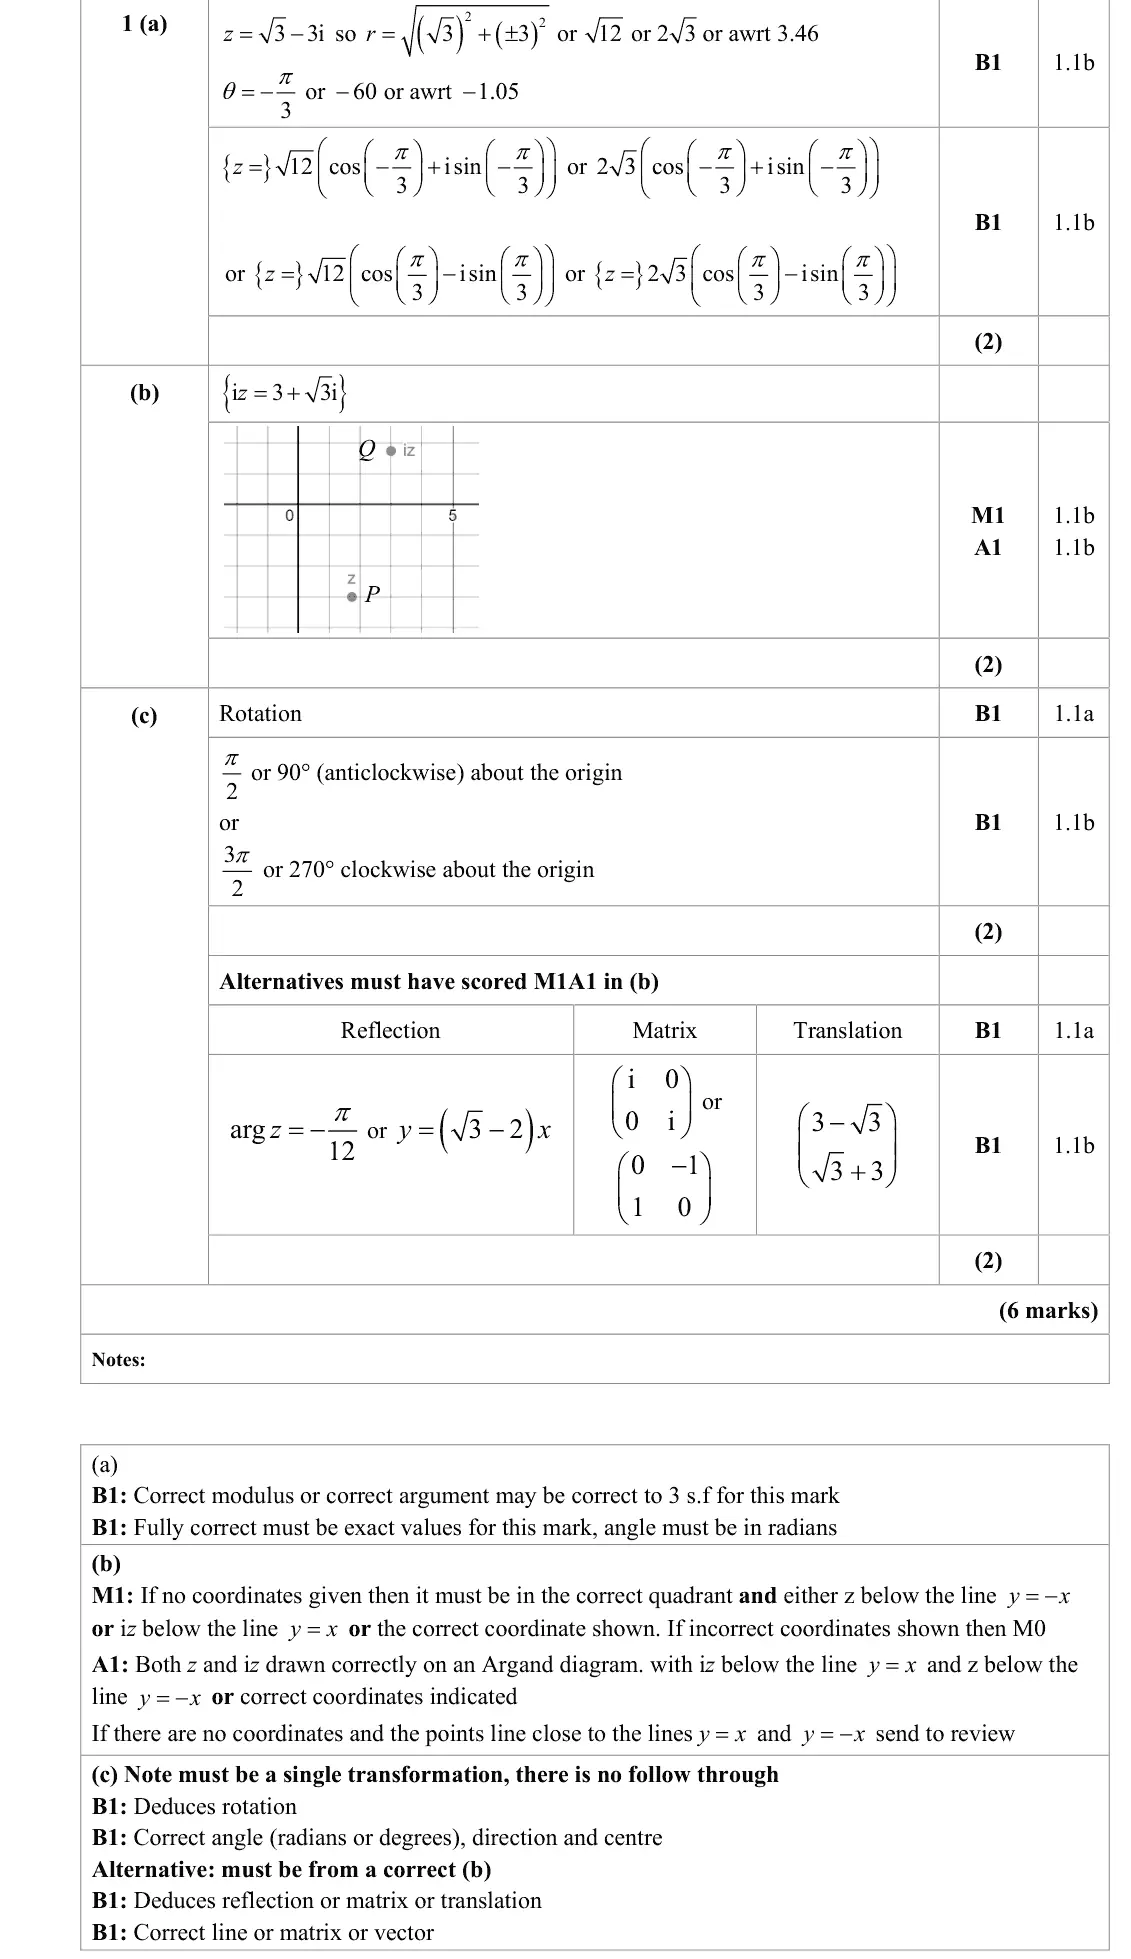
This question proved to be an accessible start to this paper with many fully correct solutions seen. In part (b), there was insufficient detail in the required diagram. When placing points on an Argand diagram, learners should clearly show the positions of the points, either by indicating scales on the axes or by indicating the coordinates of the points. Without such indications, it was assumed that the scales on each of the axes was the same. In such cases, the positioning of the points, particularly P, was insufficiently accurate to award marks. Some learners had incorrect complex number Q with 3 3i + common.
Key points from the mark scheme and examiner's report
iz = 3 + √3i
label P and Q with coordinates or scales so their positions are clear
June 2025 · AS Paper 1 (Core Pure) · Q1(c)2 marks
Mark scheme (whole question; this part is marked with the orange bar)
Examiner's comment
This question proved to be an accessible start to this paper with many fully correct solutions seen. In (c), the most common response was to say that the transformation was a rotation with a correct angle and direction about the origin. There were responses where the centre of the rotation was omitted and thus lost a mark. There were other alternative transformations which were correct for the two points P and Q such as a reflection in an appropriate line, a matrix, or a translation.
Key points from the mark scheme and examiner's report
rotation 90° anticlockwise about the origin (multiplying by i)
centre often omitted
June 2025 · AS Paper 1 (Core Pure) · Q5(a)2 marks
Mark scheme (whole question; this part is marked with the orange bar)
Examiner's comment
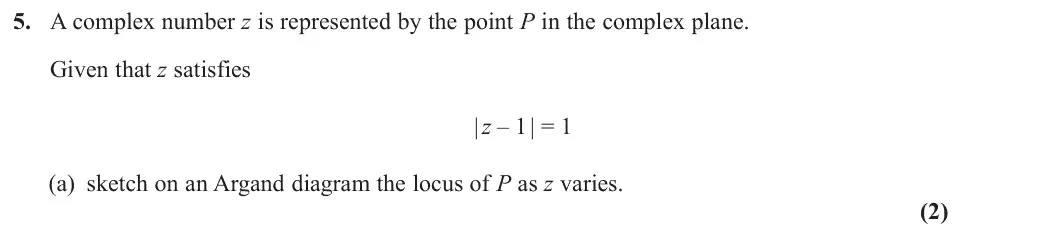
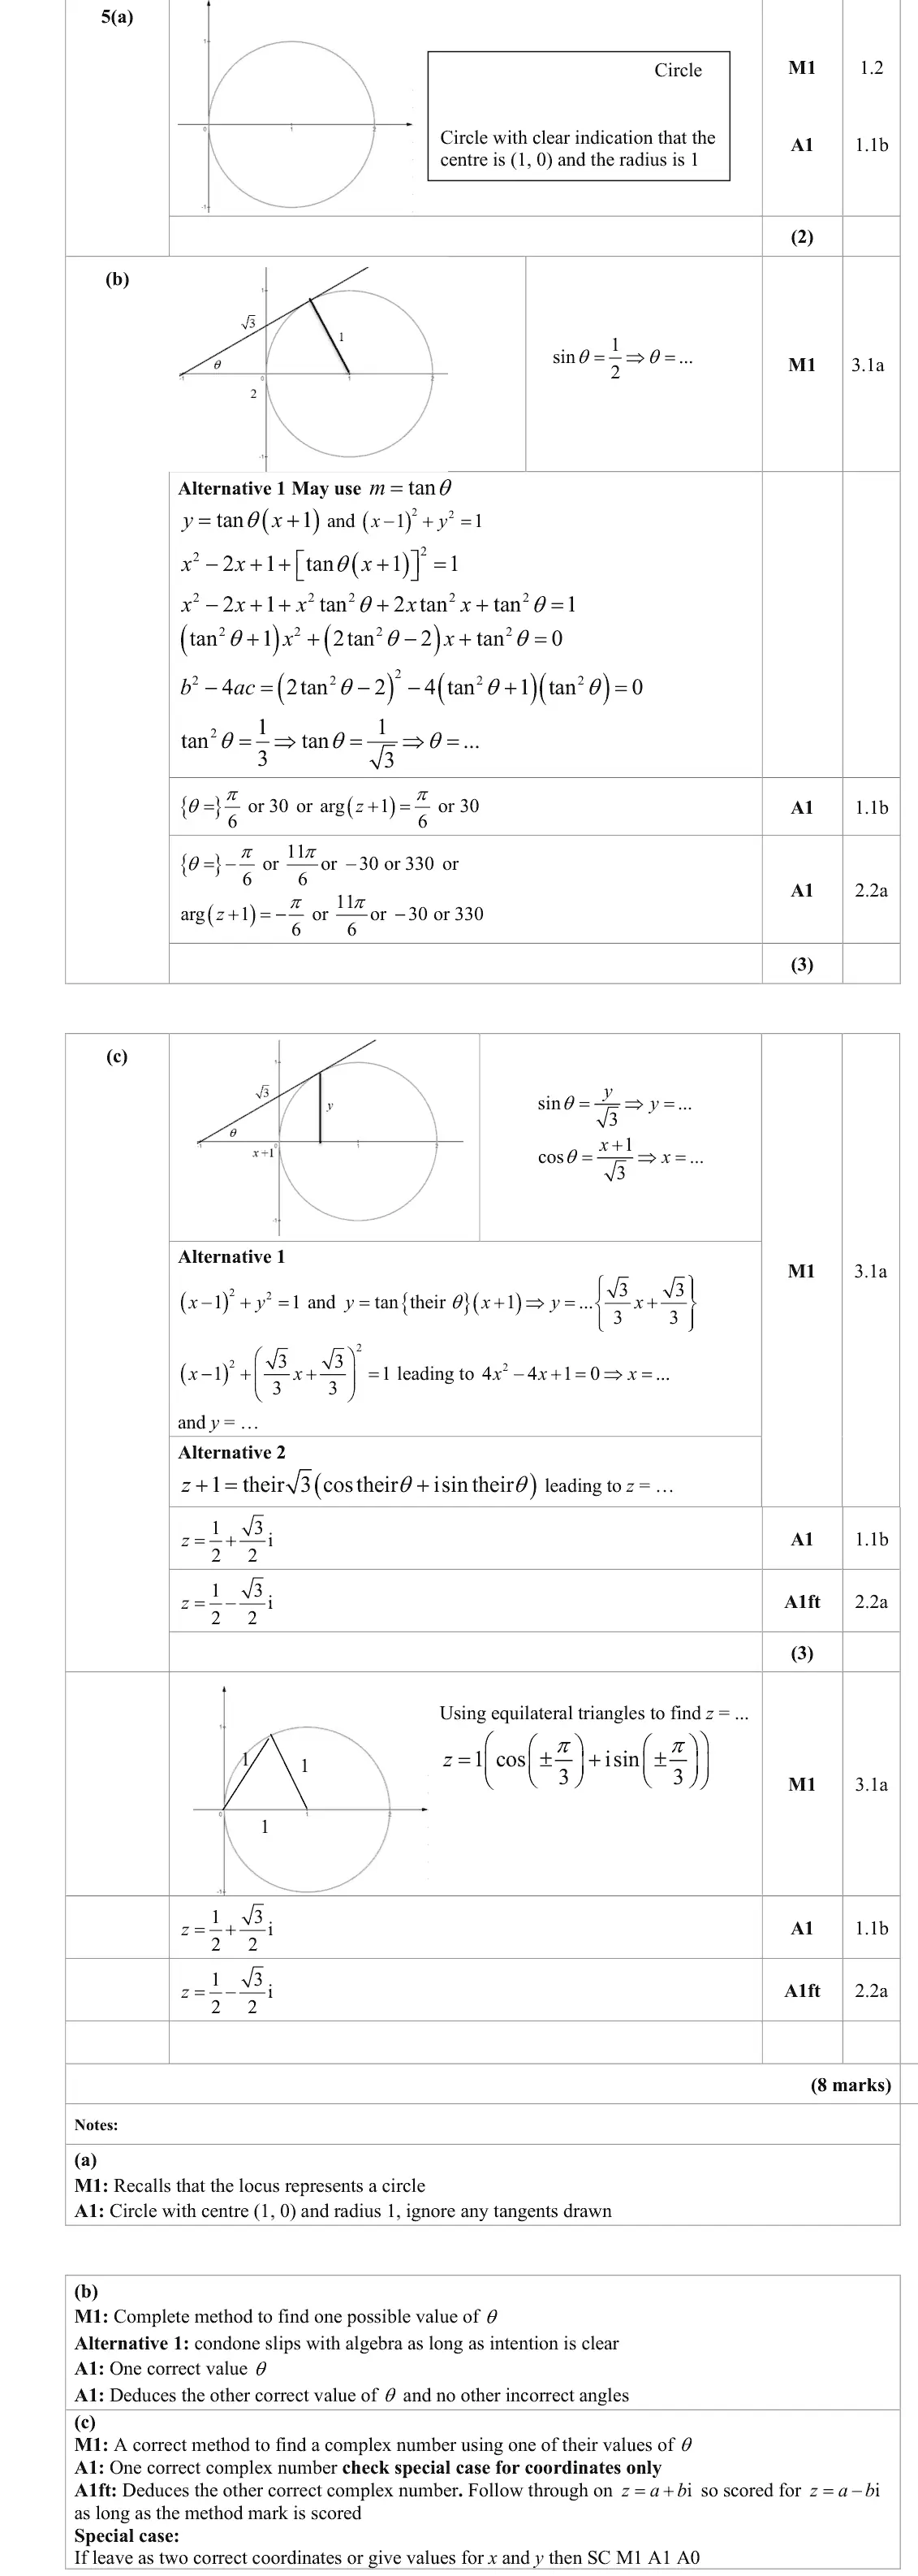
Learners found this to be a challenging question with only a minority achieving full marks. In part (a), the circle was usually drawn in the correct place although there were cases of the circle being centred on the imaginary rather than the real axis. Learners should have produced a diagram that was labelled at least with the centre as (1, 0) so that it was clear that the radius was correct.
Key points from the mark scheme and examiner's report
circle centre (1, 0) radius 1, centre labelled
centring on the imaginary axis an error
June 2025 · Paper 1 (Core Pure 1) · Q65 marks
Mark scheme (whole question; this part is marked with the orange bar)
Examiner's comment
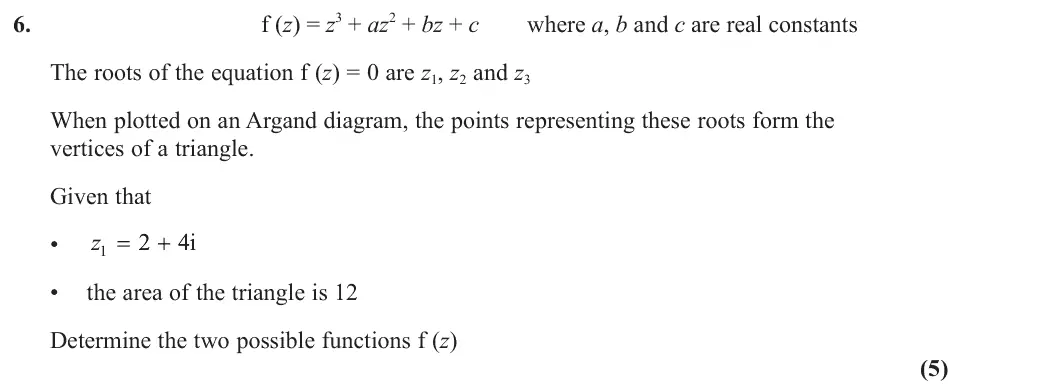
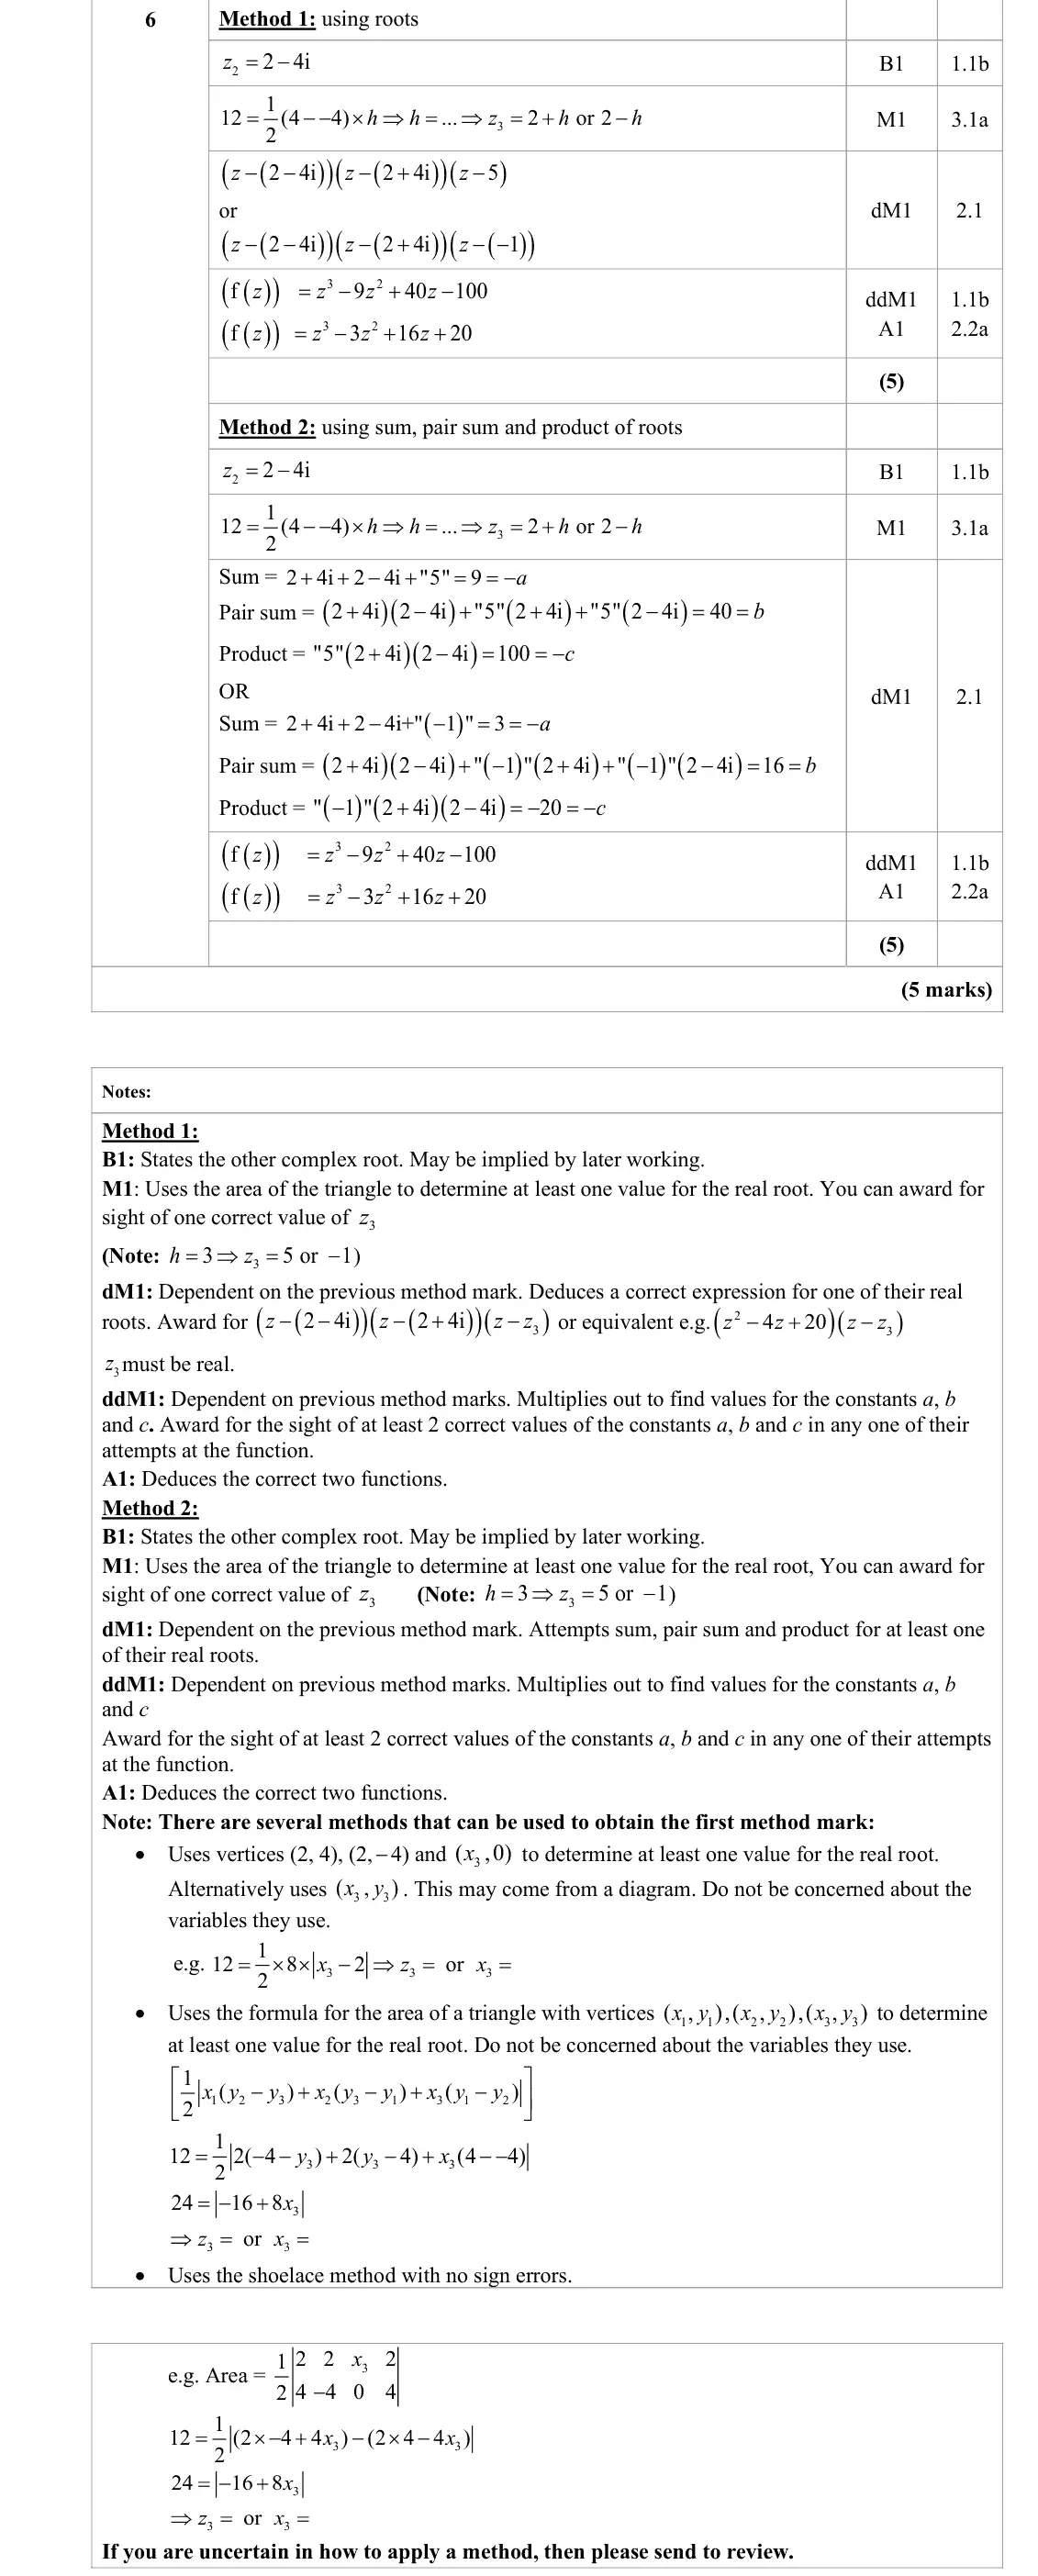
This was a well attempted question. It emphasised that candidates should read the entire question before embarking on their solution as some assumed the triangle was equilateral. Those candidates then usually attempted to answer the question using an exponential method for nth roots of a complex number, scoring no marks. Most students were awarded the B mark for sight of 2 – 4i. They then had to find a real root of the cubic. There were many routes to finding the real root, but the most reliable methods included a sensible diagram. A sizeable minority of candidates either did not realise that the height of the triangle was 8 and used 4 or instead thought that their height was also the root. There were a few attempts at the use of 1 sin 2 ab C where students were unsure what they were trying to find. For students who found the correct triangle height of 3, those that did not go on to find the correct roots of 5 or –1 usually used 3 or -3 as the root, gaining no further credit. A clear majority of candidates, however, found the real root quickly and efficiently, gaining the first method mark. Where this mark was awarded, students generally went on to score dM1 and ddM1 and very often the A mark unless there were slips in working or only one possible function was found. Having found the three roots, candidates had the choice of using roots of polynomials or the factor theorem to find the resulting cubic expressions. Candidates had less algebraic work to do if they used the factor theorem and generally made fewer errors with this approach. There were a pleasing number of accurate and well-presented solutions from candidates who used the sums and products of roots, showing that it could be done efficiently.
Key points from the mark scheme and examiner's report
z₂ = 2 − 4i
triangle base 8, area 12 gives height 3, so the real root is 5 or −1
assuming an equilateral triangle, or using height 4 or root ±3
June 2025 · Paper 2 (Core Pure 2) · Q4(ii)(a)2 marks
Mark scheme (whole question; this part is marked with the orange bar)
Examiner's comment
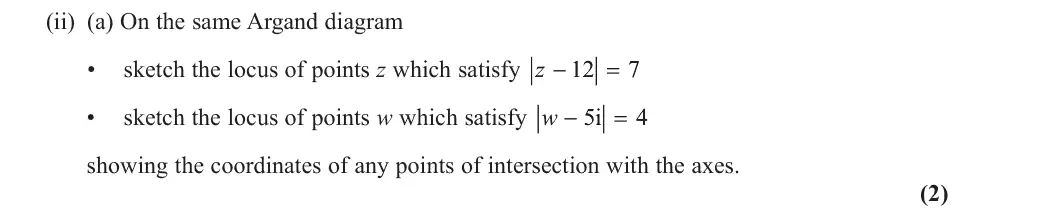
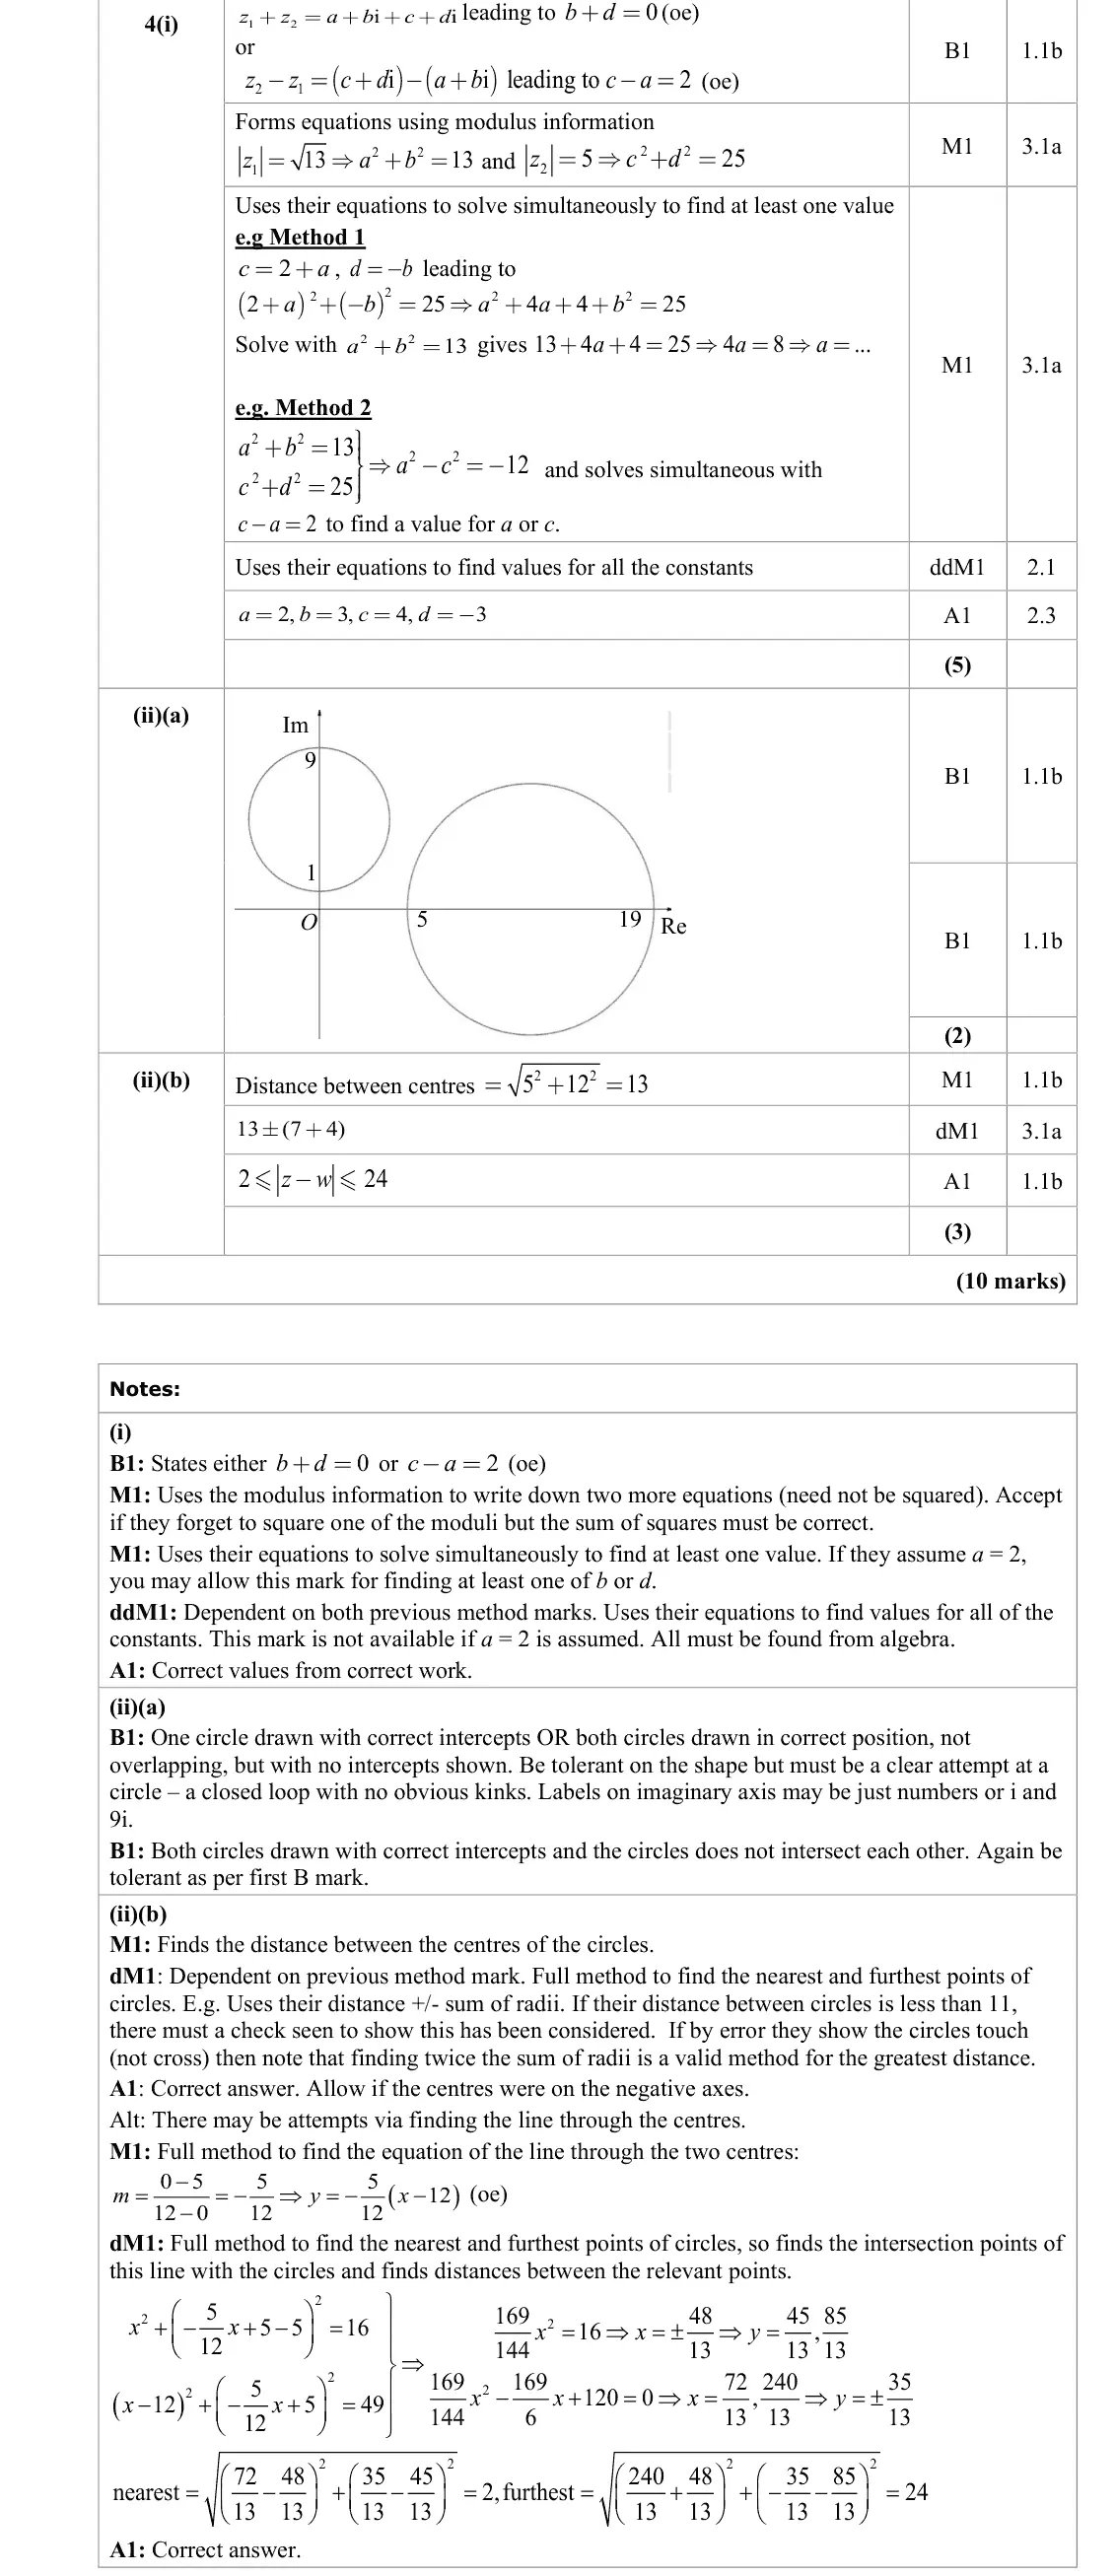
This proved a useful question for discriminating across grades with good access in part (i) for all grades but a demanding part (ii) that gave the better learners opportunity to show case their ability. Part (i) was well done overall. The majority gained the first two marks for the links between a and c and/or b and d, though there were occasional slips particularly with the used of the modulus. Some forgot to square the 5 to give , for example, while others squared 2 2 5 a b + = the 13, giving but most usually had one correct to gain the method mark. Only 2 2 169 a b + = a minority had subtraction between the terms or left an i in the equation. Proceeding from this point there were several different approaches to the problem, but most were able to manipulate their equations to find the required values by some means (the mark scheme shows the most common approaches). The non-standard nature of the simultaneous equations occasionally caused confusion with some unable to correctly solve, either giving incorrect answer or assuming a =2 in order to find the remaining values and so lost the final two marks. A few did not read the question properly and stopped when they found a. Perhaps some took a as given by a misread of the question. Those who managed to successfully find one correct value legitimately almost always gained full marks, though occasionally errors square rooting 9 occurred. Putting the b and d values in order was done well. Part (ii) was more troublesome for learners, especially (b). Most were able to sketch the loci to give two circles for (a) with the majority recognising that there was one on each axis. Relatively few had them on the negative parts of the axes. Drawing them to scale was less well done, though, and hence many failed to realise that the circles did not touch or overlap. Also, many marked the centres and radii rather than marking the x and y intercepts, so not heeding the directive of the question regarding labelling. An relatively common error was to have 17, rather than 19, for the second intercept on the larger circle. Overlapping circles were quite common, though as long as sufficient labelling was given these could still gain at least one mark, but it did mean the second mark was quite often lost. So, knowing the loci were circles was shown by the majority but scales and positions were not considered by all. For (ii)(b) learners were much less secure on how to proceed to find the answer, and as such proved to be a good discriminator. Many candidates either did not attempt the question at all or did a lot of unnecessary algebra with the 2 cartesian equations, attempting to find the intersections of the circles (rarely leading to successful solutions). Not many used the diagram they had drawn to realis that | z - w | was the distance between points on the circles, so that they were looking for closest points. Those who did were able to spot what to do, so those who had incorrect diagrams disadvantaged themselves, particularly those with crossing circles. Many were able to gain the first mark for finding the distance between the centres, albeit that they did not always proceed to show how it related to the problem in subsequent work. Those who assumed the circles touch or cross usually did no work to show it, so could not gain the next marks, though a few did at least find the maximum distance. There were a small number of cases of correct extreme values, but incorrect inequalities used, so most who were able to identify the correct method were able to score full marks. The alternative method of the line through the centres was far less common to see, but occasionally did lead to successful solution. However, this method was laborious and rarely led to full marks.
Key points from the mark scheme and examiner's report
circle centre 12 radius 7 through 5 and 19 on the real axis
circle centre 5i radius 4 through i and 9i
the circles do not intersect
June 2025 · Paper 2 (Core Pure 2) · Q4(ii)(b)3 marks
Mark scheme (whole question; this part is marked with the orange bar)
Examiner's comment
This proved a useful question for discriminating across grades with good access in part (i) for all grades but a demanding part (ii) that gave the better learners opportunity to show case their ability. Part (i) was well done overall. The majority gained the first two marks for the links between a and c and/or b and d, though there were occasional slips particularly with the used of the modulus. Some forgot to square the 5 to give , for example, while others squared 2 2 5 a b + = the 13, giving but most usually had one correct to gain the method mark. Only 2 2 169 a b + = a minority had subtraction between the terms or left an i in the equation. Proceeding from this point there were several different approaches to the problem, but most were able to manipulate their equations to find the required values by some means (the mark scheme shows the most common approaches). The non-standard nature of the simultaneous equations occasionally caused confusion with some unable to correctly solve, either giving incorrect answer or assuming a =2 in order to find the remaining values and so lost the final two marks. A few did not read the question properly and stopped when they found a. Perhaps some took a as given by a misread of the question. Those who managed to successfully find one correct value legitimately almost always gained full marks, though occasionally errors square rooting 9 occurred. Putting the b and d values in order was done well. Part (ii) was more troublesome for learners, especially (b). Most were able to sketch the loci to give two circles for (a) with the majority recognising that there was one on each axis. Relatively few had them on the negative parts of the axes. Drawing them to scale was less well done, though, and hence many failed to realise that the circles did not touch or overlap. Also, many marked the centres and radii rather than marking the x and y intercepts, so not heeding the directive of the question regarding labelling. An relatively common error was to have 17, rather than 19, for the second intercept on the larger circle. Overlapping circles were quite common, though as long as sufficient labelling was given these could still gain at least one mark, but it did mean the second mark was quite often lost. So, knowing the loci were circles was shown by the majority but scales and positions were not considered by all. For (ii)(b) learners were much less secure on how to proceed to find the answer, and as such proved to be a good discriminator. Many candidates either did not attempt the question at all or did a lot of unnecessary algebra with the 2 cartesian equations, attempting to find the intersections of the circles (rarely leading to successful solutions). Not many used the diagram they had drawn to realis that | z - w | was the distance between points on the circles, so that they were looking for closest points. Those who did were able to spot what to do, so those who had incorrect diagrams disadvantaged themselves, particularly those with crossing circles. Many were able to gain the first mark for finding the distance between the centres, albeit that they did not always proceed to show how it related to the problem in subsequent work. Those who assumed the circles touch or cross usually did no work to show it, so could not gain the next marks, though a few did at least find the maximum distance. There were a small number of cases of correct extreme values, but incorrect inequalities used, so most who were able to identify the correct method were able to score full marks. The alternative method of the line through the centres was far less common to see, but occasionally did lead to successful solution. However, this method was laborious and rarely led to full marks.
Key points from the mark scheme and examiner's report
distance between centres √(5² + 12²) = 13, then 13 ± (7 + 4): 2 ≤ modulus of z − w ≤ 24
June 2024 · AS Paper 1 (Core Pure) · Q5(b)1 mark
Mark scheme (whole question; this part is marked with the orange bar)
Examiner's comment
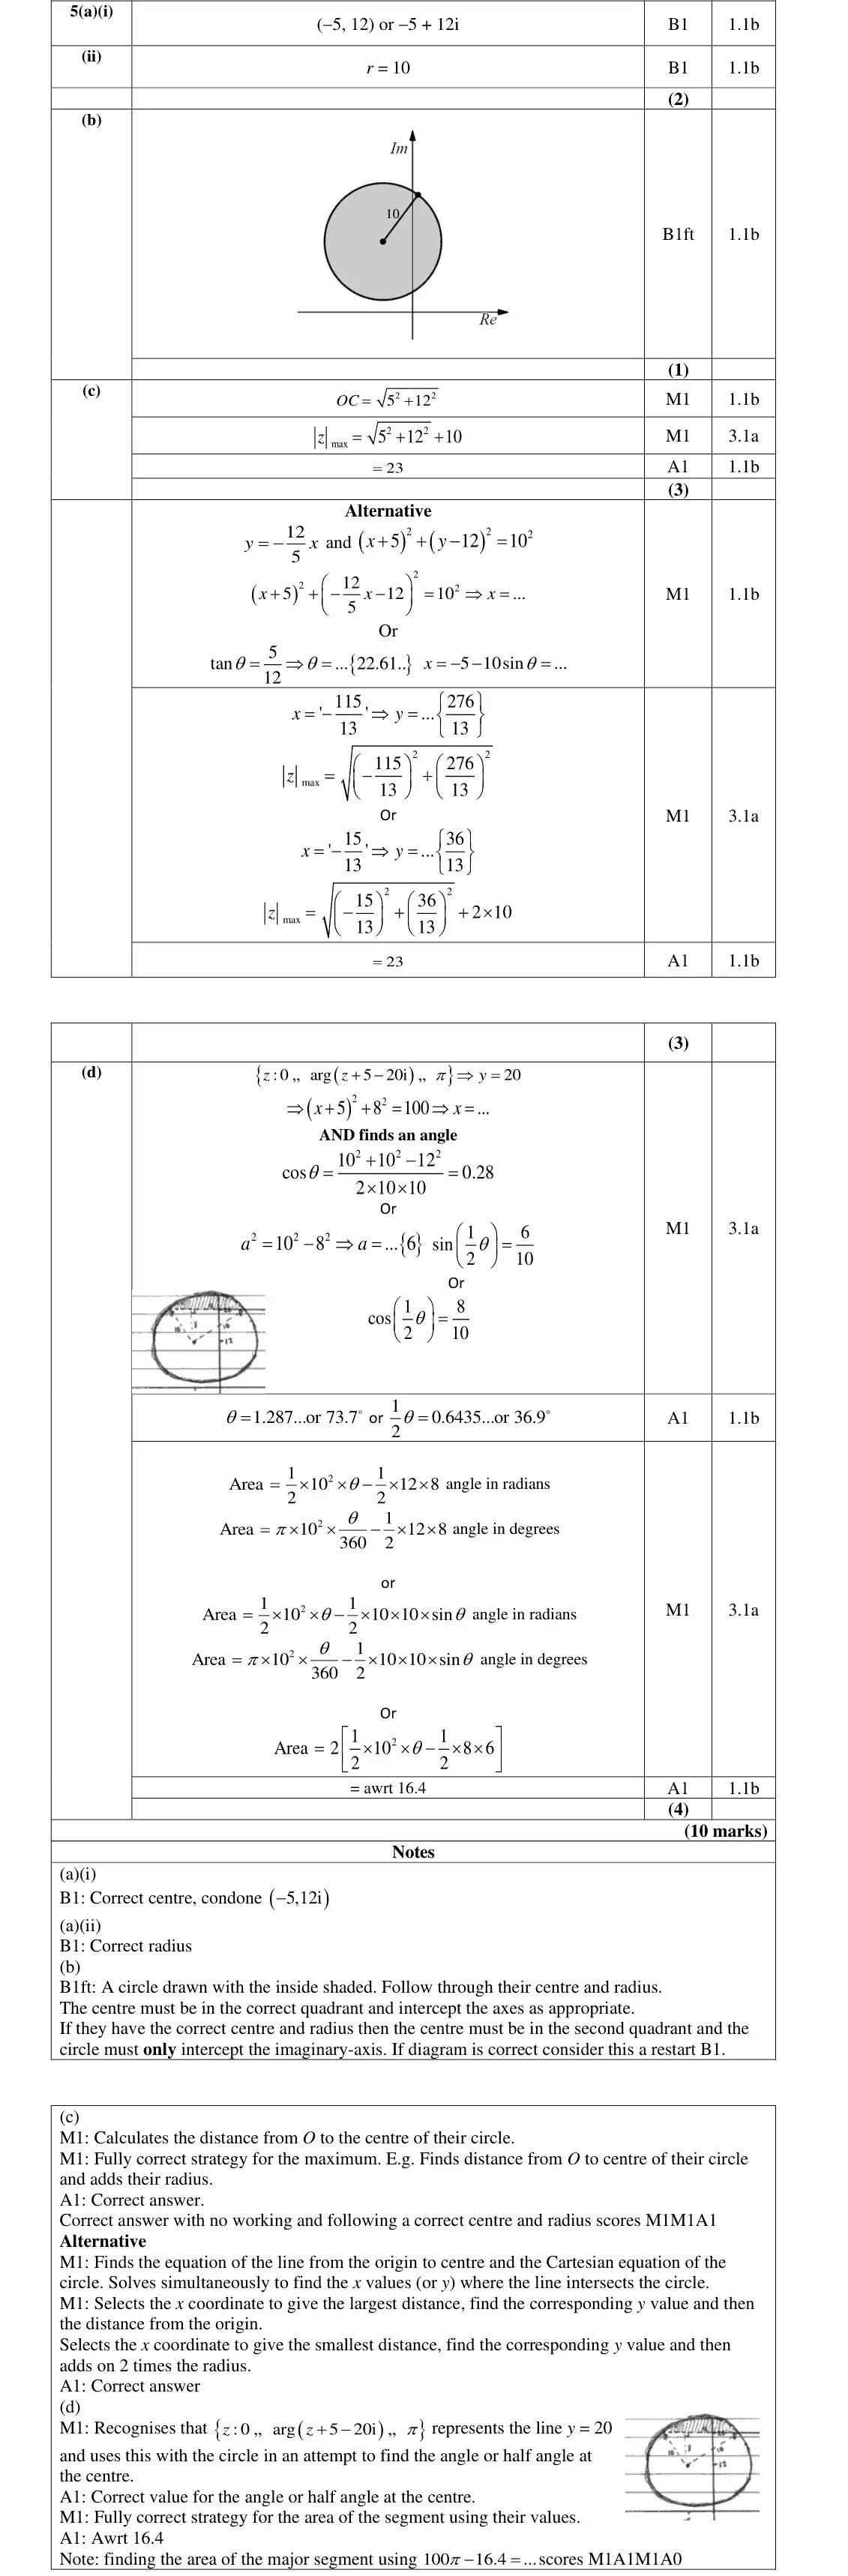
In part (b), nearly all of the cohort drew a correct circle with the inside shaded.
Key points from the mark scheme and examiner's report
circle centre in the second quadrant touching/crossing only the imaginary axis, inside shaded
June 2024 · AS Paper 2 (Further Pure 2) · Q4(a)2 marks
Mark scheme (whole question; this part is marked with the orange bar)
Examiner's comment
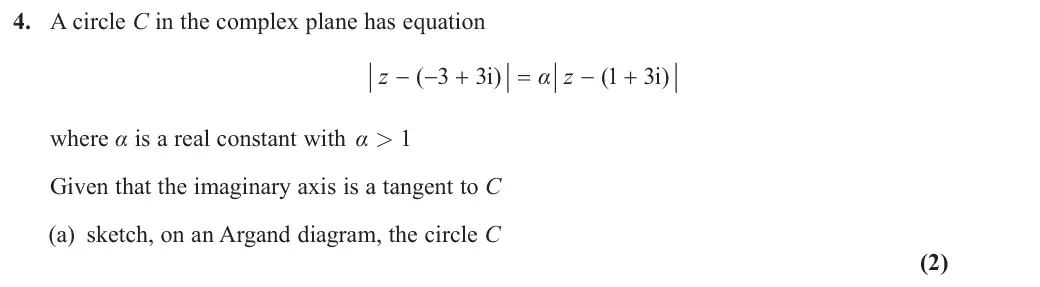
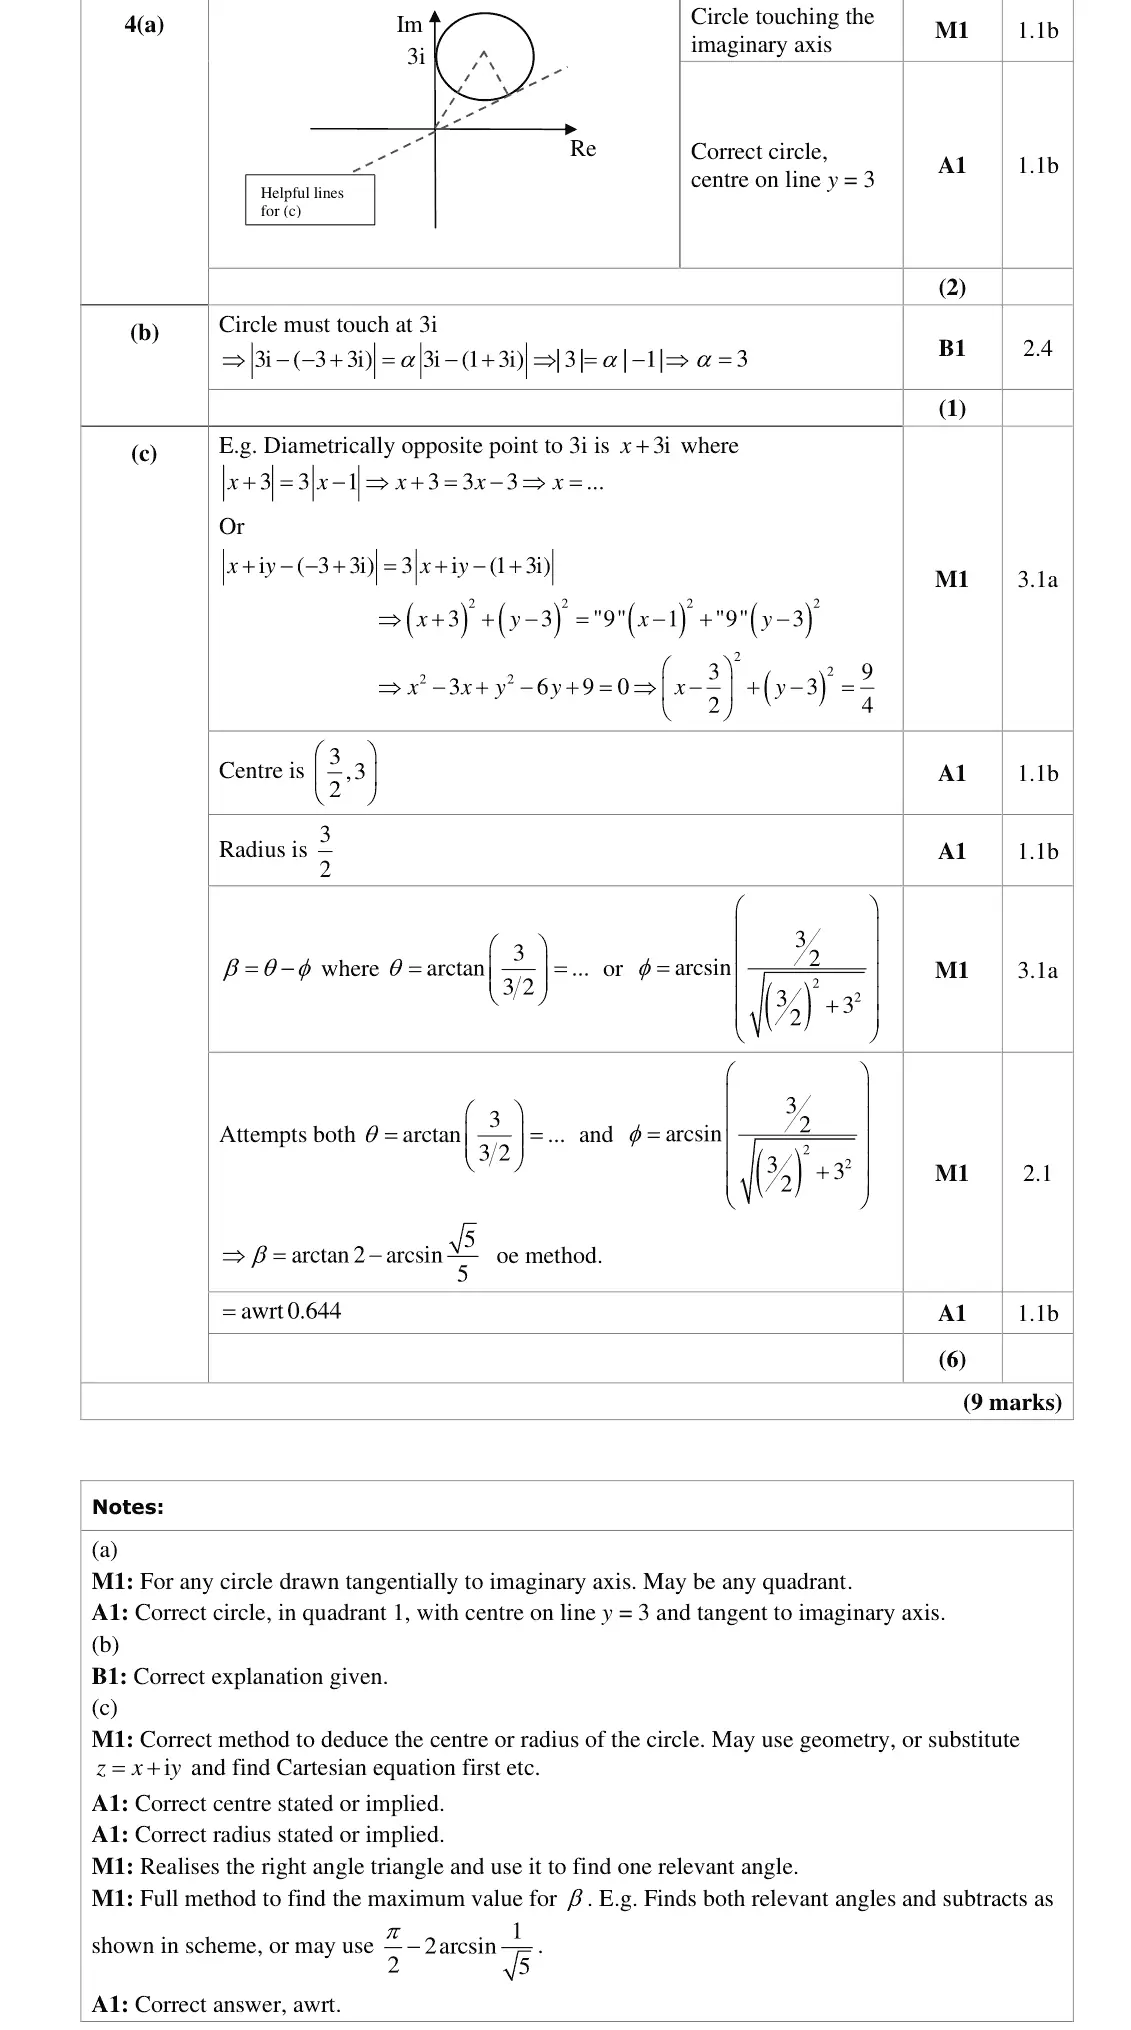
Candidates found this question demanding with unfortunately many scoring no marks. Part (a) it was interesting to see many candidates draw circles which were the imaginary axis was not a tangent, as stated in the question, scoring no mark. Some candidates did manage to draw a circle with the imaginary axis as a tangent but drew with the centre in the second quadrant, scoring one mark. Only a few candidates scored both marks for the centre in the first quadrant.
Key points from the mark scheme and examiner's report
circle in the first quadrant with centre on y = 3, touching the imaginary axis at 3i
many drew circles not tangent to the axis or in the second quadrant
June 2024 · Paper 1 (Core Pure 1) · Q1(b)2 marks
Mark scheme (whole question; this part is marked with the orange bar)
Examiner's comment
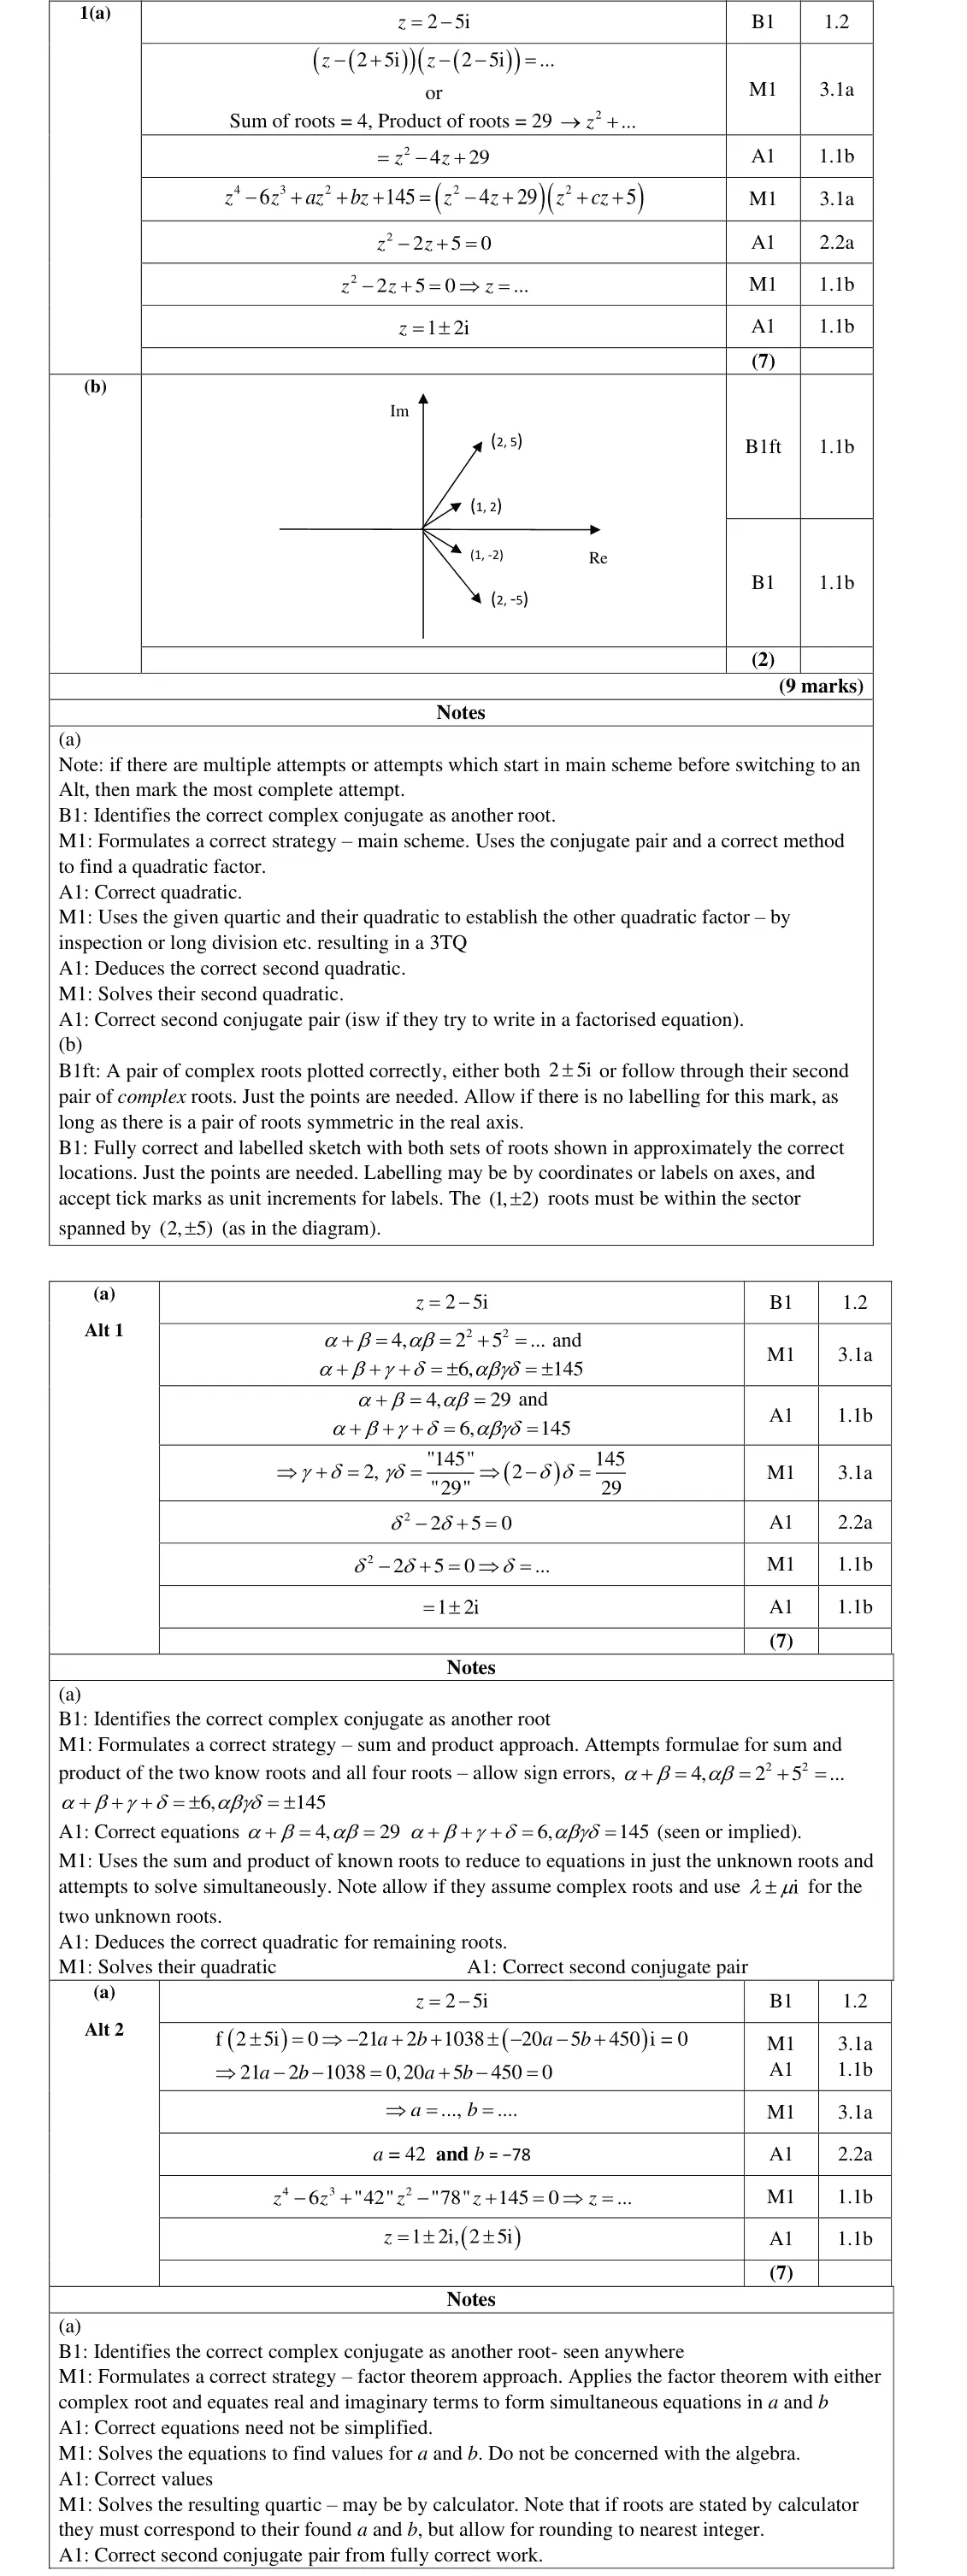
The majority of students found this an accessible start to the paper with many fully correct solutions, and the most common error being a failure to sketch the roots correctly on their diagram for part (b). In part (b) a surprising proportion of candidates did not draw the required diagram carefully enough, and the general standard of diagrams was quite poor. Most did plot two roots correctly (usually the first two), even if there was a slight lack of symmetry due to the quality of the diagram – being either skewed or angled (rulers were not used by most) – but the correct idea of the complex conjugates was portrayed. While the majority were able to add the second roots to the diagram correctly, many were too slack with proportions, the 1± 2i roots lying outside the sector formed by the 2 ± 5i roots being the most common fault, thus losing the final mark. The labelling was generally given if the roots were correctly placed.
Key points from the mark scheme and examiner's report
plot all four roots, labelled, symmetric in the real axis
(1, ±2) must lie inside the sector of (2, ±5)
careless freehand diagrams lost the second mark
June 2024 · Paper 2 (Core Pure 2) · Q5(a)4 marks
Mark scheme (whole question; this part is marked with the orange bar)
Examiner's comment
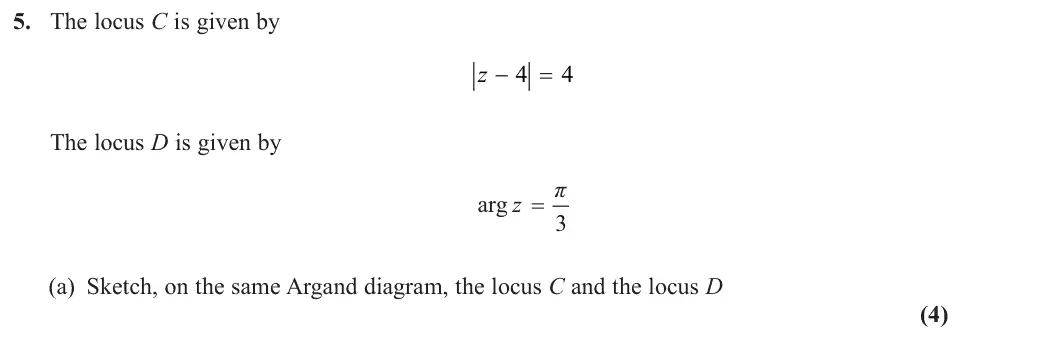
(a) There were many very good, correct diagrams and almost all students identified that the two loci were a circle and a half line. A small number of candidates drew their circle centred on the imaginary axis, but the significant majority drew the correct circle in place and drew a suitable half line. By far the most common error was the angle at which the half line was drawn, with many students drawing a line with shallow gradient that intersected the circle to the right of centre, losing this mark and potentially giving a misleading diagram from which to work from in part c). diagram in part (a) often scored full marks. When marks were dropped using polar co-ordinates it was usually due to arithmetic errors when squaring their value for r or omitting the 1 2 from their integral or using sin instead of cos. Occasional attempts at integration of the Cartesian form were seen; however, this method was significantly more demanding and rarely scored any marks.
Key points from the mark scheme and examiner's report
circle centre 4 radius 4 touching the imaginary axis
half-line from O at π/3 meeting the circle left of its centre (steep angle)
shallow half-lines were the most common error
June 2024 · Paper 2 (Core Pure 2) · Q5(c)4 marks
Mark scheme (whole question; this part is marked with the orange bar)
Examiner's comment
(c) There was increased challenge here, with several potential routes to finding the required area. Most candidates attempted this part, though success was notably mixed. Candidates with the correct diagram generally went on to score well. Some got confused by which parts to subtract/add to each other. Many started to work with a semicircle and then switched to a full circle when attempting to find the areas of the relevant sectors or segments. Some successfully found both coordinates of the point of intersection, gaining the first two marks, but had no overall strategy for the required area. Those who used the geometrical approach had less work to do, especially if they realised the triangle formed by the intersection point, the origin and the circle centre was equilateral. A successful approach was to use polar coordinates, where candidates with an incorrect diagram in part (a) often scored full marks. When marks were dropped using polar co-ordinates
Key points from the mark scheme and examiner's report
intersection 2 + 2√3i
area = sector of angle 2π/3 at the centre (16π/3) + triangle O, centre, intersection (4√3) = 16π/3 + 4√3
spotting the equilateral triangle O, centre, intersection helps
polar ½∫64cos²θ dθ from 0 to π/3 also works
many had no overall strategy
June 2024 · Paper 2 (Core Pure 2) · Q7(b)2 marks
Mark scheme (whole question; this part is marked with the orange bar)
Examiner's comment
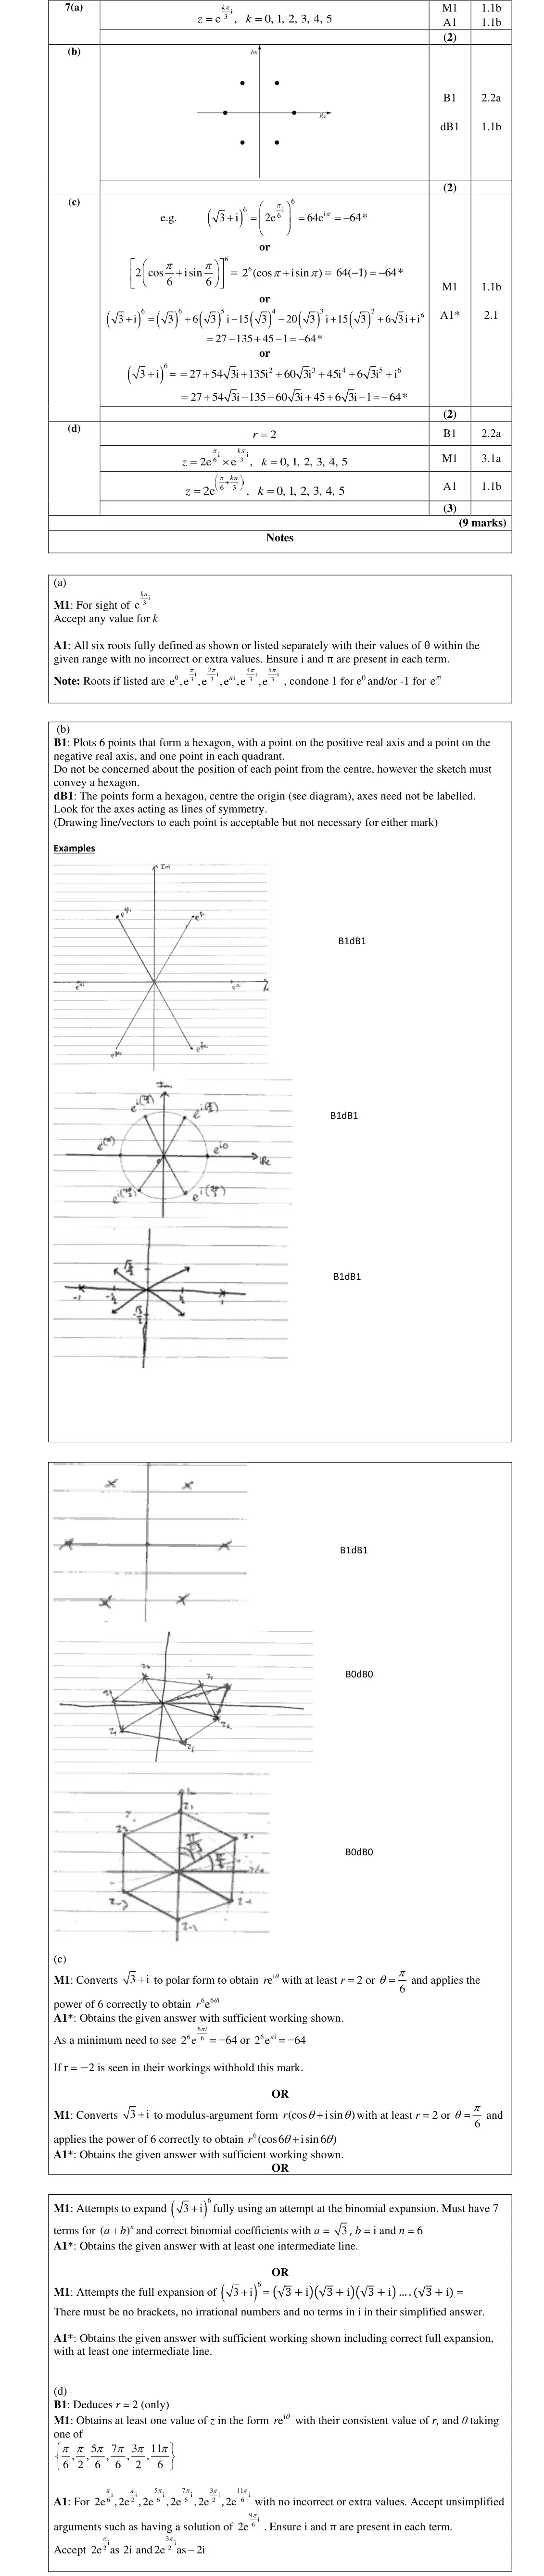
(b) Most candidates realised the six points form a hexagon of some description. However, there was a lack of care in the drawing of a regular hexagon with two vertices needed to be correctly plotted on the coordinate axis. There was often a lack of symmetry in the diagram.
Key points from the mark scheme and examiner's report
regular hexagon centred at O with vertices on the positive and negative real axis and one in each quadrant
symmetry needed
June 2024 · Paper 4A (Further Pure 2) · Q5(i)(b)2 marks
Mark scheme (whole question; this part is marked with the orange bar)
Examiner's comment
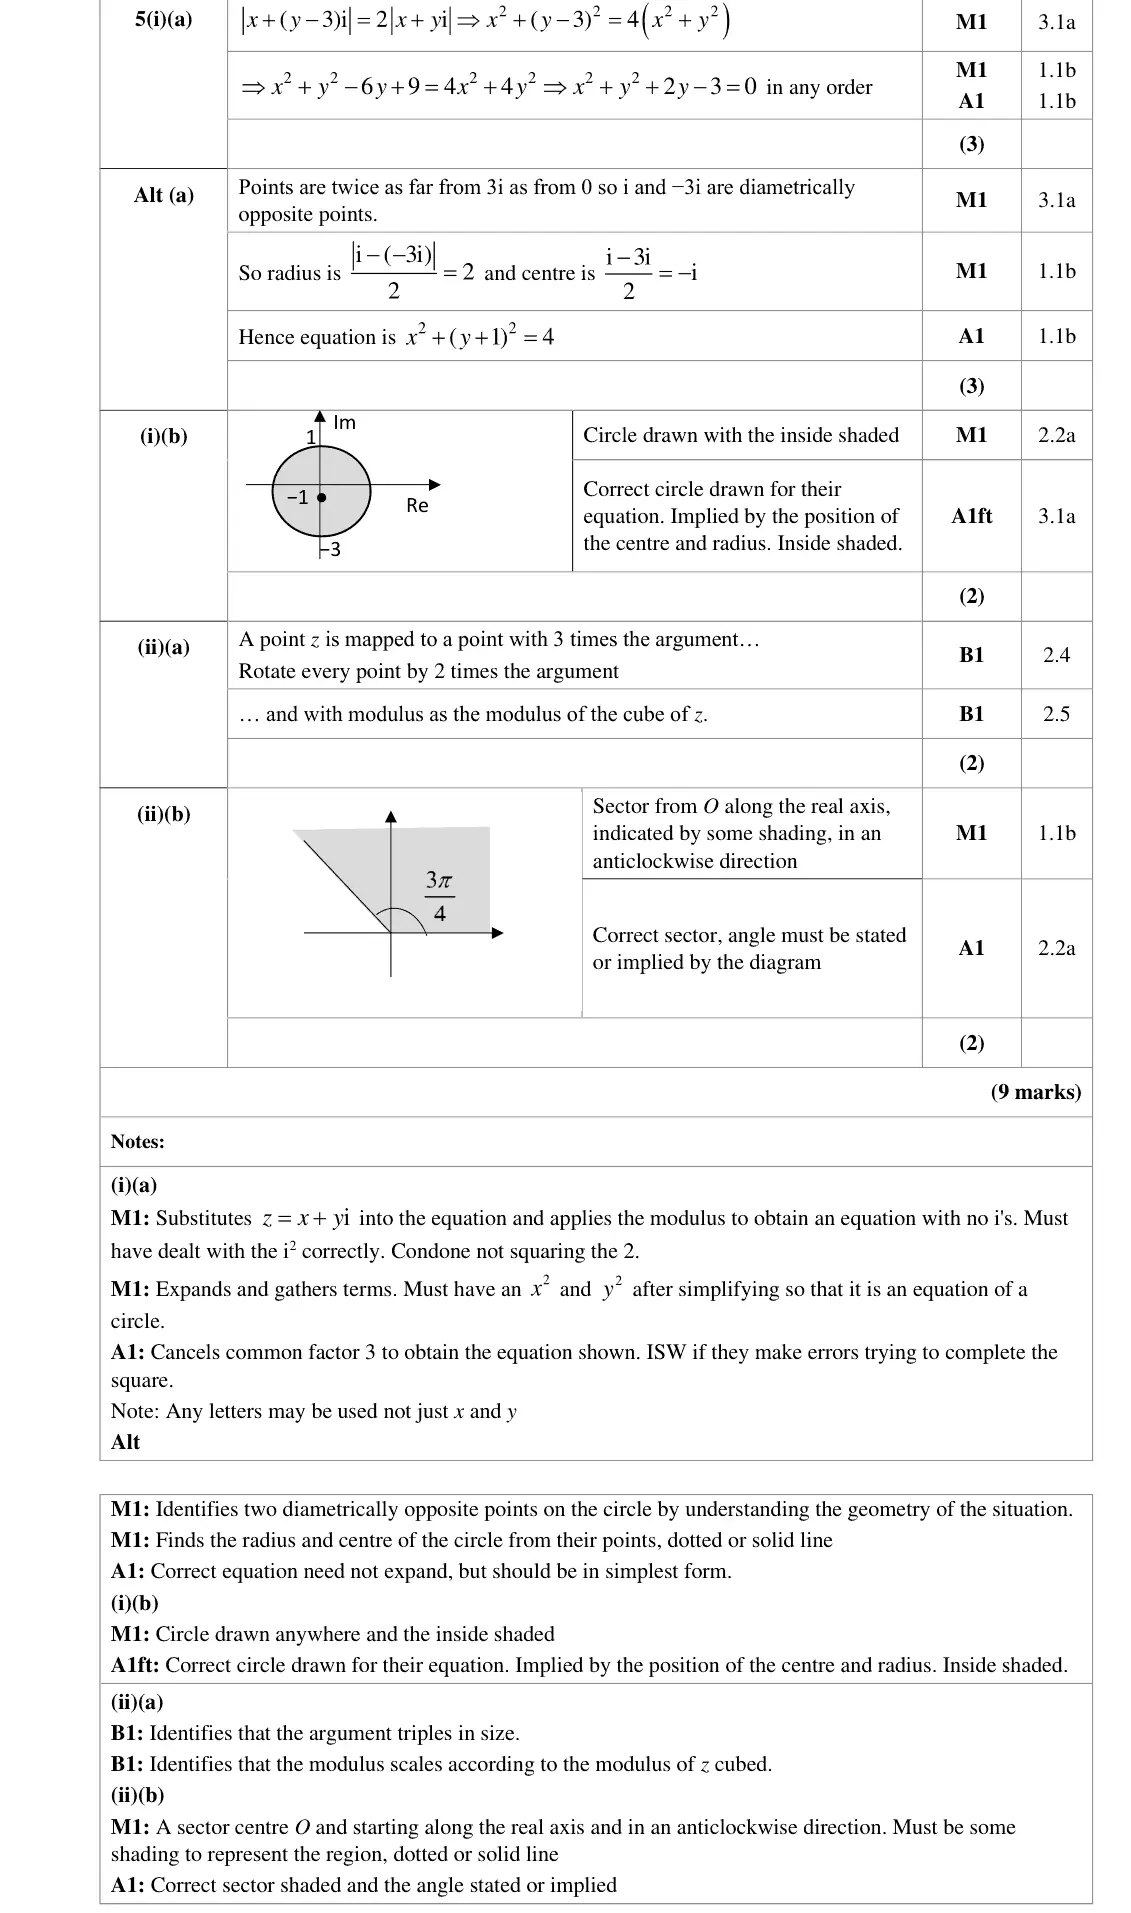
In (i) candidates found this accessible. = + z x y i Part (a) the majority of candidates knew to substitute into the equation and applies the modulus to obtain an equation and correctly squared 2. They used algebra correctly to simplify the equation, with some doing extra work in this part to write in the form 2 2 + + = x ( 1) y 4 . Common error was a slip when dividing by 3, forgetting to divide the constant 9. Part (b) the majority of candidates knew that the required region was the inside of a circle and 2 2 + + = ( x 1) y 4 scored a mark for this. Candidates used their equation to deduce the correct centre and radius of the circle. If candidate had made a sip in part (a) there was a follow through on their equation. A few candidate incorrectly had the centre coordinate as ( – 1, 0) instead of (0, – 1) losing the accuracy mark. In (ii) this was more demanding Part (a) some candidates incorrectly said that the transformation was an enlargement scale factor 3. There are two marks of this question and candidates needed to explain what effect = 3 the transformation had on the modulus and argument. Only a few candidates managed w z to correct identify that the argument would be multiplied by 3, rotate every point by 2 times the argument. Fewer candidates were able to identify that the modulus would be cubed, some 3 incorrect answers were that the modulus would be multiplied by scale factor of z . Part (b) was done more successfully that part (a). Even though candidates were not able to describe the transformation correctly they were able to sketch a locus of the correct form and . Some candidates drew a half line but did not shade even with the correct argument of 3 4 the require region so did not score any marks.
Key points from the mark scheme and examiner's report
circle centre −i (0, −1), radius 2
shade inside
centre (−1, 0) was a common error
June 2023 · AS Paper 1 (Core Pure) · Q2(b)2 marks
Mark scheme (whole question; this part is marked with the orange bar)
Examiner's comment
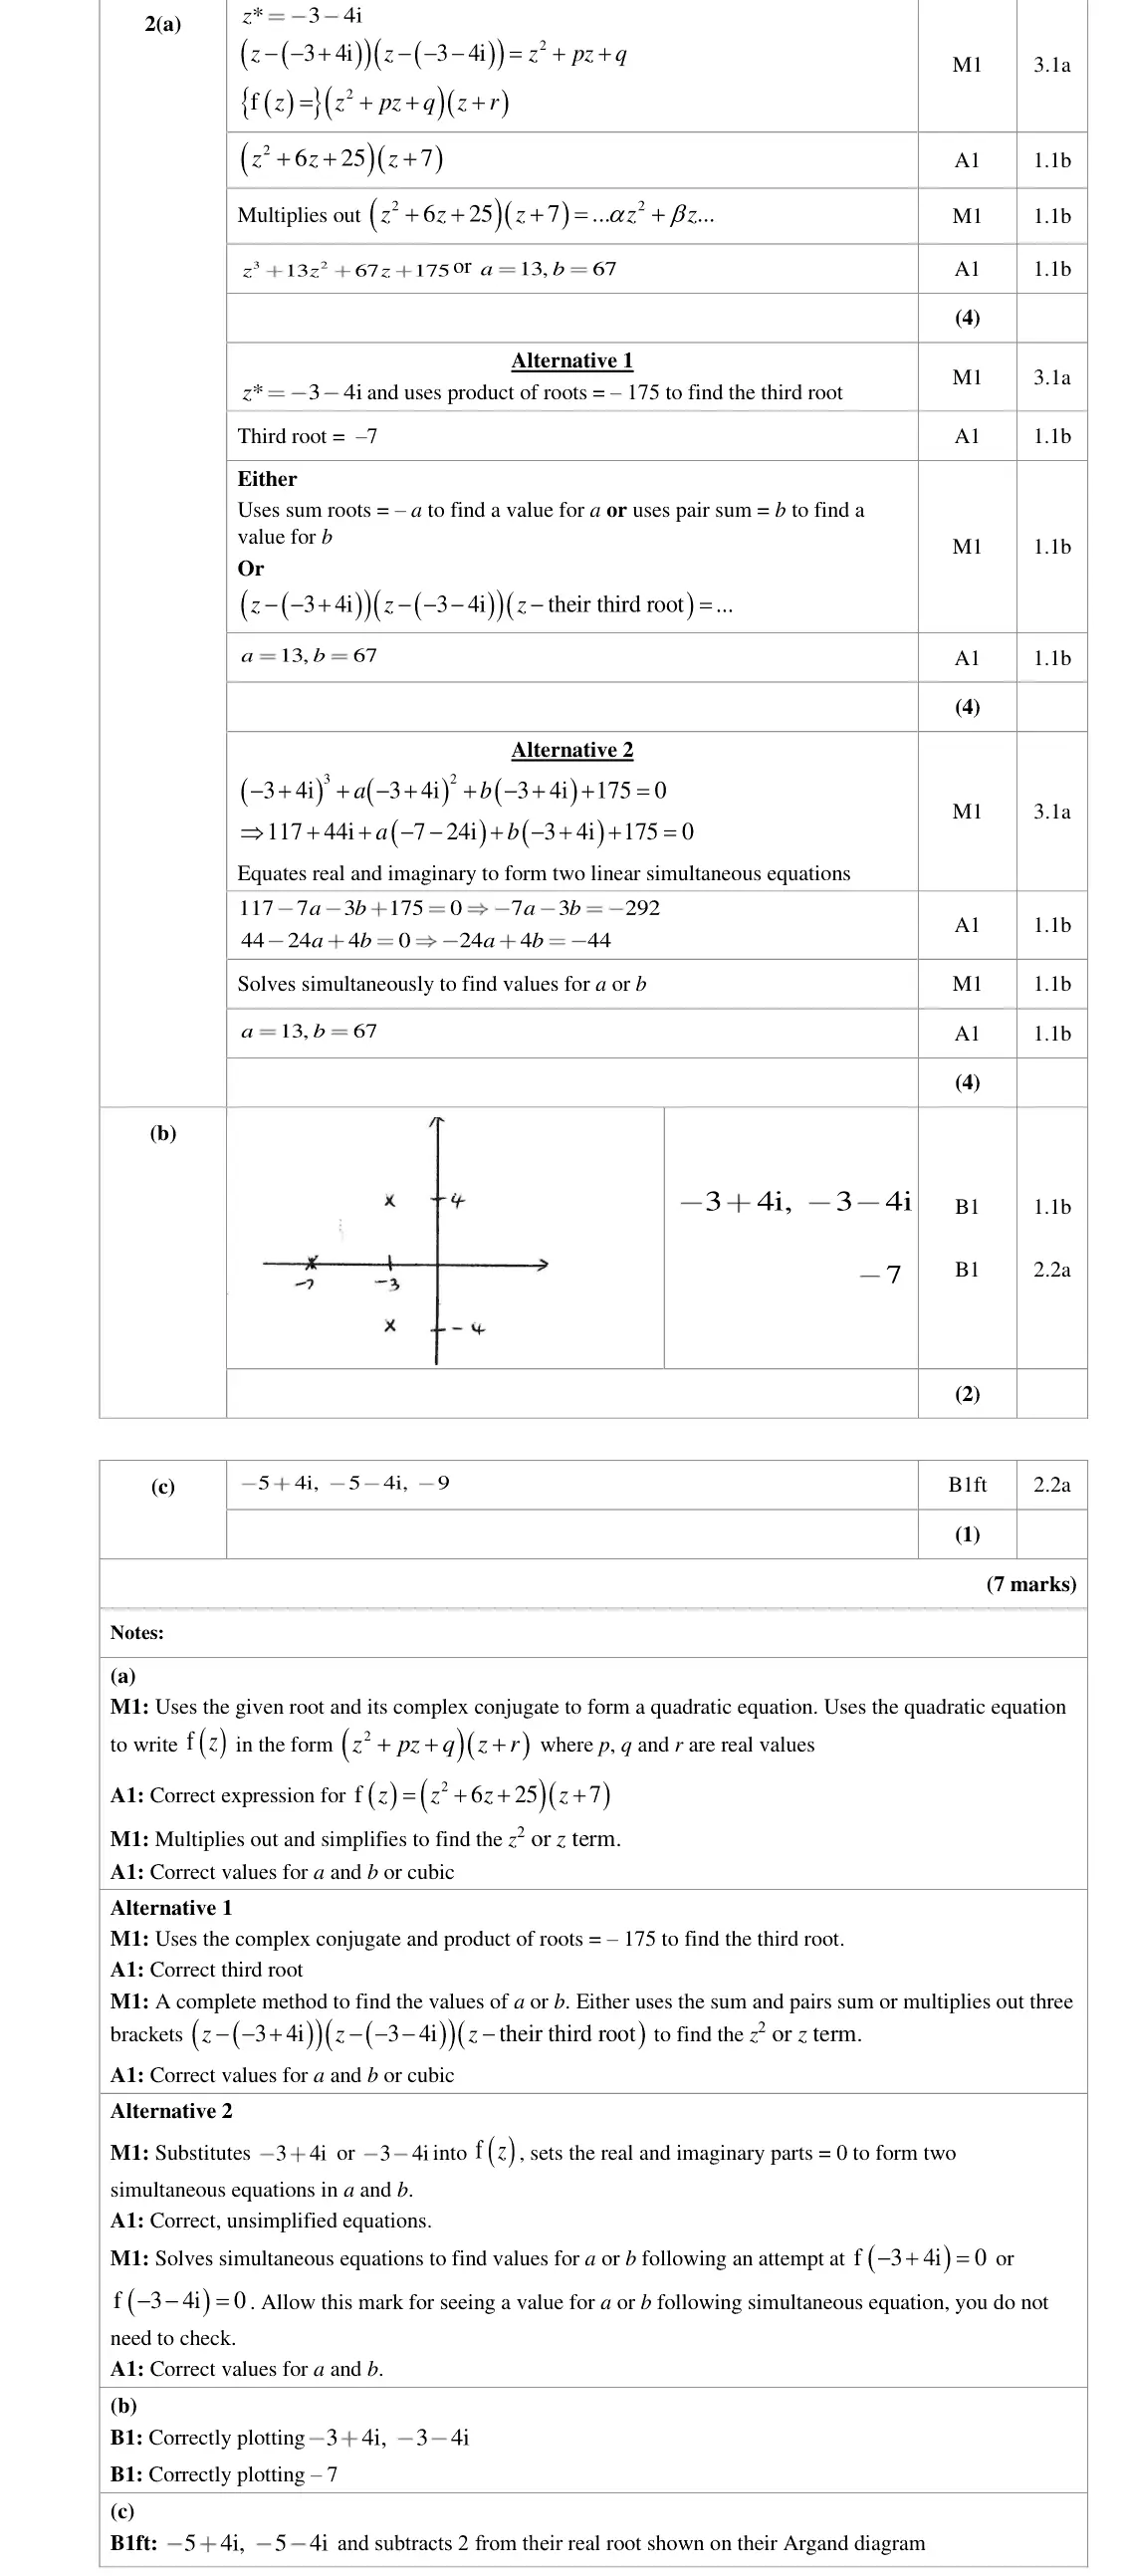
In part (b), the majority of candidates correctly plotted the complex numbers –3 + 4i and –3 – 4i. However, a significant minority, having obtained an incorrect real root, lost the 2nd B mark in this part.
Key points from the mark scheme and examiner's report
plot −3 ± 4i symmetric in the real axis and −7 on the real axis
June 2023 · AS Paper 1 (Core Pure) · Q7(i)3 marks
Mark scheme (whole question; this part is marked with the orange bar)
Examiner's comment
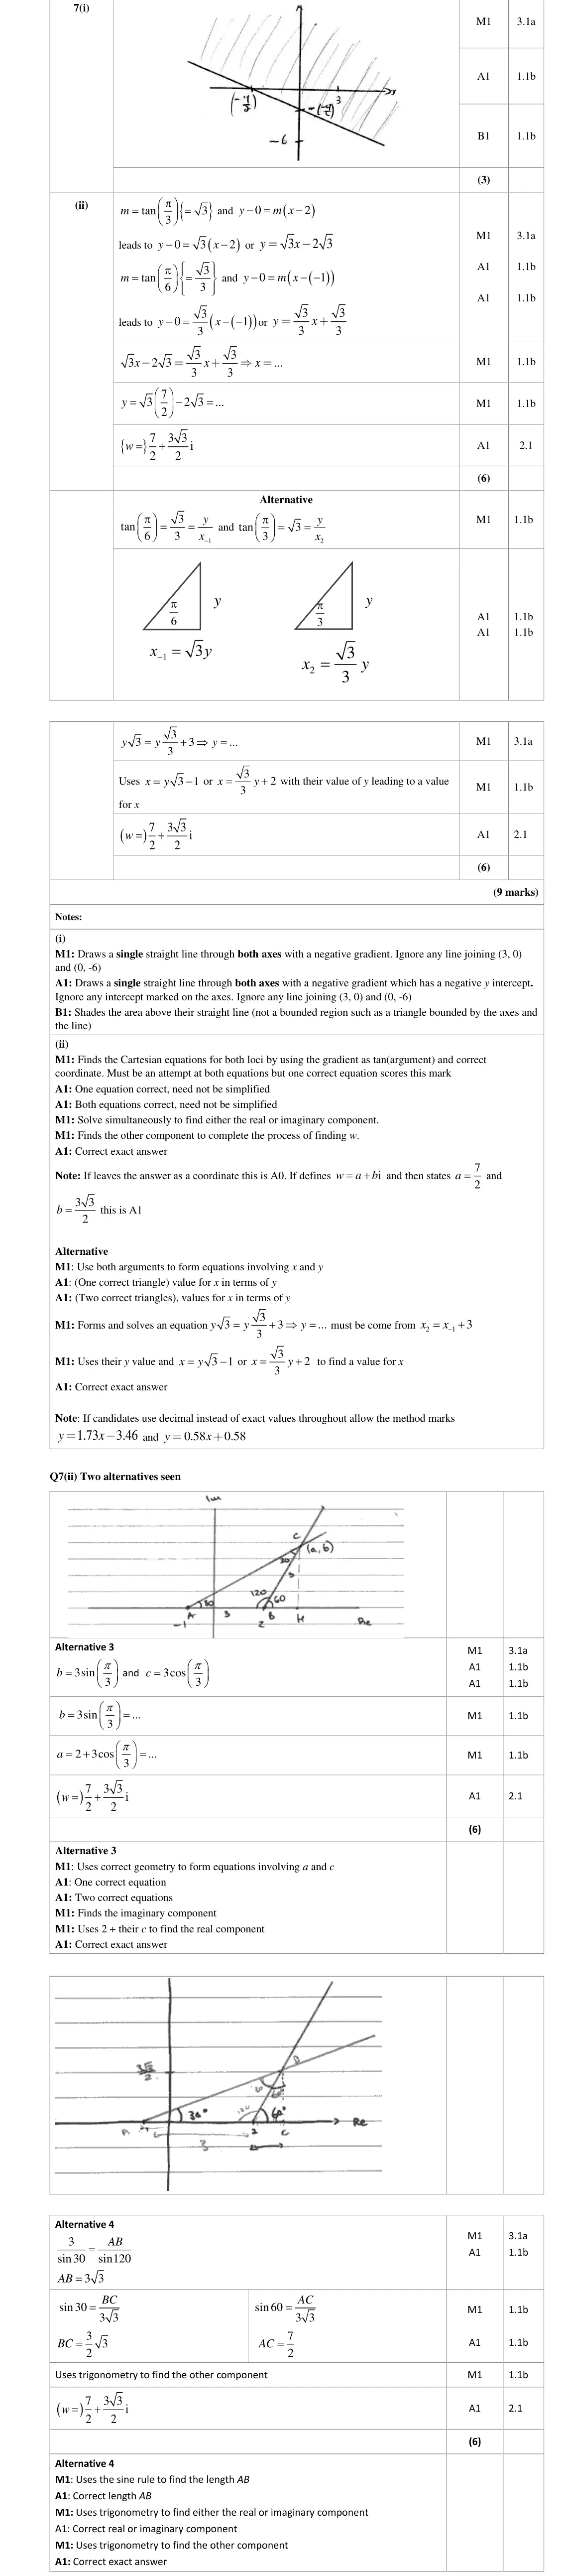
In part (a), the first part of this question was well done overall, with the best solutions coming from candidates who drew a scale drawing of the perpendicular bisector required. It was necessary for equal scales on both axes to ensure that the y-intercept was negative. Quite a few went to the trouble of calculating the exact equation of the line and then drew it correctly, not required for the marks in this case. Shading the correct side of the line caused a few more difficulties with some not knowing how to decide which side to shade. Occasionally the shading was bounded which cost them the final mark. In part (b), using the argument to find the gradient of each line proved quite challenging for some in this part of the question. If the correct Cartesian equations of both lines were found, then a correct solution for w usually followed. M0A0A0M1M1A0 was a fairly common mark trait as the demand of the final Ms was simply simultaneously equating their two lines and solving to reach w. Some very good diagrams allowed some candidates to use basic trigonometry to reach the correct complex number from a very neat geometric approach, although this was not seen often it was usually correct providing the real length had been dealt with correctly. It is clear that not all students have a sound enough understanding of what the argument of a complex number actually represents.
Key points from the mark scheme and examiner's report
perpendicular bisector of 3 and −6i: negative gradient, negative y-intercept
shade the unbounded side containing 3
equal scales help
June 2023 · AS Paper 2 (Further Pure 2) · Q3(a)2 marks
Mark scheme (whole question; this part is marked with the orange bar)
Examiner's comment
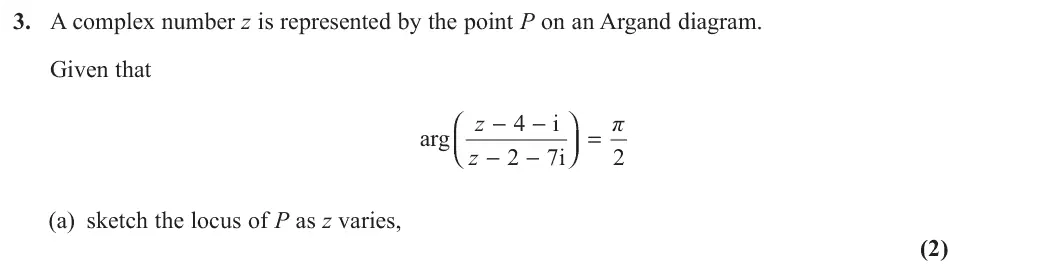
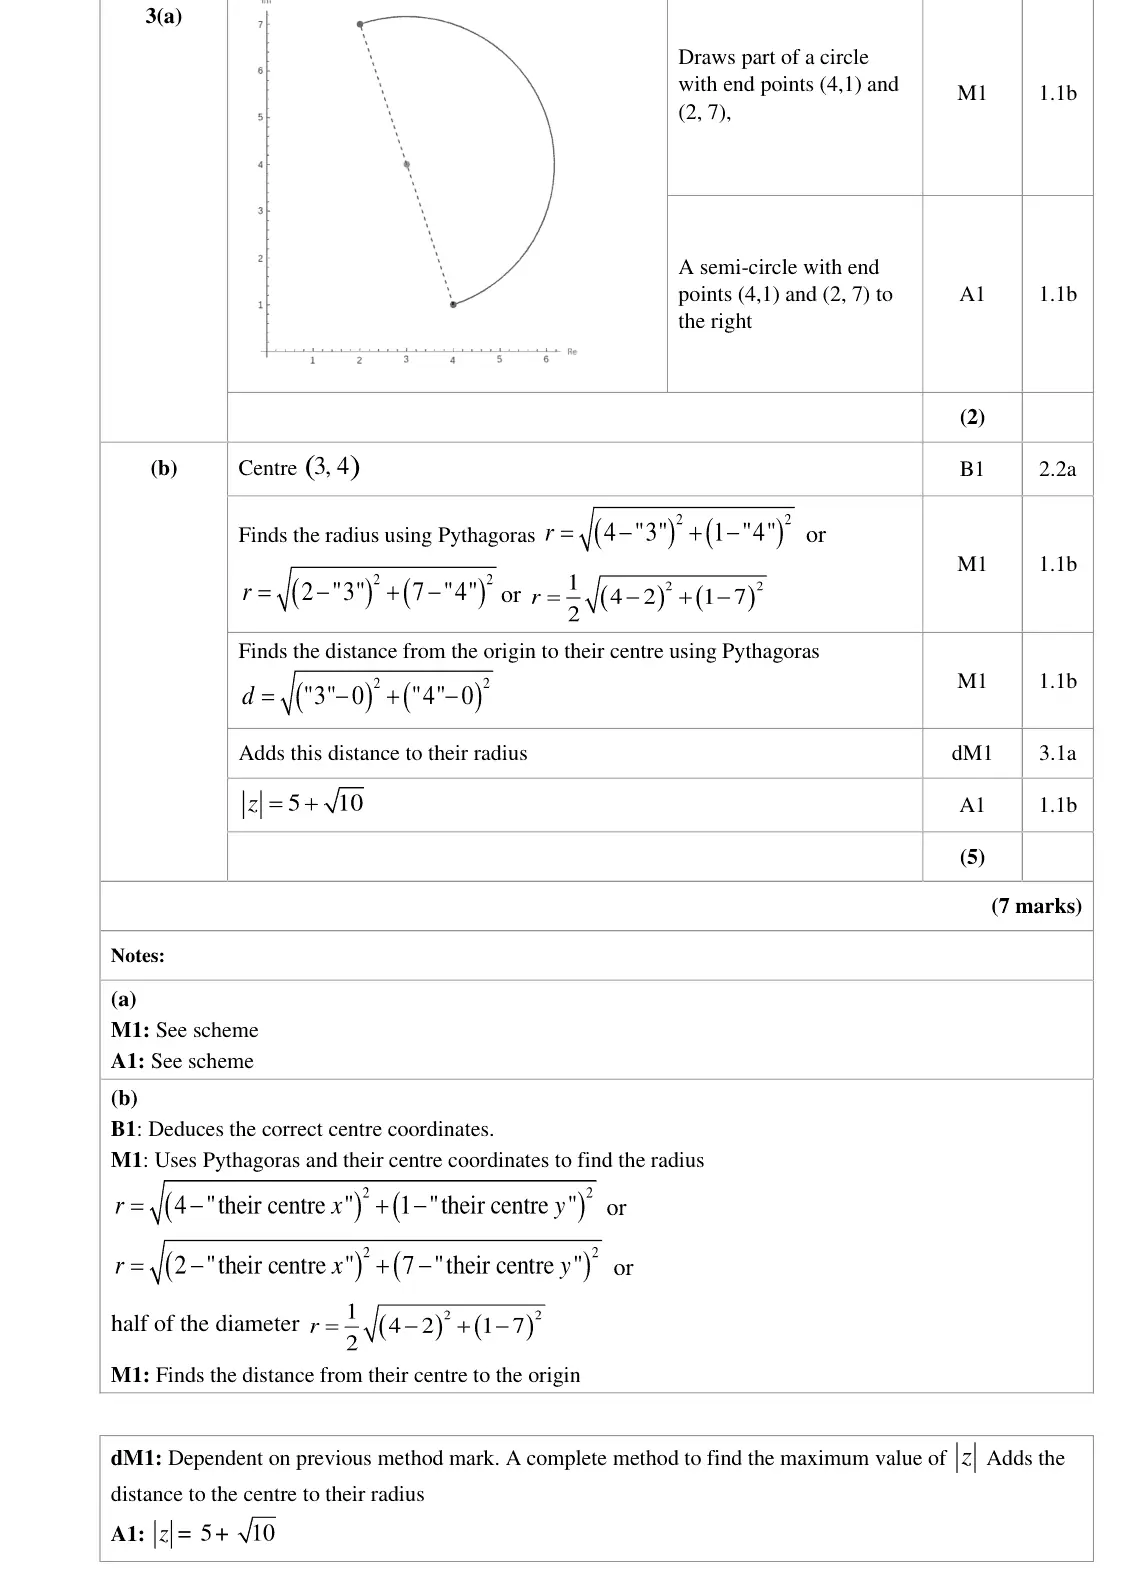
Part (a) the majority of candidate knew that the loci formed a semi-circle with end point (4, 1) and (2, 7). The majority knew that the semi-circle was above the points, one candidate drew below.
Key points from the mark scheme and examiner's report
angle π/2 so the locus is a semicircle on the diameter from (4, 1) to (2, 7), on the right-hand side, endpoints excluded
one drew it on the wrong side
June 2023 · Paper 1 (Core Pure 1) · Q3(c)4 marks
Mark scheme (whole question; this part is marked with the orange bar)
Examiner's comment
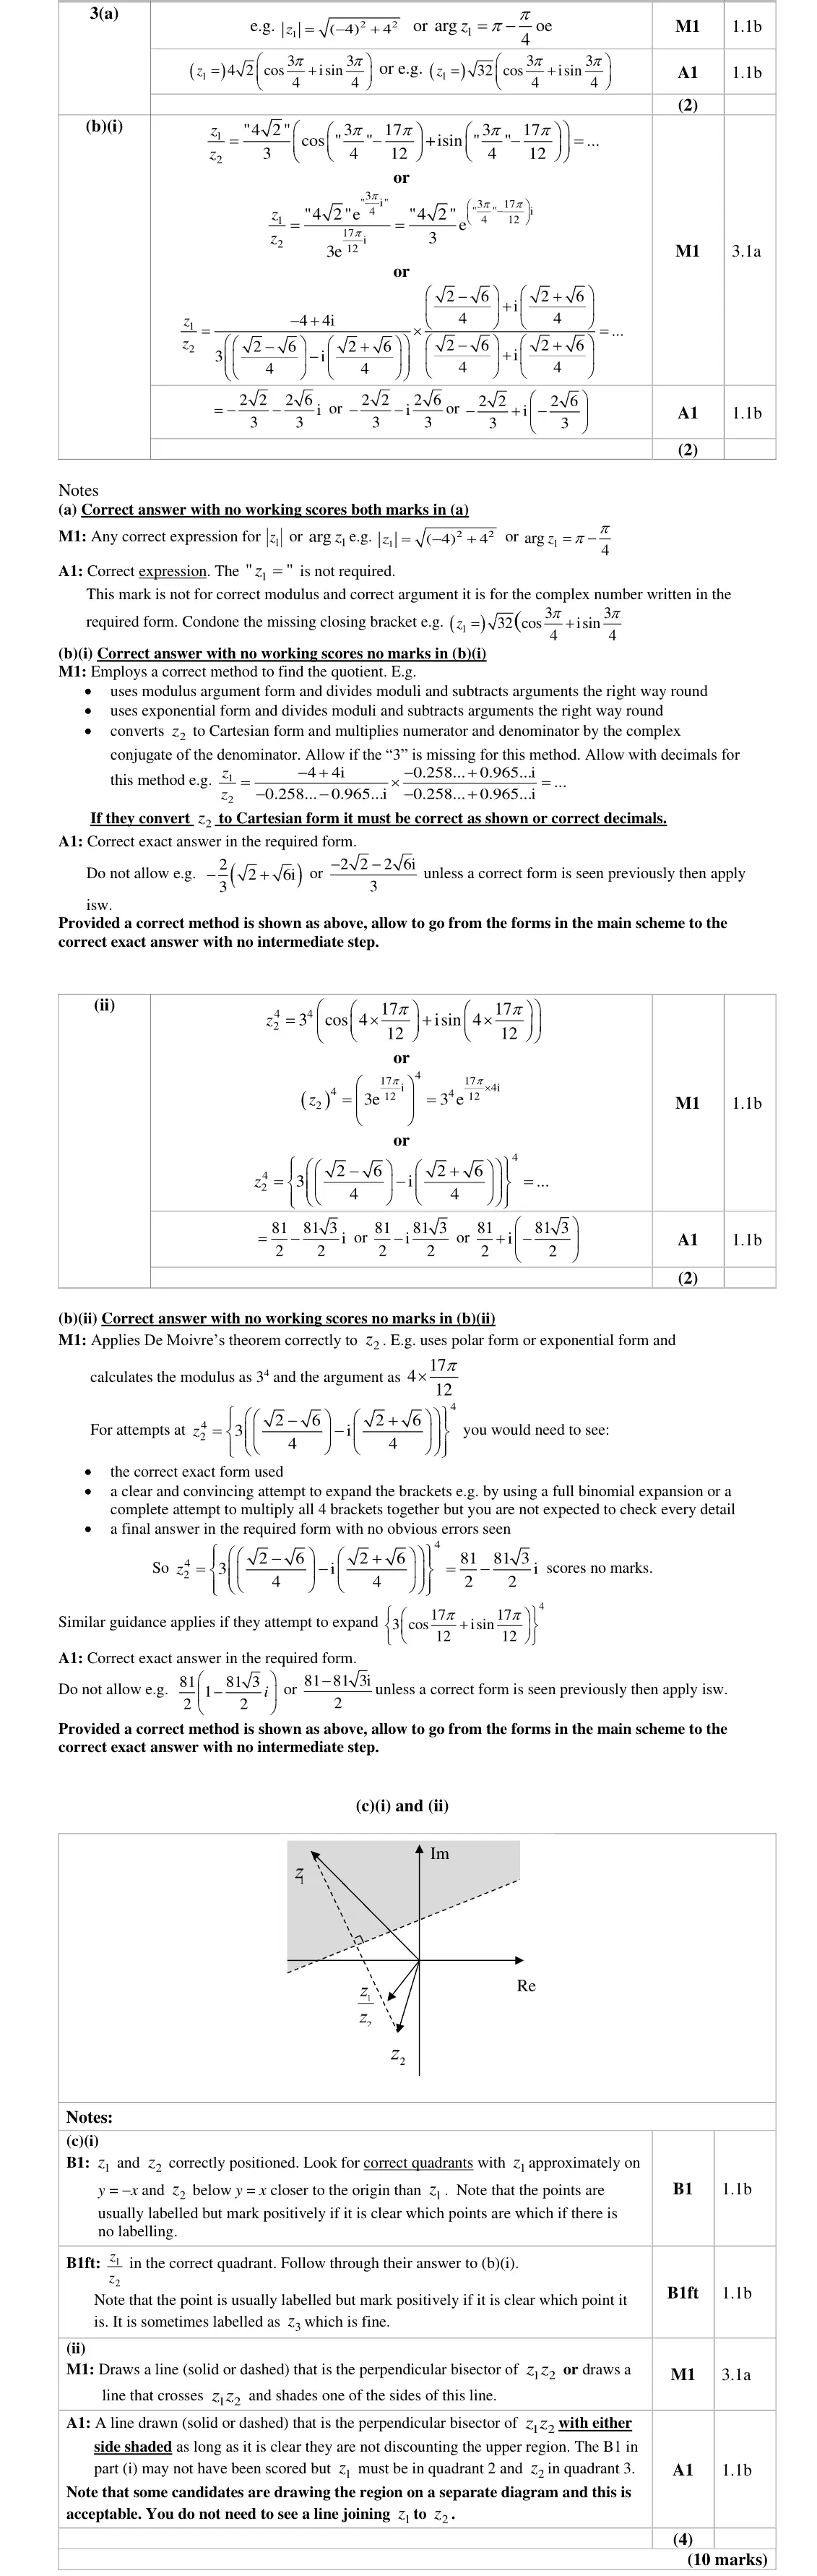
In part (c), around one third of candidates scored full marks. Axes were sometimes poorly drawn and in some cases z1 and z2 appeared to be equidistant from O or z2 was wrongly positioned within the 𝑧1 quadrant. Of those who did not give the required forms in part (b), some also positioned 𝑧2 in an
Key points from the mark scheme and examiner's report
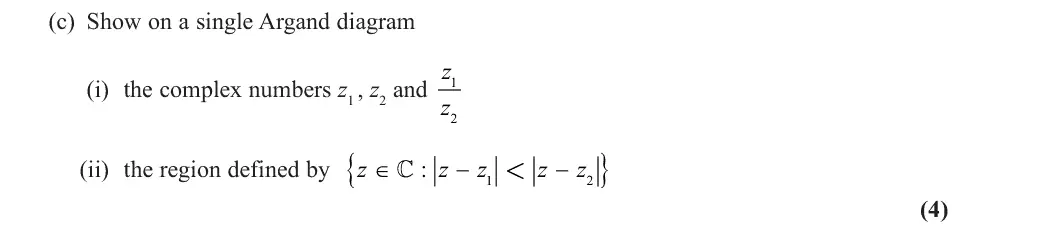
z₁ in the 2nd quadrant on y = −x, z₂ in the 3rd quadrant closer to O, z₁/z₂ in the 3rd quadrant
region is the side of the perpendicular bisector of z₁z₂ containing z₁
poorly drawn axes and z₁, z₂ shown equidistant from O
June 2023 · Paper 2 (Core Pure 2) · Q5(a)2 marks
Mark scheme (whole question; this part is marked with the orange bar)
Examiner's comment
Parts (a) and (b) were generally completed with full marks. However, a significant number of candidates failed to write the roots correctly in (c)(i) and (c)(ii) was very poorly attempted with many candidates having no idea how to begin, nor spotted the connection to the previous parts of the question. (a) A large majority of candidates managed to show the given results; recognising that the centre is the midpoint of the two complex numbers. Those who tried doing this with distances were unsuccessful. An occasional wrong response was to show 3 + 7i was equidistant from the 2 points rather than their midpoint.
Key points from the mark scheme and examiner's report
the centre is the midpoint of z₁ and z₂: 3 + 7i
showing equidistance or using distances does not prove it
June 2023 · Paper 2 (Core Pure 2) · Q8(a)2 marks
Mark scheme (whole question; this part is marked with the orange bar)
Examiner's comment
This was a really good question for testing understanding. If a candidate scored on part (a) they mostly went on to achieve (b), (c)(i) and (c)(ii). Of those who attempted part (d), about half didn’t account for the fact that the coefficient of z3 was 8 so scored a maximum of 1 out of 4; the most successful solutions were from those who used sum and product of root results to obtain both cubics and then solved the resulting equation. In (a), many candidates only realised to answer with the line x = k where k is a real number and failed to use the real axis for both marks. Those candidates who were successful with part (a) had the most success with this question. If candidates were unable to successfully identify the vertical line, the remainder of the question proved challenging to restart. A few candidates drew a diagram to show a vertical line which was acceptable.
Key points from the mark scheme and examiner's report
one real root and a conjugate pair, so the line is the real axis or a vertical line x = k (both needed)
many gave only one
June 2023 · Paper 4A (Further Pure 2) · Q2(b)2 marks
Mark scheme (whole question; this part is marked with the orange bar)
Examiner's comment
(b) The majority of candidate scored 1 out of 2 marks. They drew a circle that passed through the origin but did not indicate where it crossed the axis. Candidates are reminded to always indicate intercepts with axes to show location.
Key points from the mark scheme and examiner's report
circle (x + 2)² + (y + 4)² = 20, centre −2 − 4i, through O, −4 and −8i
intercepts must be labelled
June 2023 · Paper 4A (Further Pure 2) · Q2(c)2 marks
Mark scheme (whole question; this part is marked with the orange bar)
Examiner's comment
(c) Candidates appeared to know that 4 z = represented a circle, centre (0, 0) but errors included radius of 2 and again not indicated where it crossed an axis. Candidates were still able to score the final mark if they had two overlapping circles and shaded the overlap. Many candidates were able to score this mark.
Key points from the mark scheme and examiner's report
add circle centre O radius 4 (not 2)
shade the overlap inside both circles
June 2022 · AS Paper 1 (Core Pure) · Q2(b)3 marks
Mark scheme (whole question; this part is marked with the orange bar)
Examiner's comment
Both parts (a) and (b) of this question proved to be very accessible to the vast majority of candidates, but the geometrical aspects of (c) caused significant problems for a similar majority who were unable to go on and score any marks at the end of this early question in the paper. In (b), w was generally in the correct position, although some candidates would be well advised to pay more attention to the relative location of where points should be placed on diagrams. Similarly, the half line was generally well placed on the negative part of the imaginary axis with a positive gradient, but again, more attention needed to be paid as to whether the half line would pass above w or below it.
Key points from the mark scheme and examiner's report
w in the fourth quadrant
half-line from −10i with positive gradient (angle π/3), passing between O and w
June 2022 · Paper 1 (Core Pure 1) · Q1(c)1 mark
Mark scheme (whole question; this part is marked with the orange bar)
Examiner's comment
The Argand diagram for part (c) was usually correct, following through their third root, and most candidates achieved the mark for it, though a few candidates made the mistake of plotting their value of a (so (-3, 0) instead of (-4, 0)) rather than the root found in (b). The
Key points from the mark scheme and examiner's report
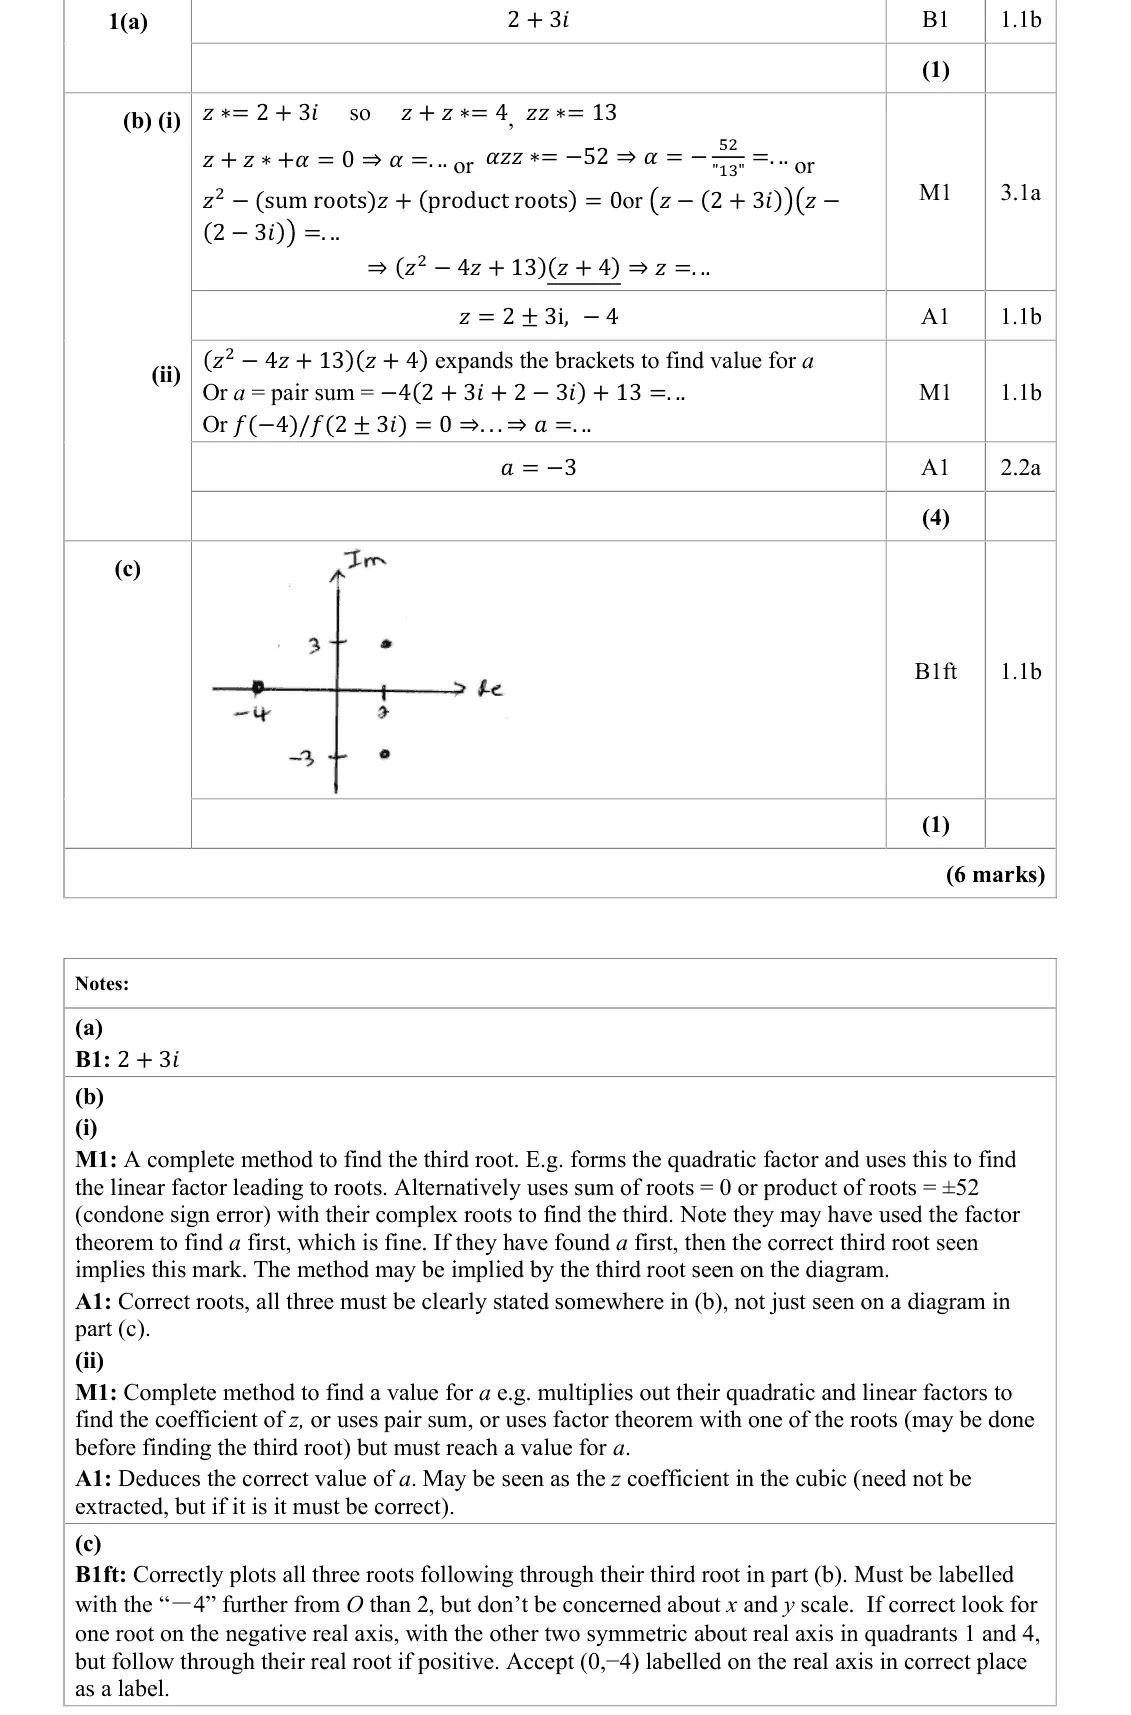
plot 2 ± 3i symmetric in the real axis and −4 on the negative real axis, further from O than 2
plotting a = −3 instead of the root −4
June 2022 · Paper 2 (Core Pure 2) · Q4(ii)3 marks
Mark scheme (whole question; this part is marked with the orange bar)
Examiner's comment
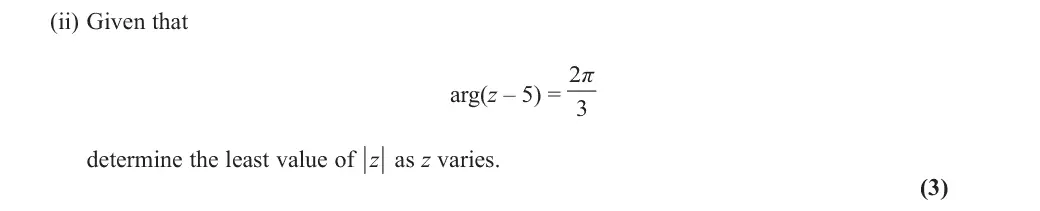
This complex number question saw a mixed response with part (b) proving fairly discriminating in particular. Most knew the sensible way forward in part (a) with the wide variety of viable alternatives rarely seen. However, having converted to a + ib form and adding, many students did not show their method to obtain the modulus and/or the argument, this is a show question. In part (b), students who produced a reasonable sketch usually went on to score all the marks. Most sketches seen were realistic with the half-line in the correct place. It was anticipated that simple right-angled trigonometry or Pythagoras would be the most likely ways forward from here. Most who opted for this were successful. Algebraic approaches were more mixed in quality. Those who chose to find the distance of the point of intersection of the two relevant lines to the origin were often correct but those embarking on a circuitous route requiring minimisation tended to fall short.
Key points from the mark scheme and examiner's report
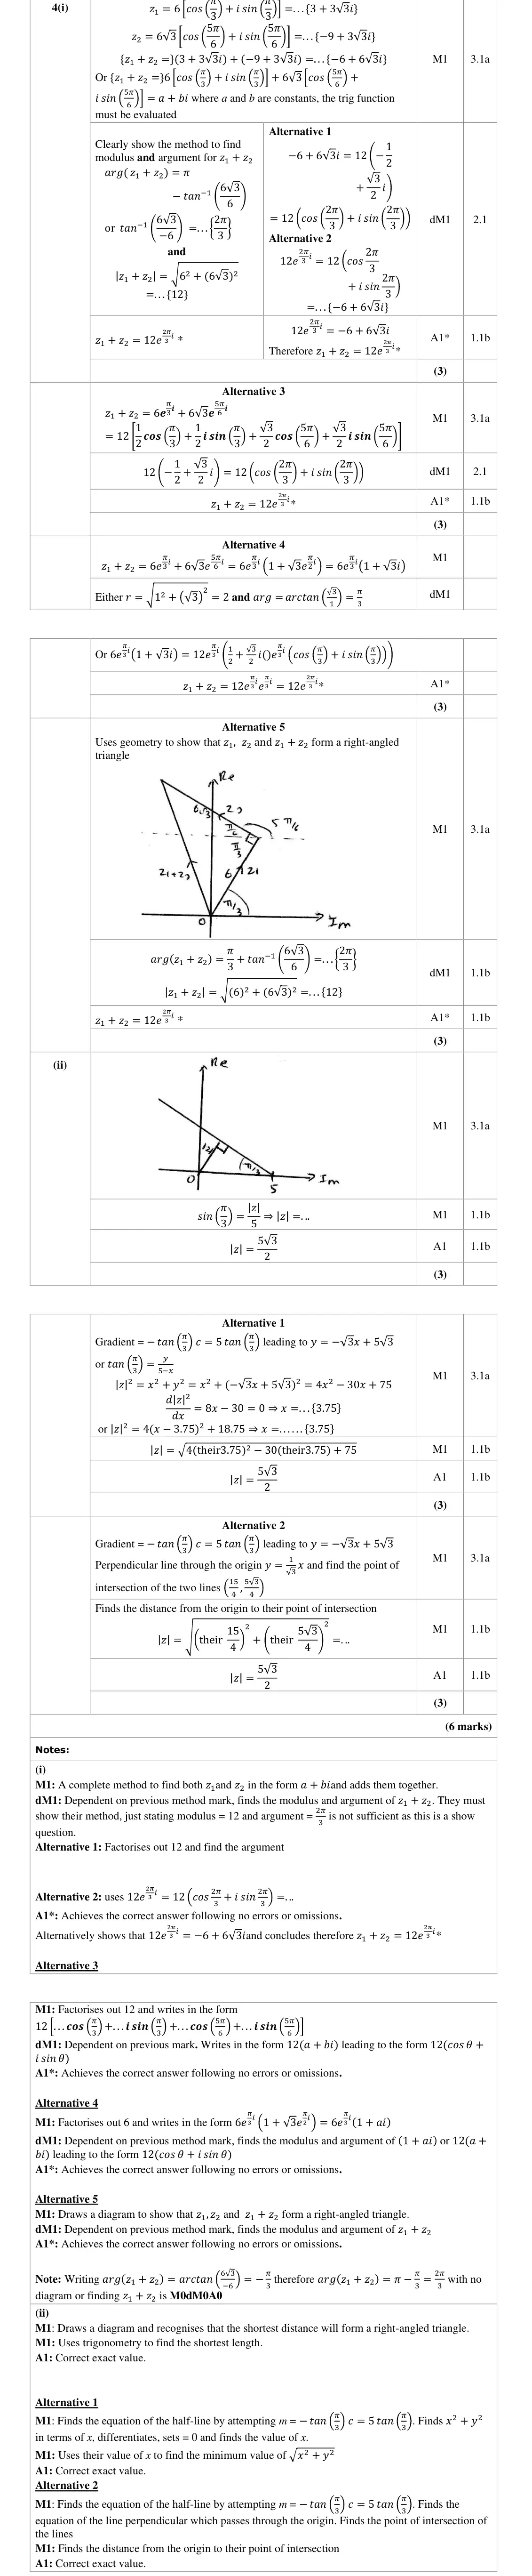
sketch the half-line from 5 at angle 2π/3
least modulus of z is the perpendicular distance 5 sin(π/3) = 5√3/2
minimisation of x² + y² routes tended to fail
June 2022 · Paper 4A (Further Pure 2) · Q8(a)2 marks
Mark scheme (whole question; this part is marked with the orange bar)
Examiner's comment
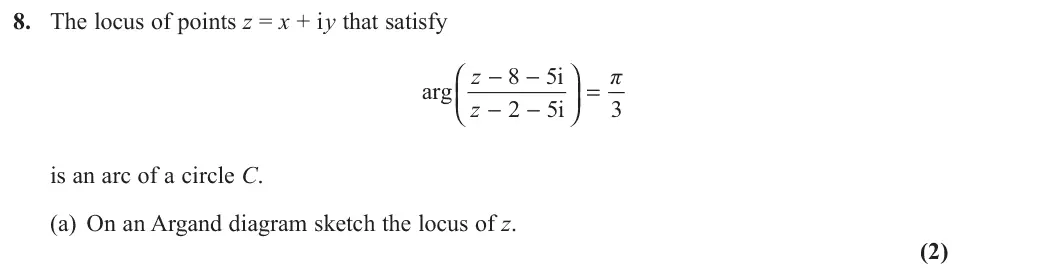
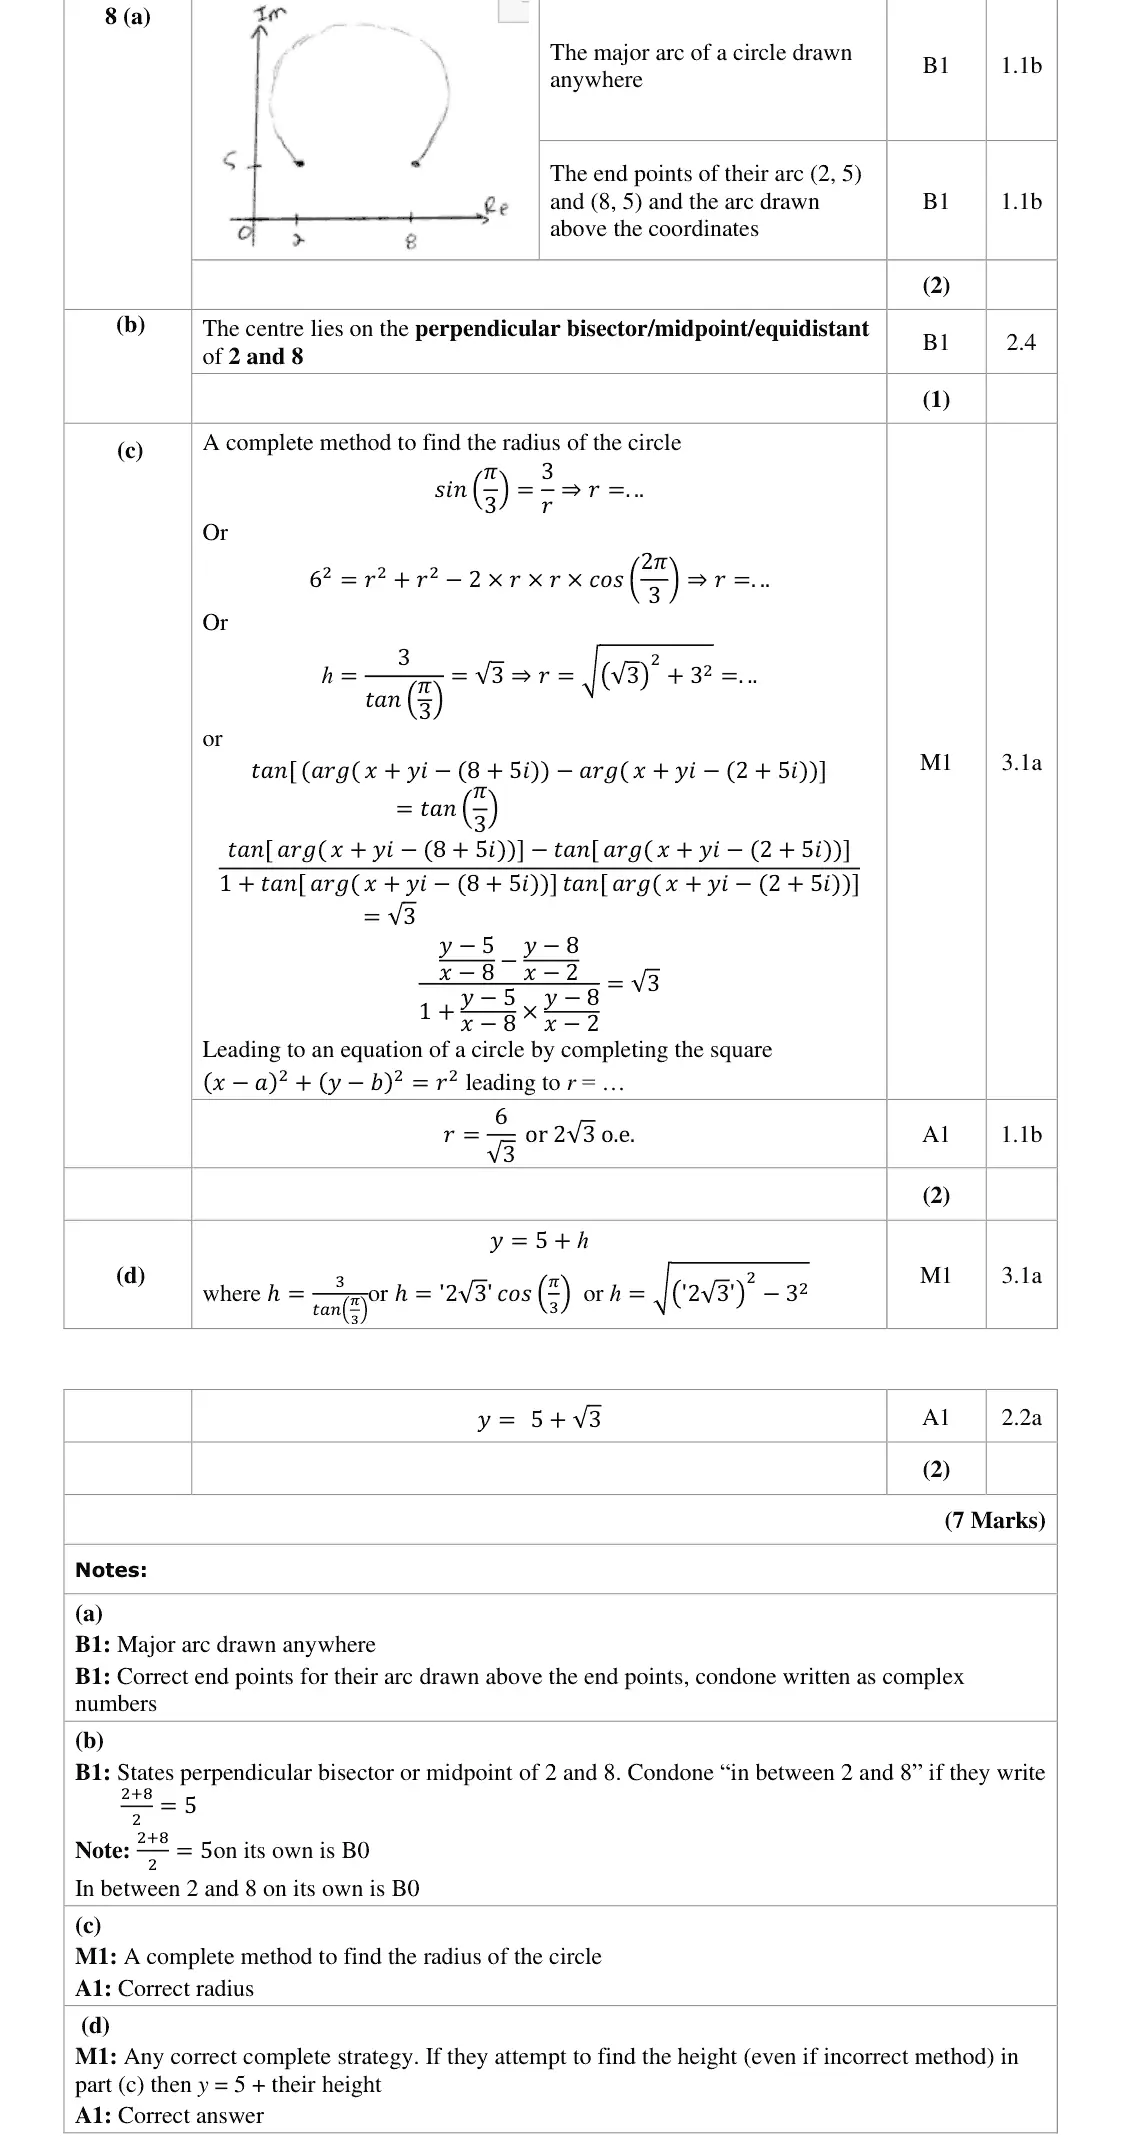
Part (a) Almost all candidates had the correct two points marked ut some did not produce a major arc while a few had the arc below the points.
Key points from the mark scheme and examiner's report
major arc of a circle through (2, 5) and (8, 5), drawn above the points
endpoints excluded
Nov 2021 · Paper 4A (Further Pure 2) · Q5(b)4 marks
Mark scheme (whole question; this part is marked with the orange bar)
Key points from the mark scheme and examiner's report
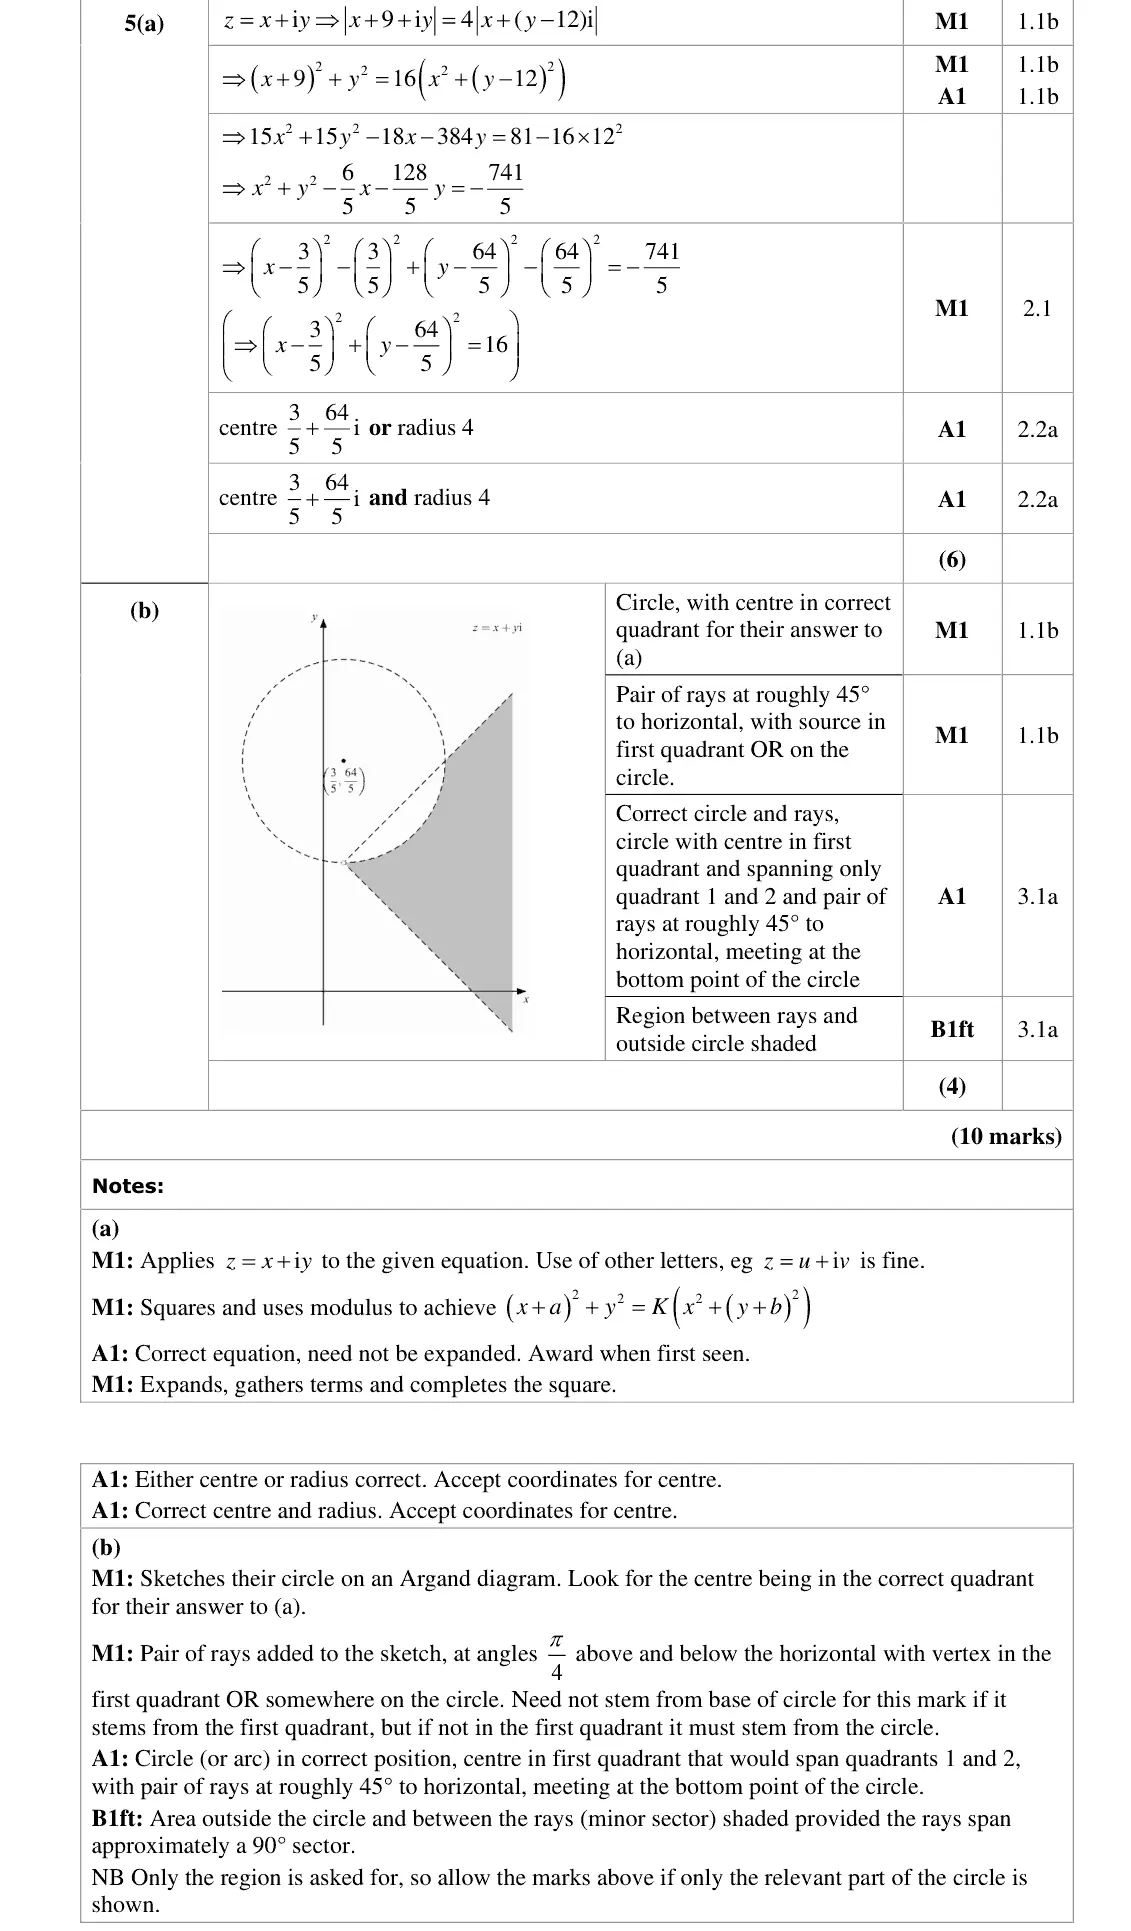
(3 + 44i)/5 is the lowest point of the circle
rays at ±π/4 from it
shade outside the circle between the rays
Oct 2020 · AS Paper 1 (Core Pure) · Q76 marks
Mark scheme (whole question; this part is marked with the orange bar)
Examiner's comment
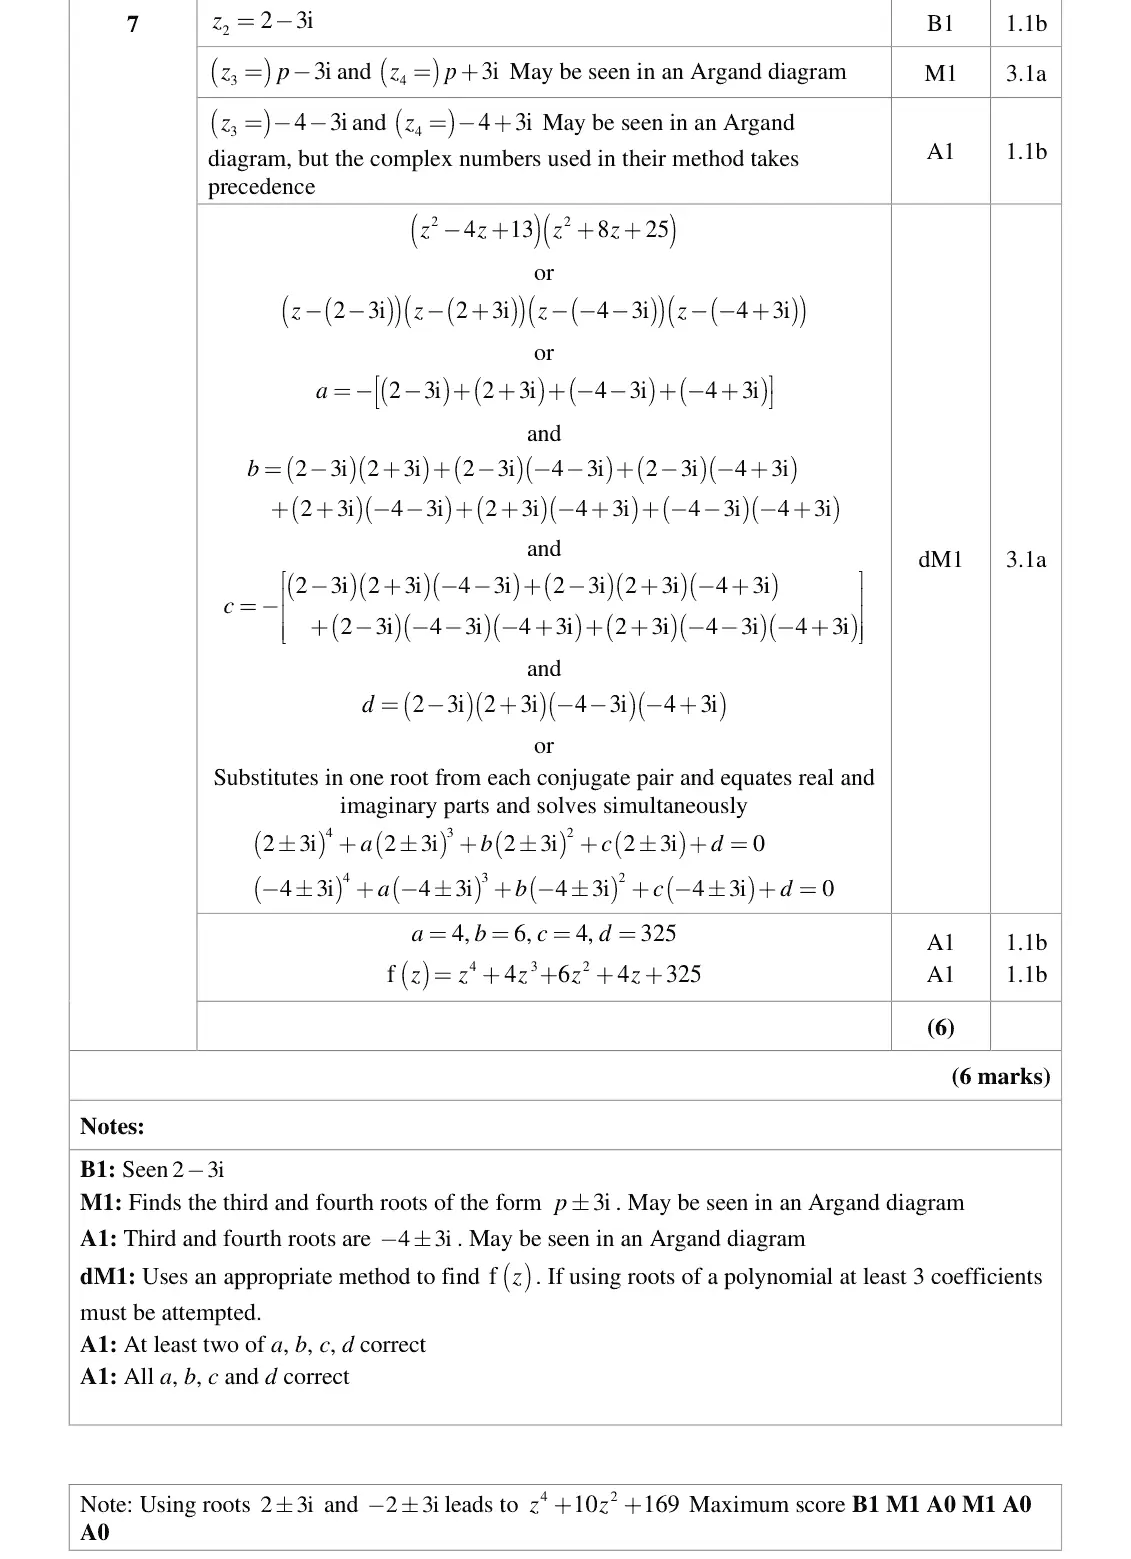
A small number of blank responses but most managed to attempt this question. About half correctly identified the 3rd and 4th root whilst the other half incorrectly used 2 3i , this meant 110100 was a common mark trait along with full marks Finding quadratic equations for each pair of roots and the then multiplying to find the quartic equation was the most successful approach. Candidates who attempted to use the roots of a polynomial often made sign slips.
Key points from the mark scheme and examiner's report
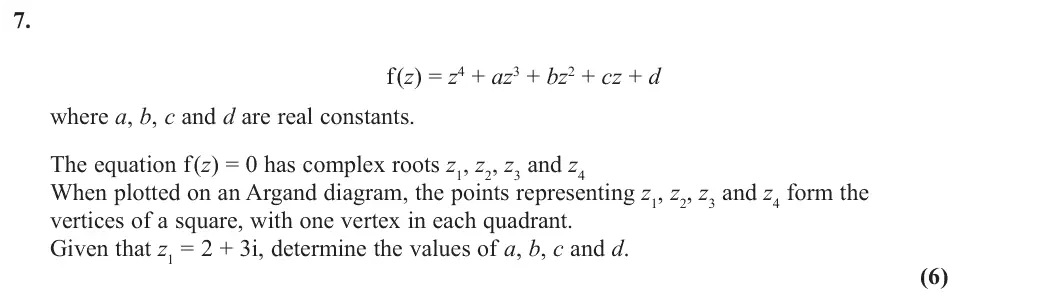
conjugate 2 − 3i
square centred on the origin gives −4 ± 3i (using −2 ± 3i was a common error)
(z² − 4z + 13)(z² + 8z + 25): a = 4, b = 6, c = 4, d = 325
Oct 2020 · AS Paper 1 (Core Pure) · Q107 marks
Mark scheme (whole question; this part is marked with the orange bar)
Examiner's comment
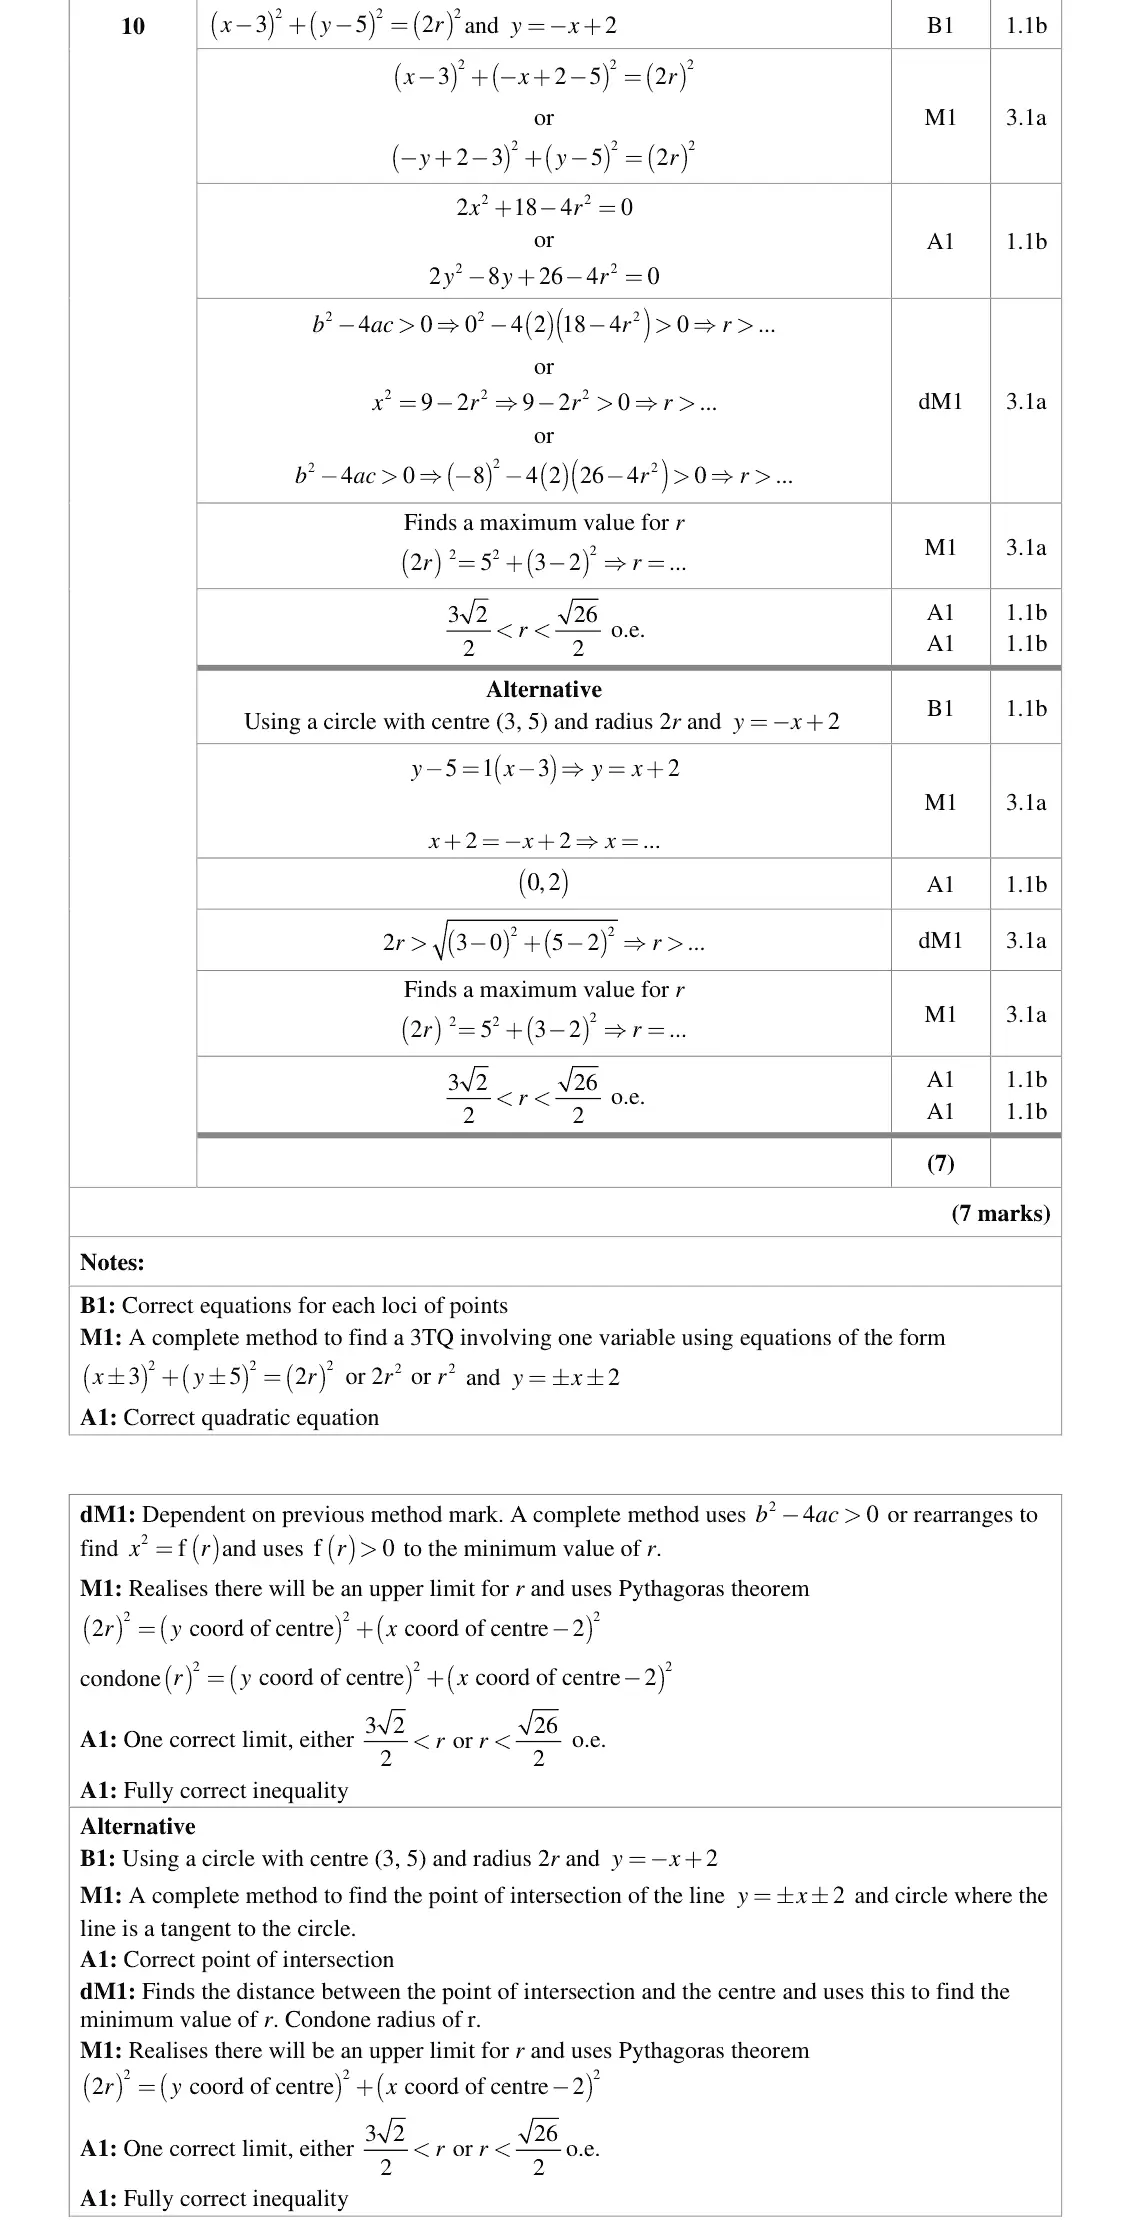
There were only a couple of fully correct responses to this question. Many candidates achieved the first 3 marks for find the equation of each loci and attempt to solve simultaneously. Many then failed to use the discriminant or rearranging for x2 and setting > 0 many just tried to solve the quadratic in terms of r. Only a small minority realised to find the upper limit of r, though those that did all where success. Candidates that did pick up the second method mark, regardless of which method used, nearly always went on to achieve the accuracy for one correct limit, those that didn't used 3 3 2 2 2 2 r
Key points from the mark scheme and examiner's report
circle (x − 3)² + (y − 5)² = 4r² and half-line y = −x + 2 (x < 2)
two intersections: discriminant > 0 gives r > 3√2/2
upper limit when circle passes through (2, 0): r < √26/2
very few fully correct, most missed the upper limit
Oct 2020 · AS Paper 2 (Further Pure 2) · Q5(b)4 marks
Mark scheme (whole question; this part is marked with the orange bar)
Key points from the mark scheme and examiner's report
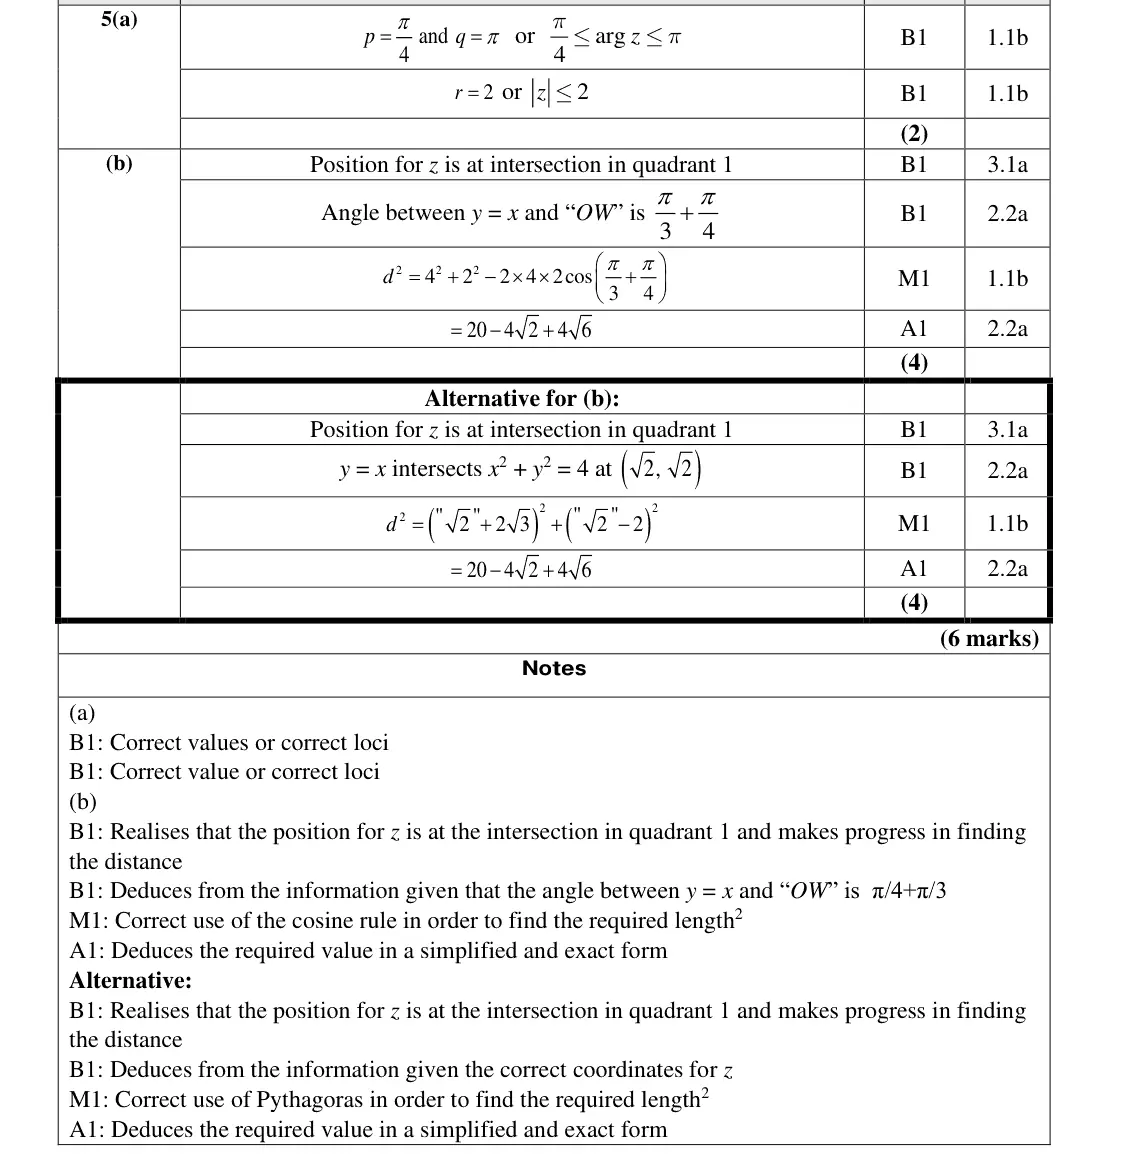
furthest point of the region from w is z = √2 + √2i (on arg z = π/4, modulus 2)
modulus of w = 4 and angle between OW and y = x is π/3 + π/4
cosine rule: maximum = 20 − 4√2 + 4√6
Oct 2020 · Paper 1 (Core Pure 1) · Q1(a)7 marks
Mark scheme (whole question; this part is marked with the orange bar)
Examiner's comment
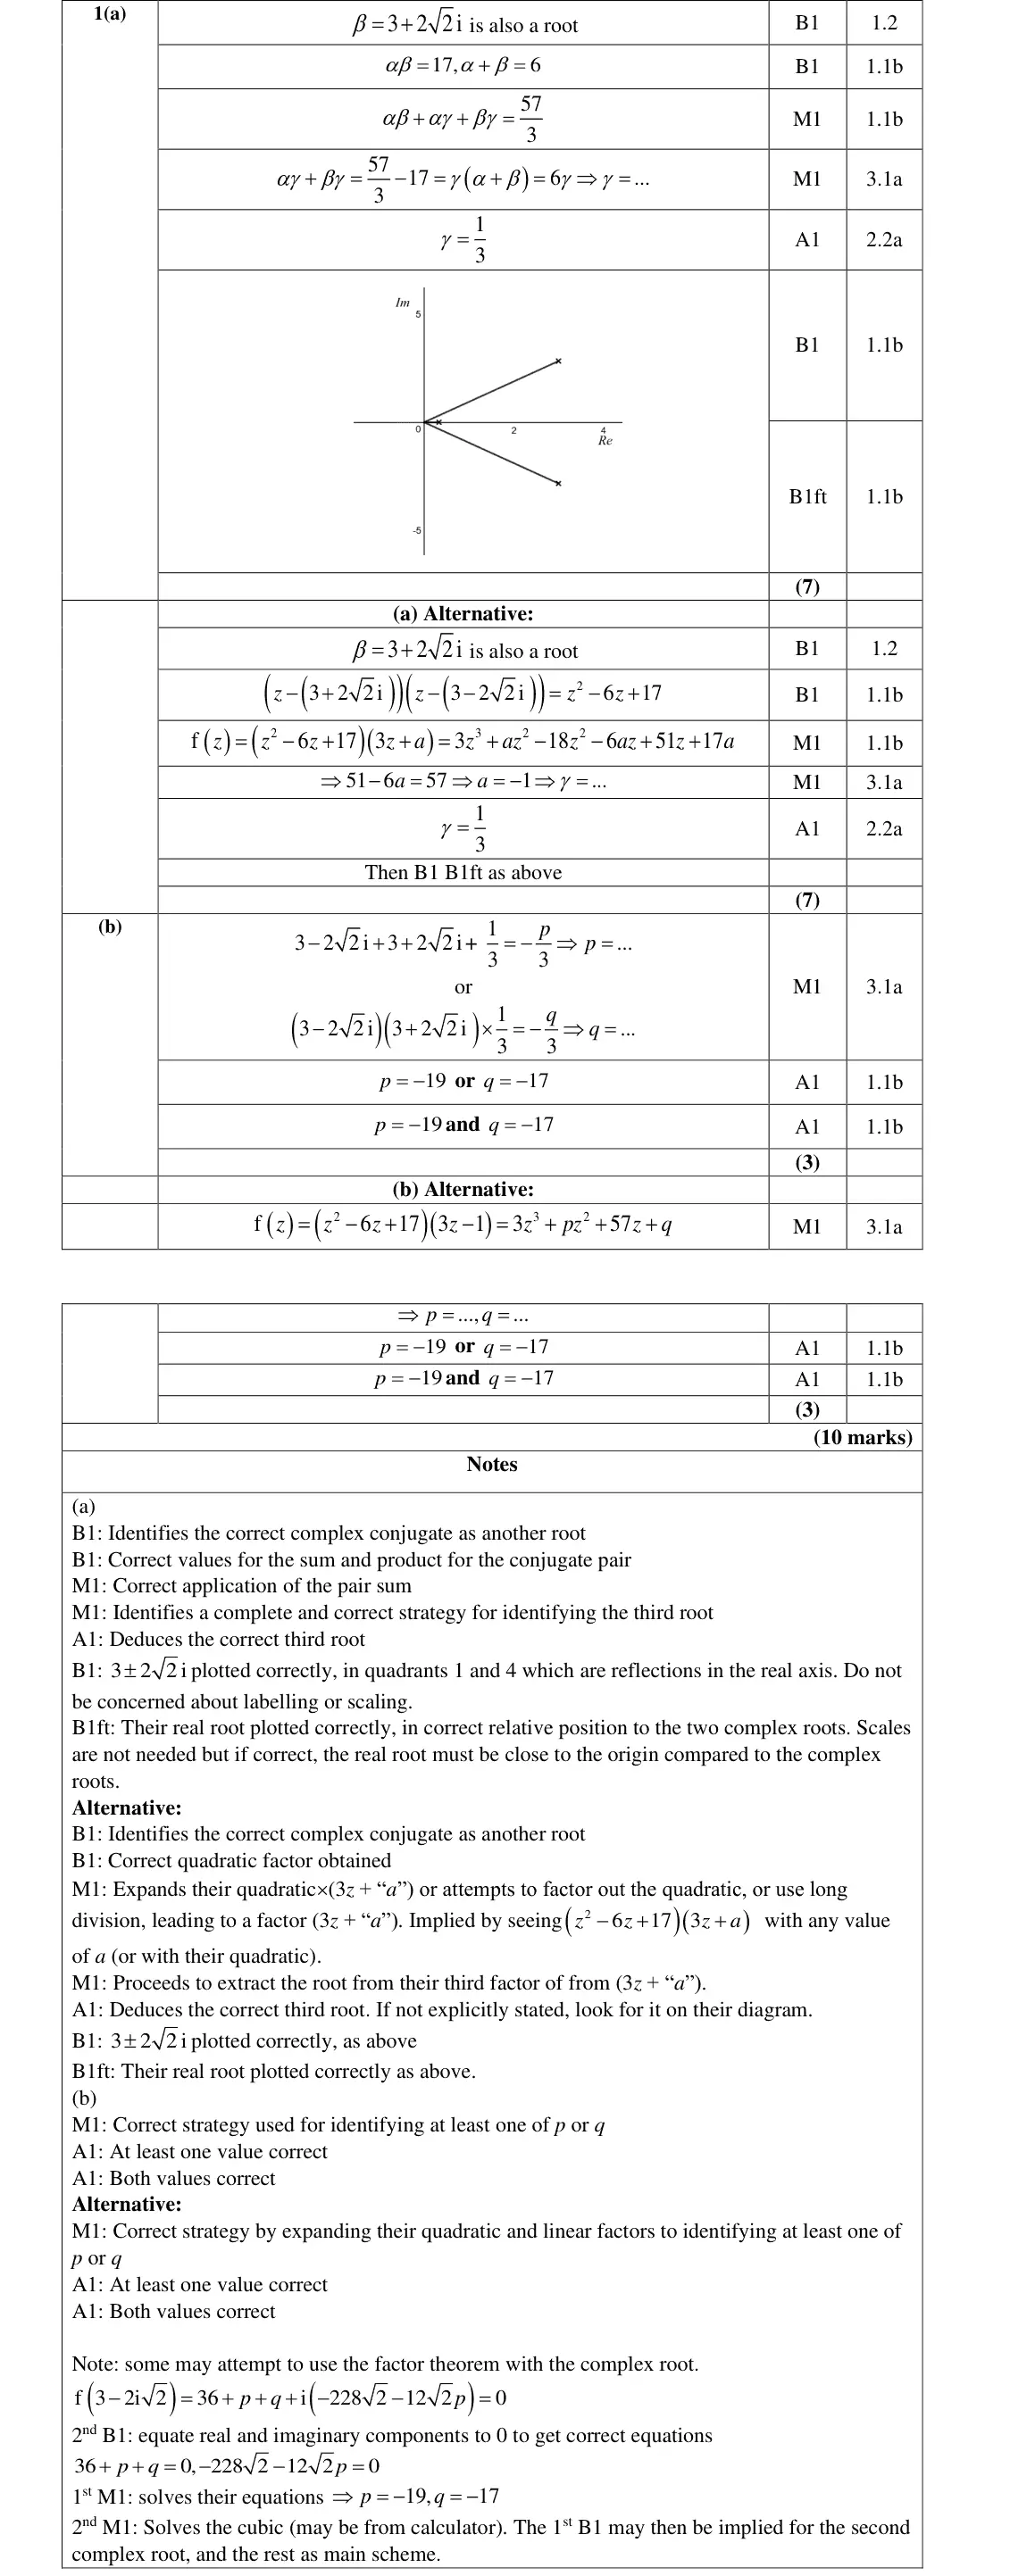
even if they had made an error in (a). Scales were not expected on the Argand diagram although the relative positions of the roots needed to be realistic for the second B mark.
Key points from the mark scheme and examiner's report
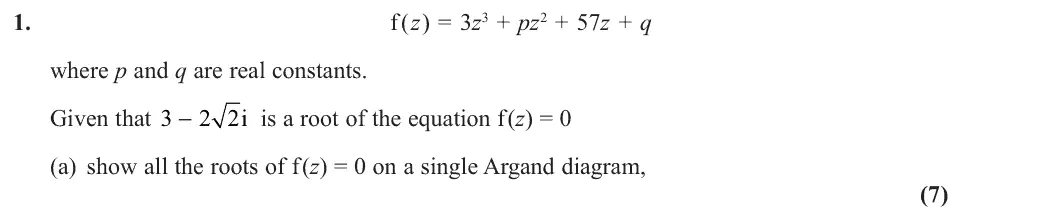
conjugate 3 + 2√2i is a root
pair sum 6 and product 17 (quadratic z² − 6z + 17)
third root from Σαβ = 57/3 or by factorising (3z − 1): γ = 1/3
plot the conjugate pair symmetric in the real axis and 1/3 near the origin
June 2019 · AS Paper 1 (Core Pure) · Q5(d)2 marks
Mark scheme (whole question; this part is marked with the orange bar)
Key points from the mark scheme and examiner's report
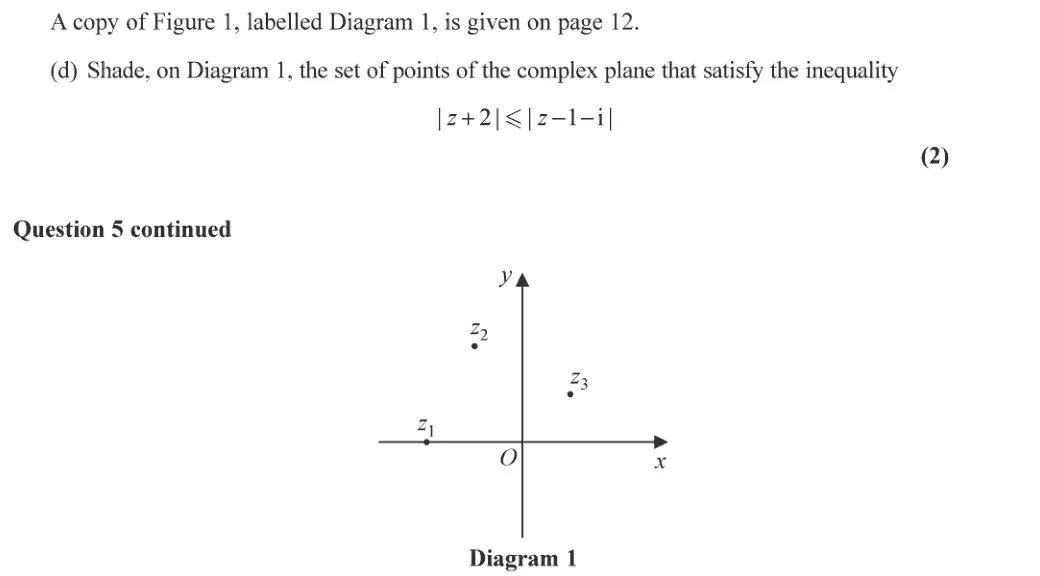
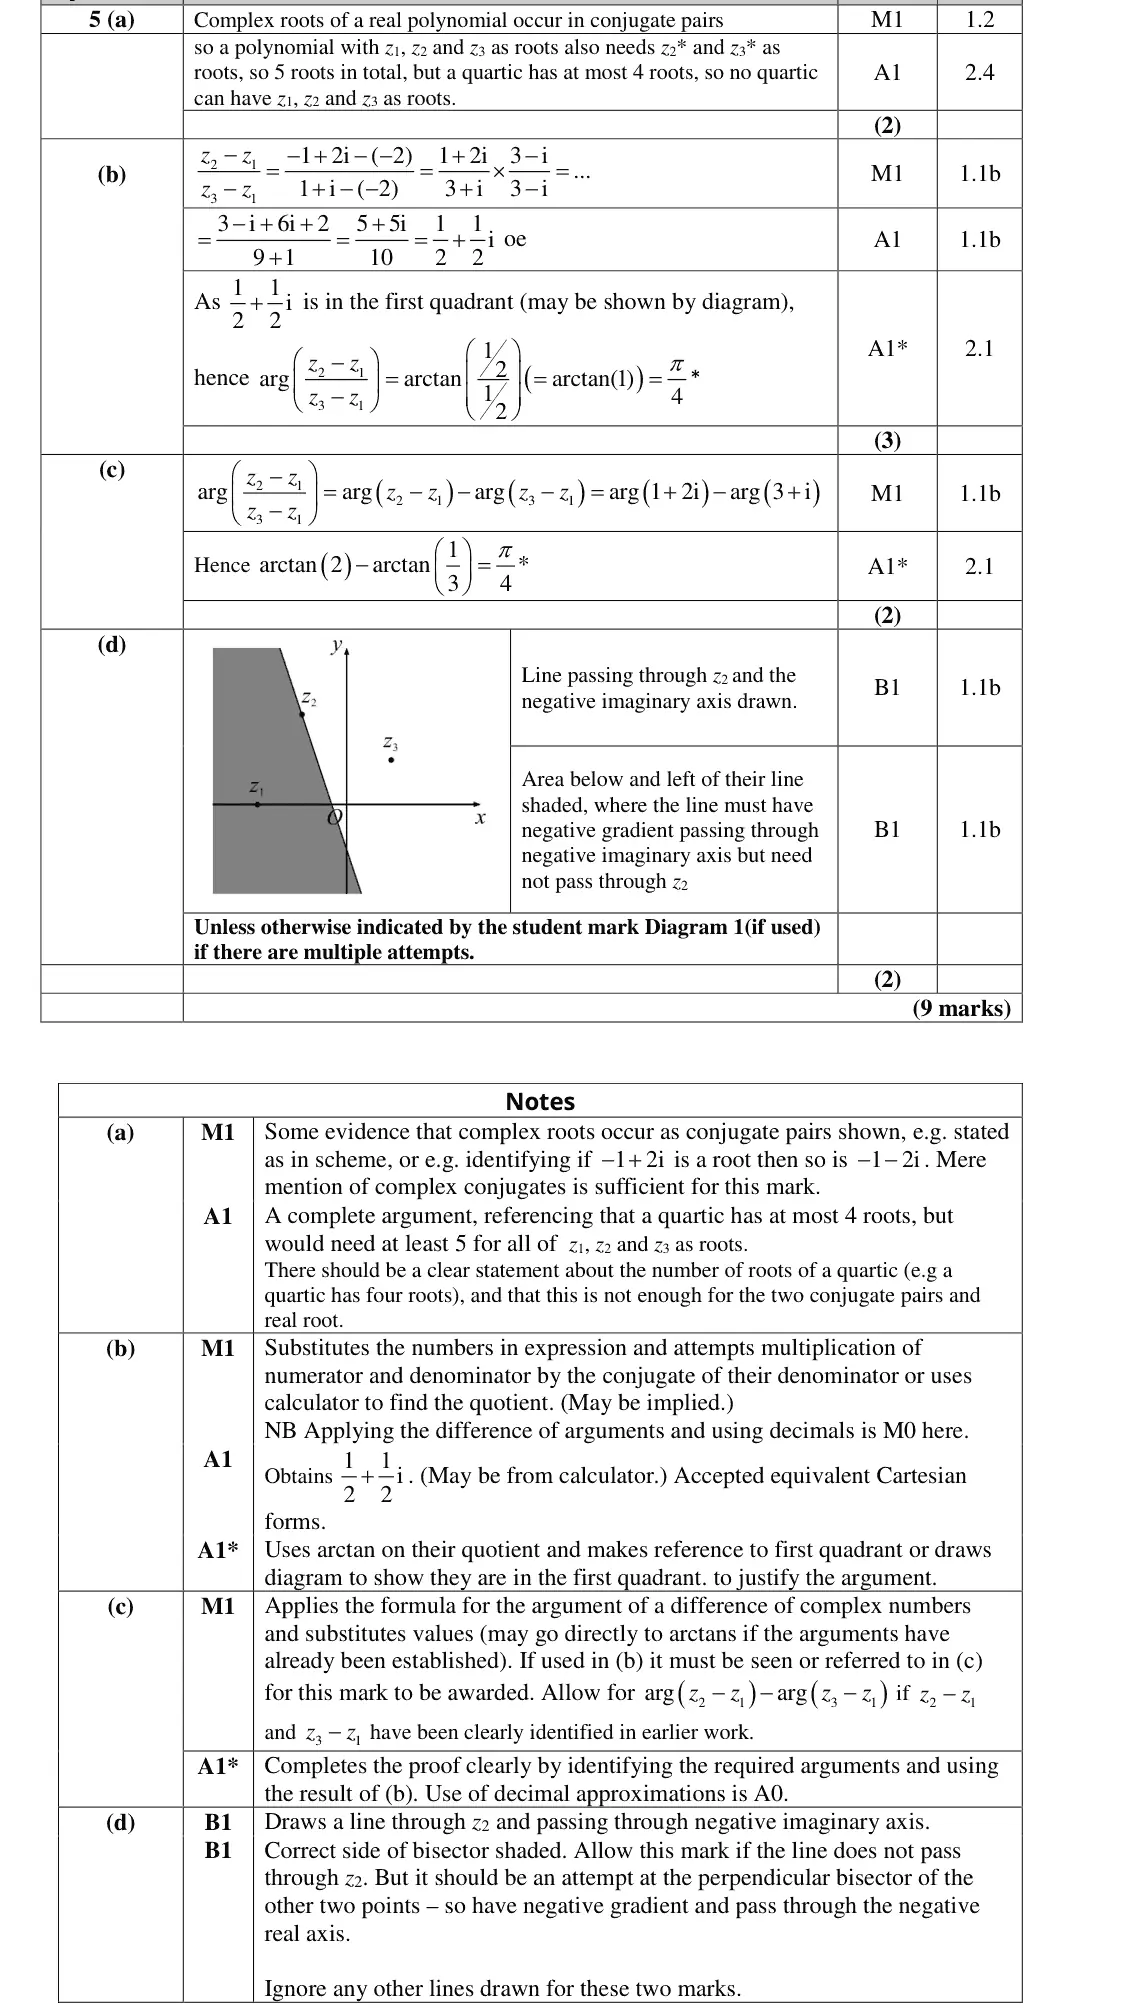
perpendicular bisector of −2 and 1 + i: line through z₂ with negative gradient crossing the negative imaginary axis
shade the side containing z₁ (below/left)
June 2019 · Paper 1 (Core Pure 1) · Q1(a)4 marks
Mark scheme (whole question; this part is marked with the orange bar)
Examiner's comment
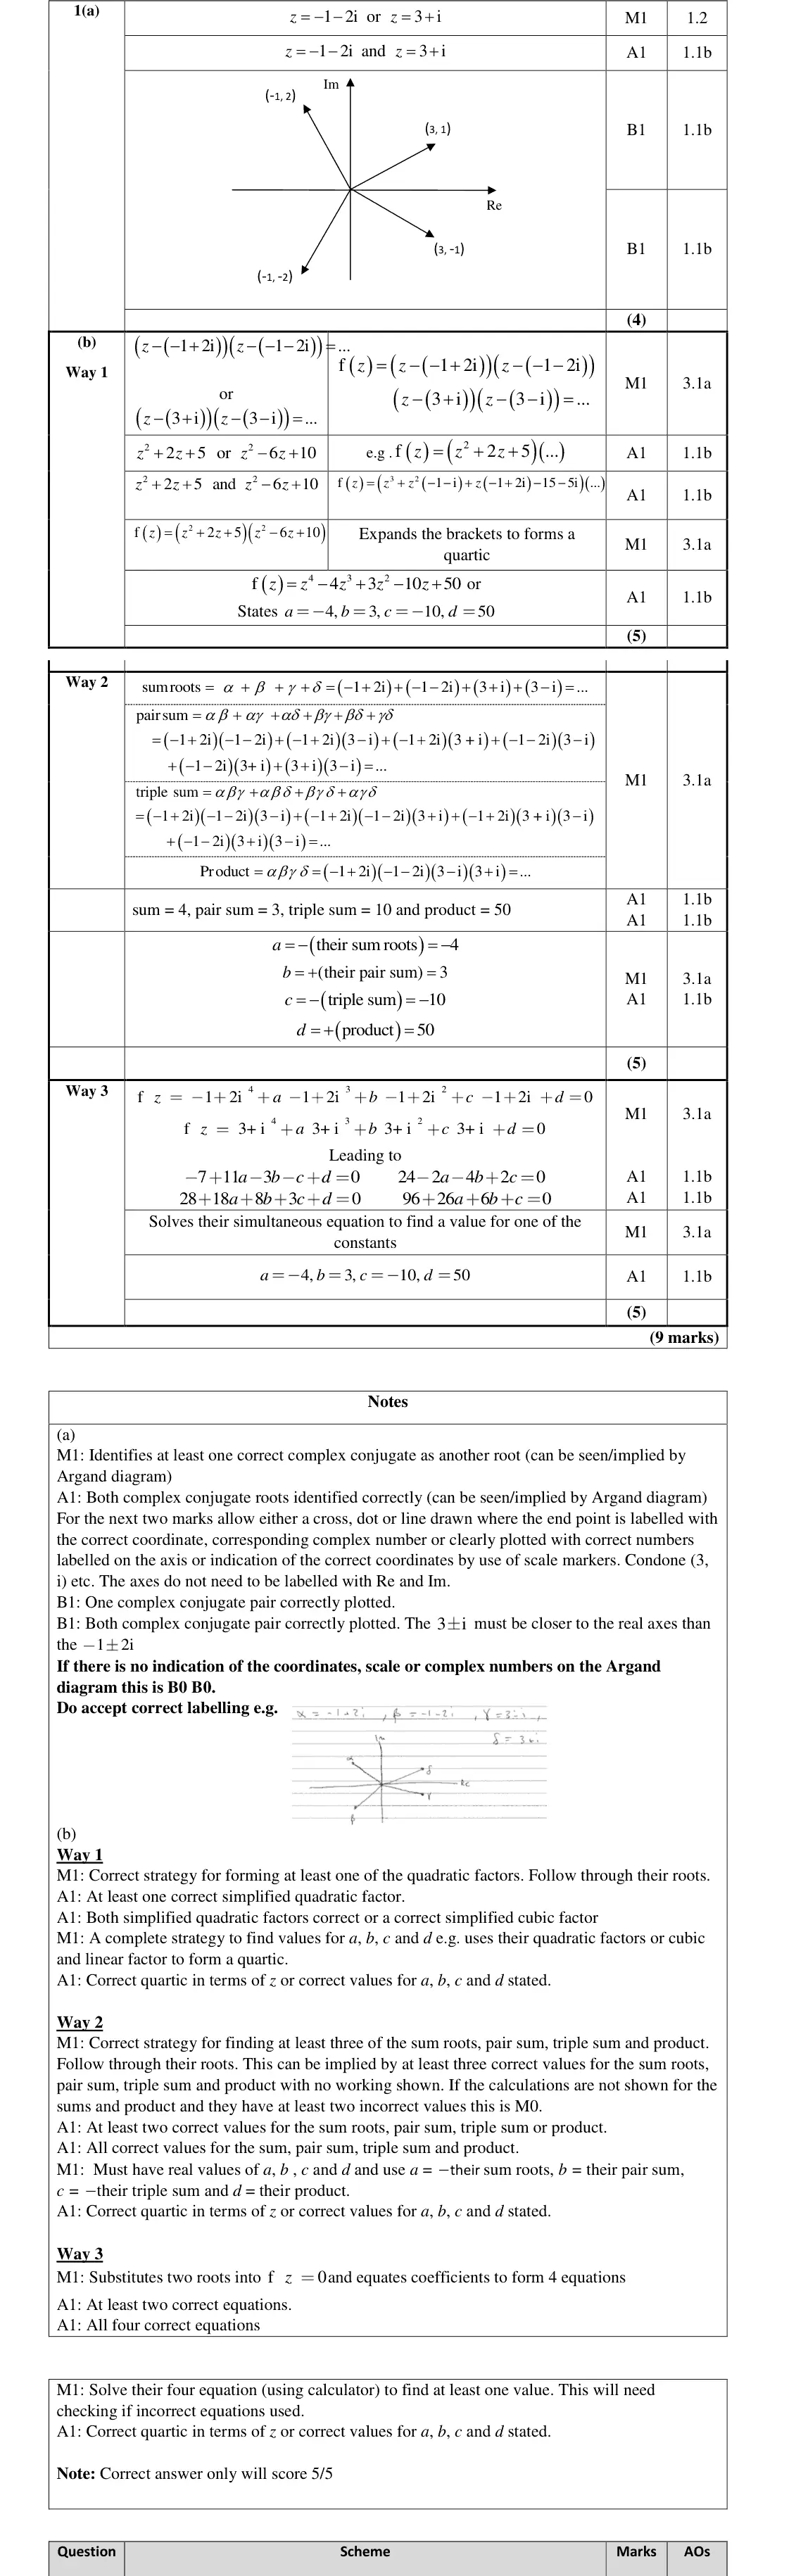
Parts(a) was accessible to almost all candidates, with most gaining full marks. A handful of candidates thought the conjugate was 1 + 2i and – 3 – i, and a few candidates lost marks because of a poor diagram, failing to indicate a scale or labelling or with -1 + 2i closer to the real axis than 3 + i
Key points from the mark scheme and examiner's report
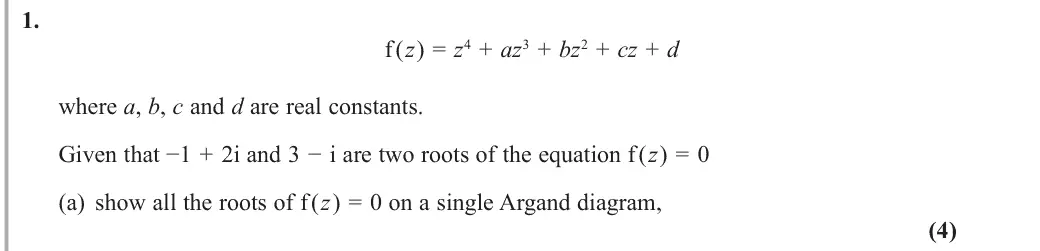
other roots are the conjugates −1 − 2i and 3 + i (not 1 + 2i, −3 − i)
plot all four with labels or a scale
3 ± i must be nearer the real axis than −1 ± 2i
June 2019 · Paper 4A (Further Pure 2) · Q7(b)2 marks
Mark scheme (whole question; this part is marked with the orange bar)
Examiner's comment
The main challenge of this question came in part (b), with many good attempts at part (a) seen. For part (b) a number of candidates were unable to place their circles correctly on the Argand diagram, placing their centres on the real axis not the imaginary axis, or above the real axis when it should have been below. Some omitted this part entirely - usually if they had made little progress in part (a), although circle C did not depend on any work in (a) and should have been an easily accessible mark. The sketching of simple loci such as these ones should be providing candidates some accessible marks at this stage of the paper, so it was surprising to see such difficulty with them.
Key points from the mark scheme and examiner's report
C: centre −i, radius 1 through O
D: centre 3i, radius 1
centres often wrongly put on the real axis
June 2018 · AS Paper 1 (Core Pure) · Q3(a)5 marks
Mark scheme (whole question; this part is marked with the orange bar)
Examiner's comment
(a) The majority of students were able to produce a meaningful diagram with nearly all managing a circle with centre 1 + i The vertex of the “V” shape varied in position, some had it at the origin and also at various other positions. For those who did have a “V” shape, the directions of the branches also varied, with some pointing both to the left or right. Most students realised that the left hand branch crossed the y-axis below the circle although many had the left branch and the circle intersecting at the same point on the y-axis. Irrespective of success with the circle and “V” shape, students almost always knew that they had to shade the area between the “V” and within the circle and so could at least recover a mark following an incorrect diagram.
Key points from the mark scheme and examiner's report
circle centre 1 + i radius 3 and two half-lines from 2 at π/4 and 3π/4 above the real axis
shade inside both
vertex at the origin or branches below the axis were common errors
June 2018 · AS Paper 1 (Core Pure) · Q77 marks
Mark scheme (whole question; this part is marked with the orange bar)
Examiner's comment
This proved to be a very challenging question, and a significant number of blank or very low scoring attempts were seen. Many students produced work worthy of the first mark (many achieved it several times over) but failed to make progress beyond this – either going round in circles or making wild assumptions. Most recognised that an equation could be formed in terms of the area of the triangle but the bigger challenge was to find another way into the question, i.e. by using the sum of roots or, occasionally by dividing the polynomial by (z – 3), although very few recognised that they could solve the quadratic and hence find the other two roots. Most successful students realised that the other two roots needed to be a conjugate pair and then were able to use the sum of roots to find the real part. Many diagrams did not show a conjugate pair so the method to find the imaginary part using the area of a triangle was not always successful. Those that found values for the real and imaginary part of the other roots were able to find values for p and q. Many used the method in the scheme, but some multiplied out (z – 3)(z – “(–2 + 7i)”)(z – “(–2 – 7i)”) successfully. Many who tried the alternative approach divided successfully by (z – 3) but were unable to use the quadratic to any great effect. Drawing a diagram certainly helped in this question.
Key points from the mark scheme and examiner's report
other roots a conjugate pair α ± βi
sum of roots gives α = −2
triangle area ½ × 2β × 5 = 35 gives β = 7
p = 41, q = −159
very challenging, many made wild assumptions
a diagram helps
June 2018 · AS Paper 2 (Further Pure 2) · Q5(a)3 marks
Mark scheme (whole question; this part is marked with the orange bar)
Examiner's comment
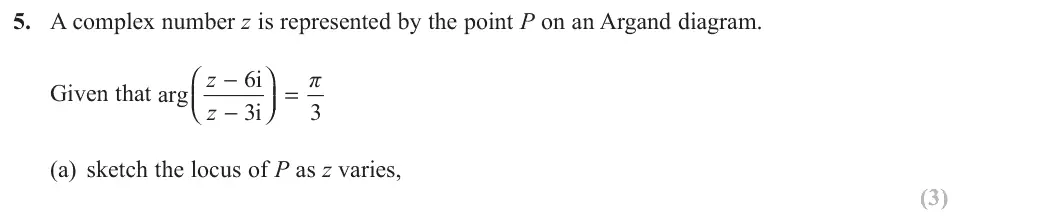
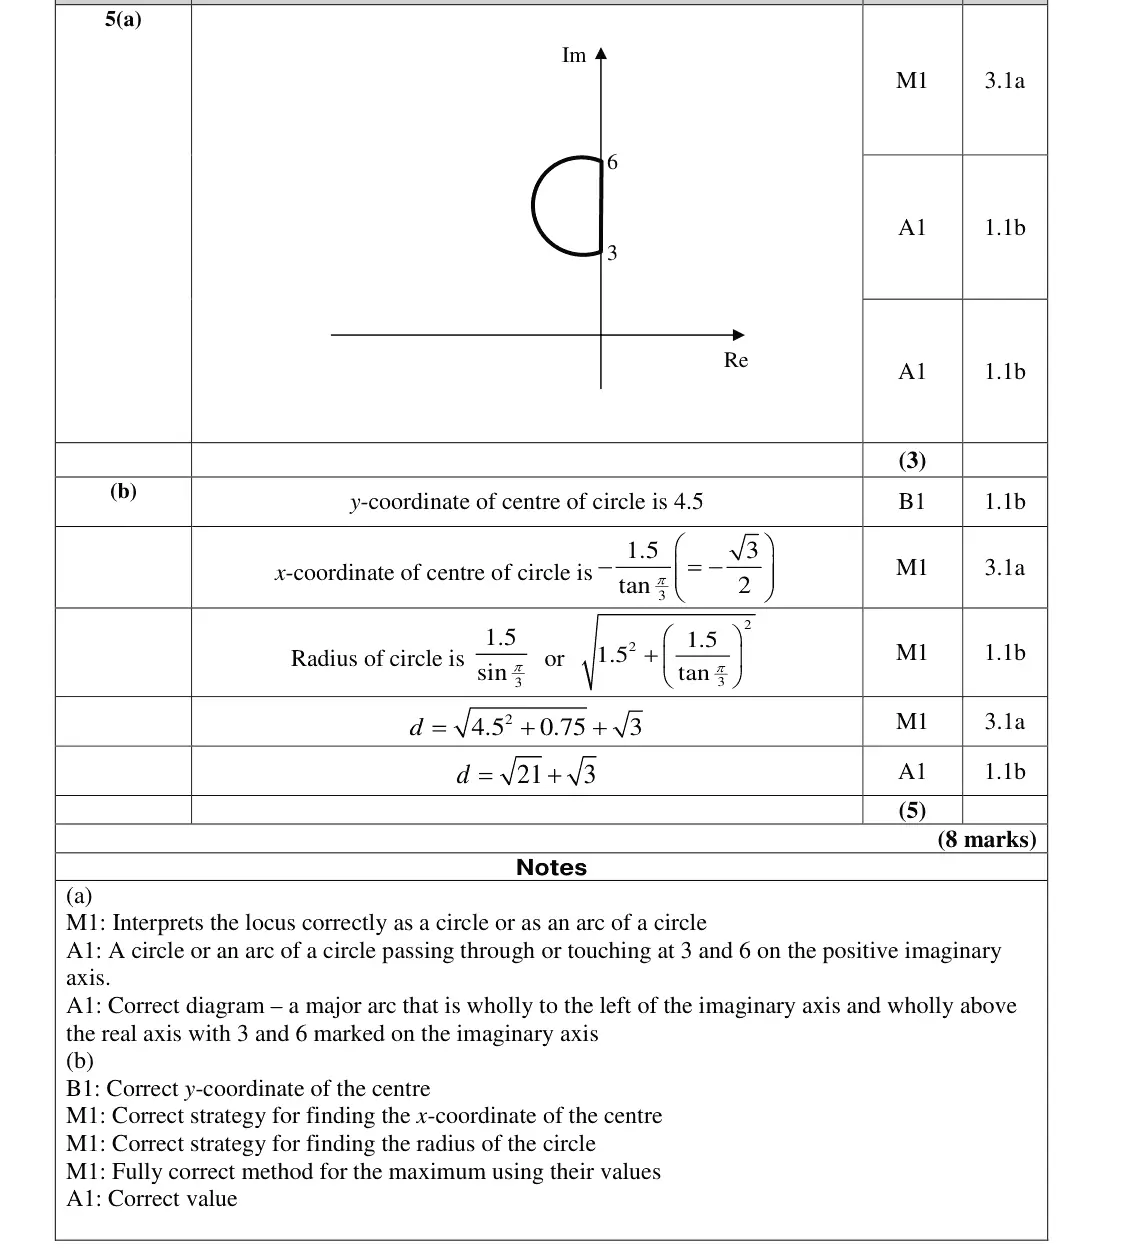
(a) Fully correct diagrams were rare although a significant number of students knew that a circle or arc of a circle was required.
Key points from the mark scheme and examiner's report
locus is a major arc of a circle through 3i and 6i, to the LEFT of the imaginary axis
endpoints marked
fully correct sketches rare
Find an Edexcel Further Maths tutor
Stuck on this? Book a trial lesson with our Further Maths tutor.